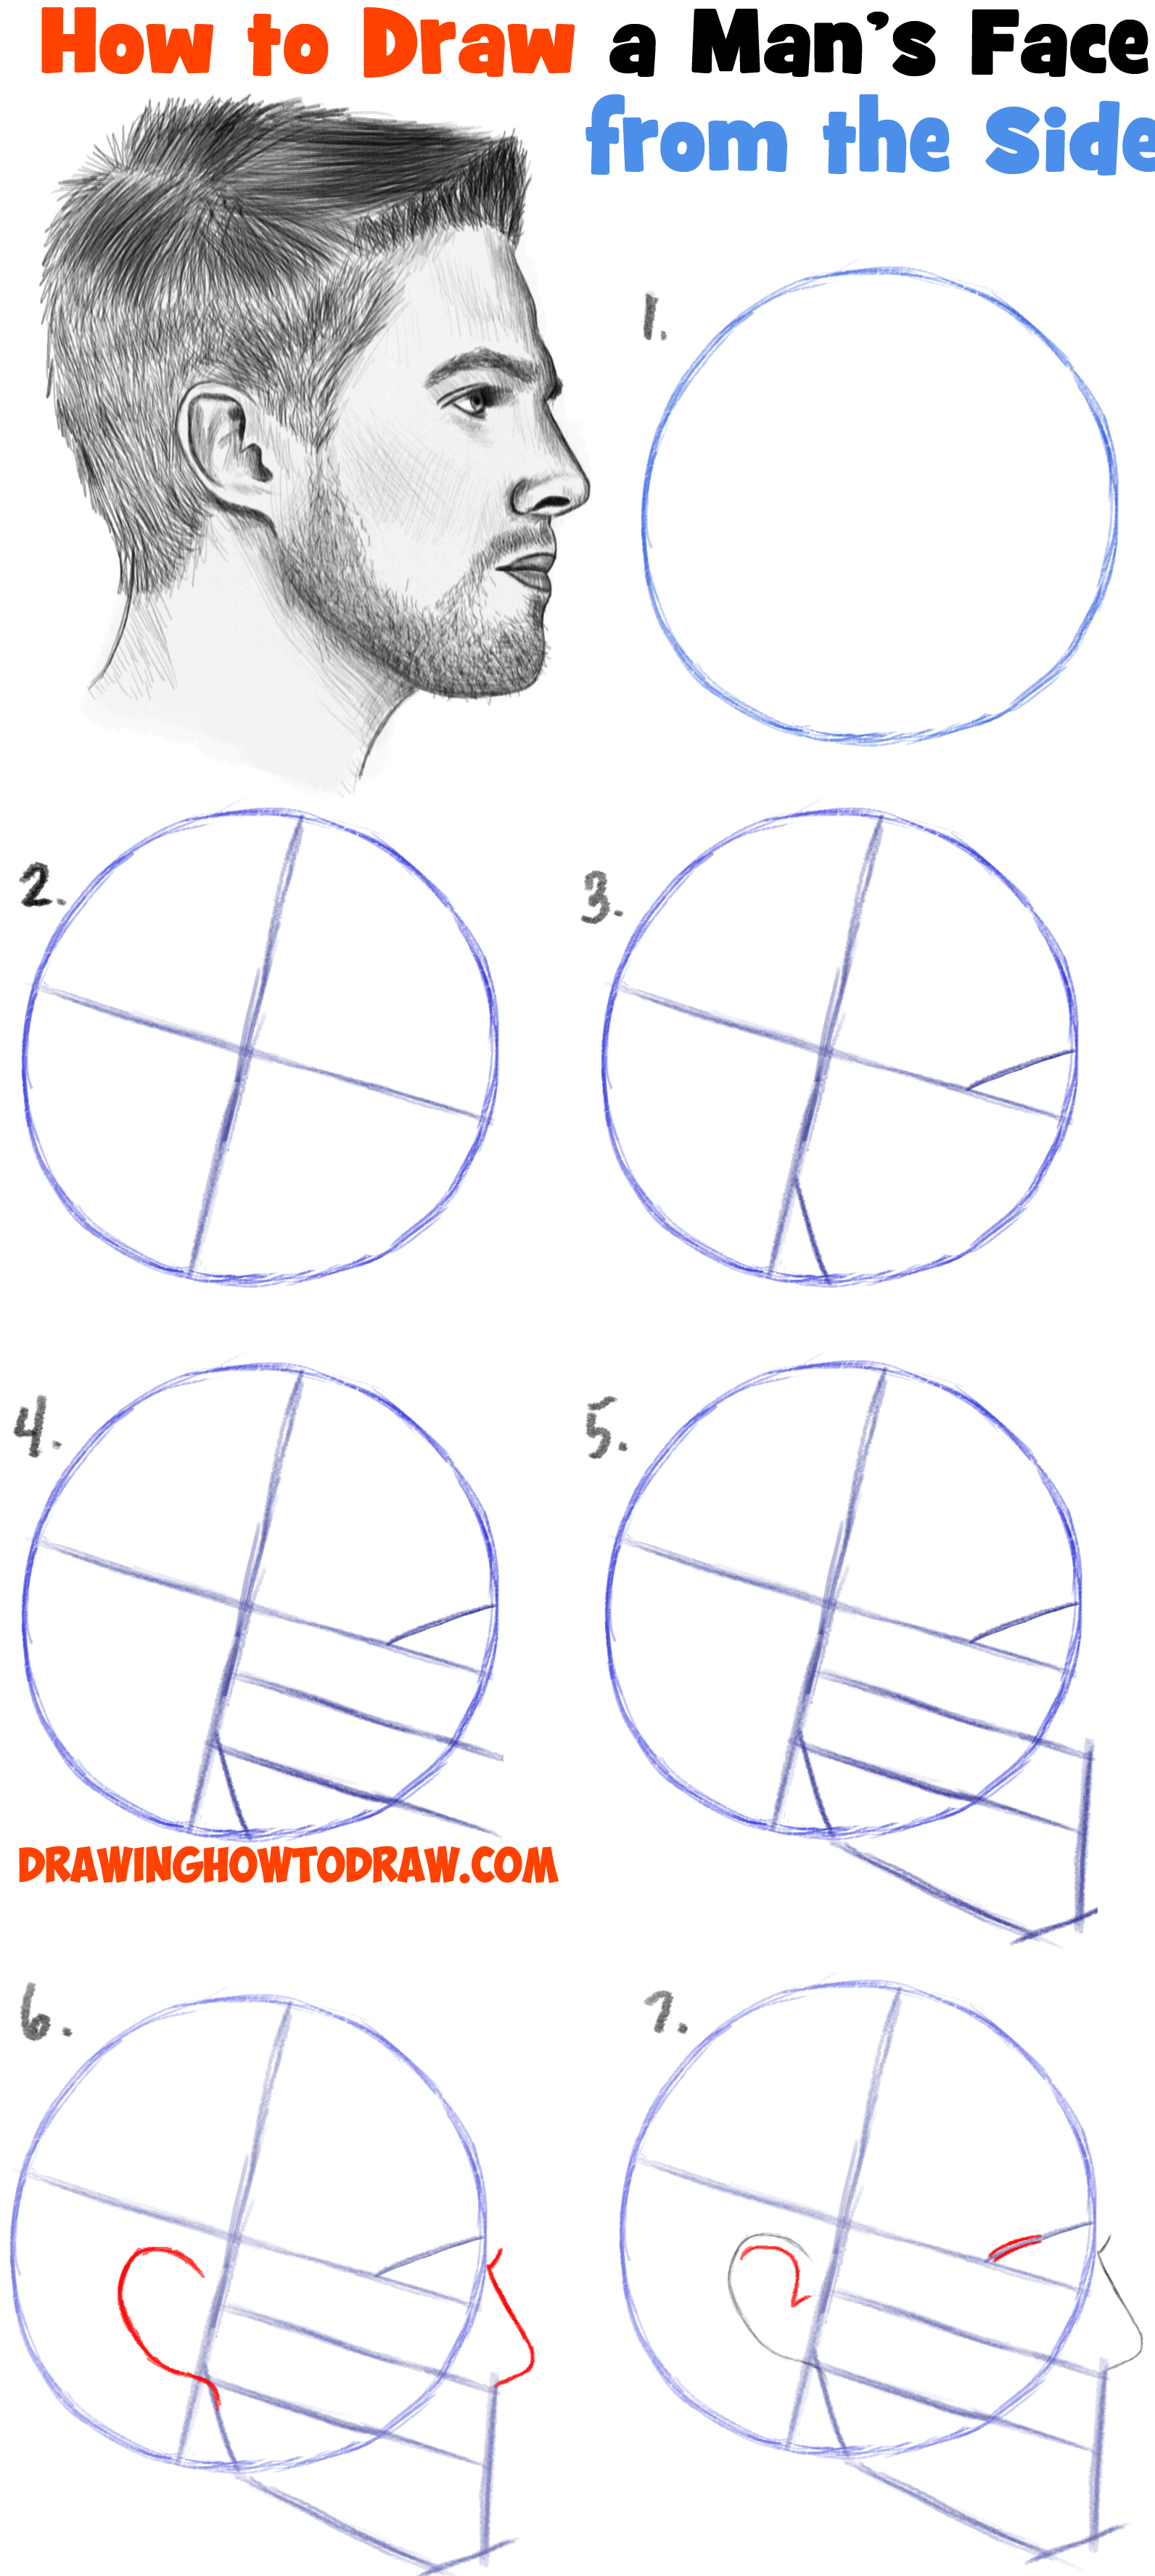
Today I’ll show you how to draw a realistic man’s face from the side view. This profile view is of a handsome man’s face and I guide you through the drawing process by using simple geometric shapes, alphabet letters, and numbers. The male face is structured a bit different than a female’s face..and we’ll show you how to lay it out and draw it in a realistic way. You can do this…drawing heads has never been so easy.
(Steps 1 – 5) All blue lines in this tutorial are what we call, “Guide Lines”. All guidelines will be erased at the end, so please draw them lightly. Set up the man’s face with these guidelines and drawing him will be much easier and effective.
(Step 6) Draw a backward “?”-like shape for the ear and part of the jaw. Draw a backward #5-like shape for the nose.
(Step 7) Draw a #2-like shape in the ear. Draw 2 lines for part of the eye. Use the guidelines to place these facial features.
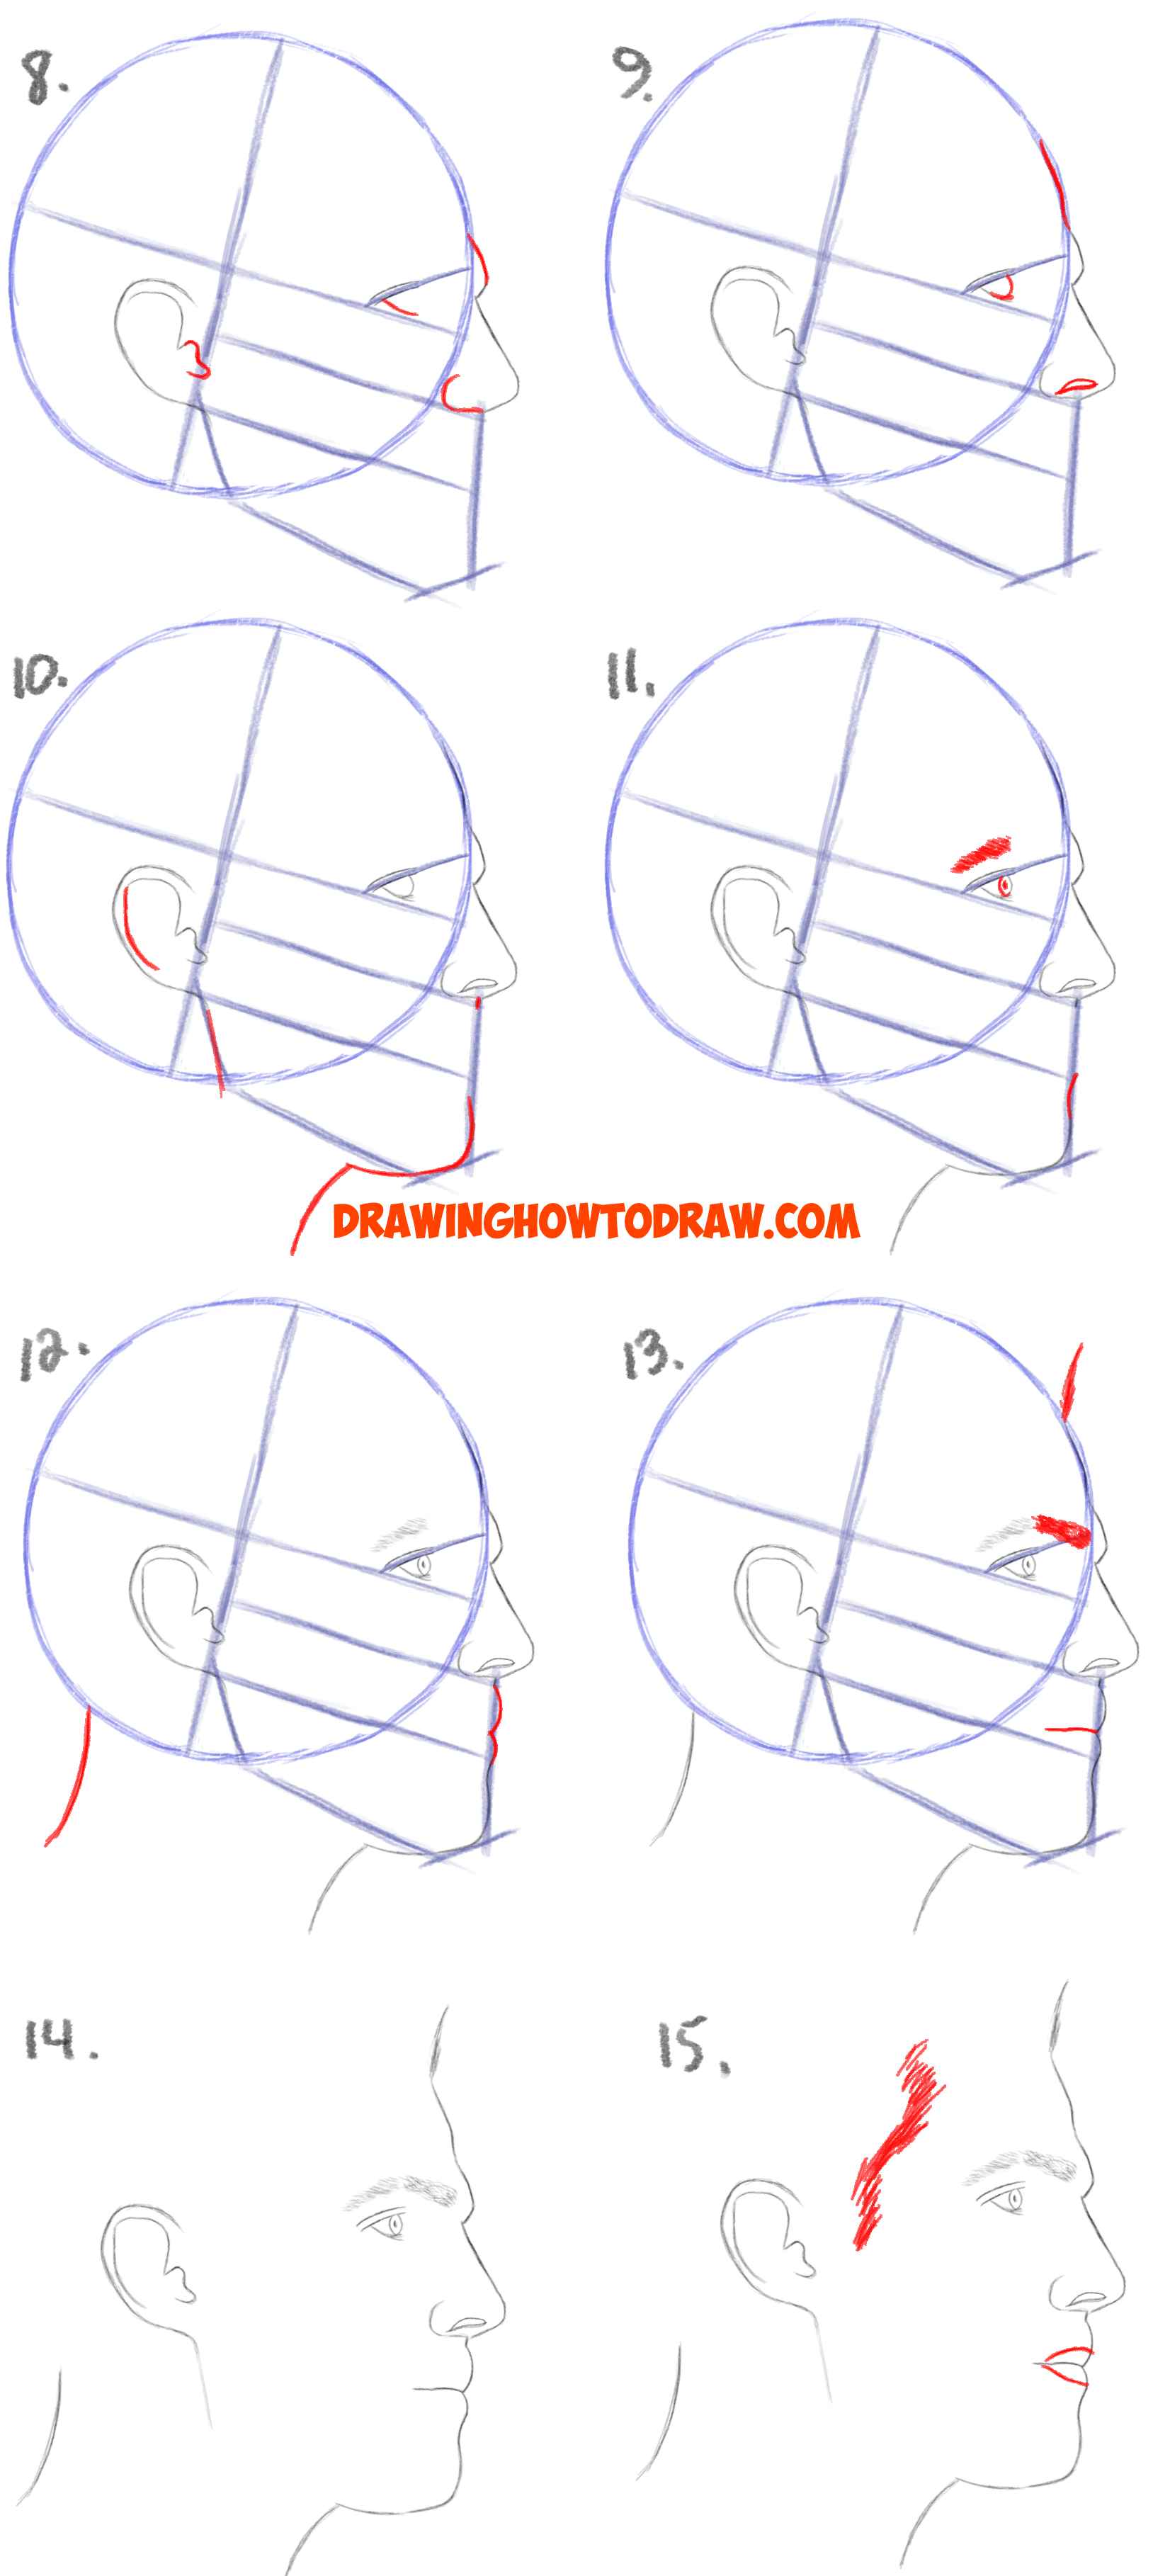
(Step 8) Draw a #3 shape in the ear. Draw some curved lines, using the guidelines to guide you.
(Step 9) Draw a slightly wavy line for the forehead. Draw a #2-like shape in the eye. Draw a sideways “D”-like shape for the nostril.
(Step 10) Draw some lines/curved lines. Draw a sideways #2-like shape for the chin & neck.
(Step 11) Draw lines for the eyebrow. Draw a few curved lines and a dot in his eye.
(Step 12) Draw a curved line for the back of his neck. Draw a #3-like shape for the lips.
(Step 13) Draw some lines for the front of his hair. Draw some lines for the part of the eyebrow that go towards the right. This turned out too dark…see #14 for how dark the brows should be. Draw a curved line for the center of the lips.
(Step 14) Erase some or all of the guidelines.
(Step 15) Draw some lines for some of the hair. Draw curved lines for the top and bottom lips.
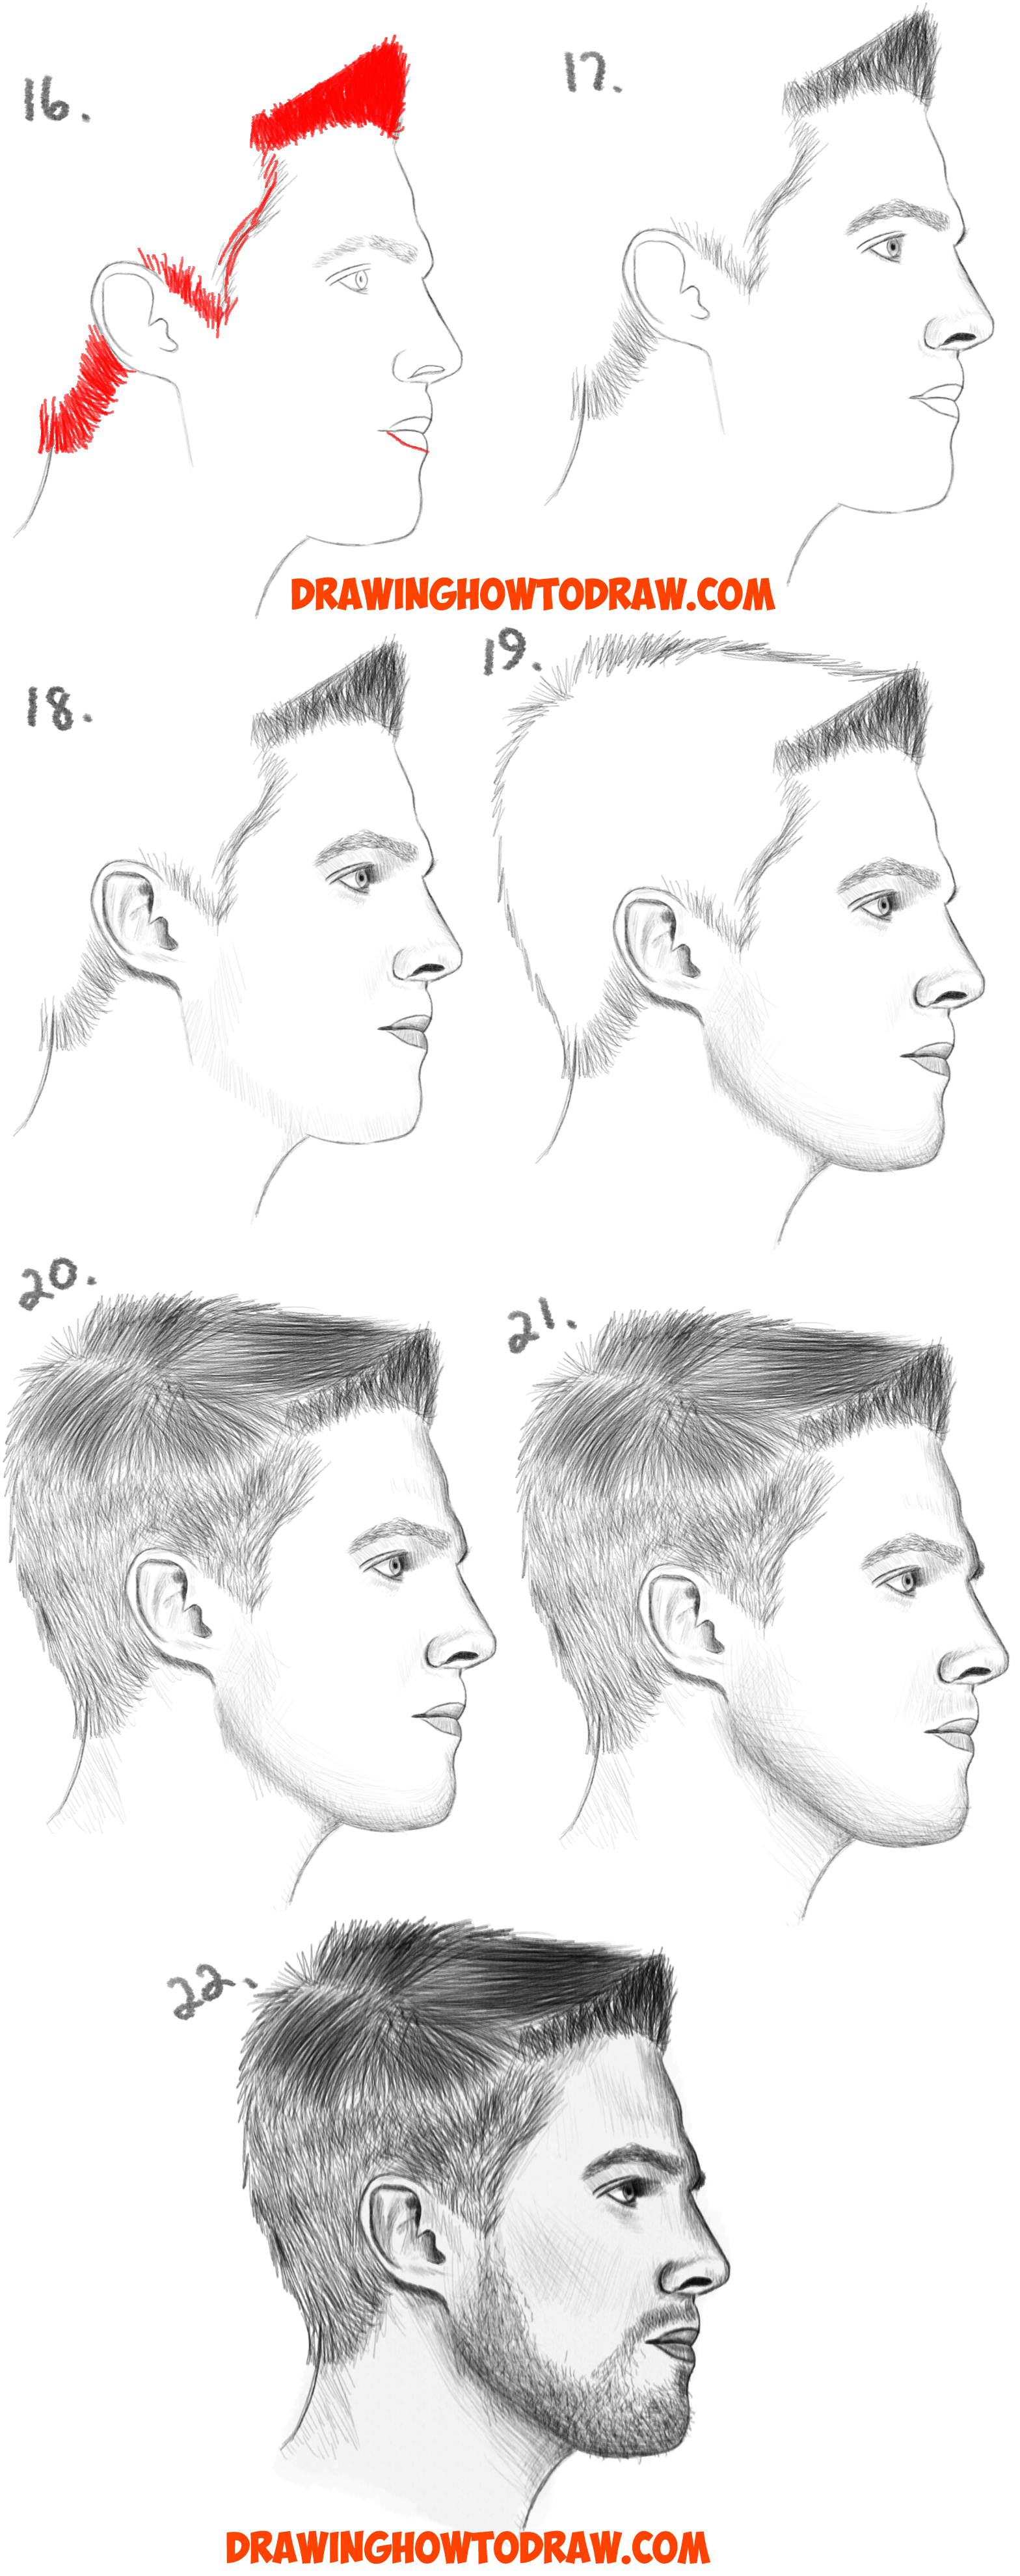
(Step 16) Draw more lines for the hair. Draw the lines for the bangs in a triangular way as I have.
(Step 17-22) I’m no longer highlighting what I have drawn. Just follow along with the steps and add shadows where I have. Shading is just drawing lines (very lightly). When you want darker shadows just draw more light lines on top of the previous light lines. It will look graduated, just like you want it.
Technorati Tags: how to draw a face, face, faces, head, heads, profile view, side view, male, boy, girl, how to draw a realistic face, realistic
Today I'll show you how to draw Rick from the Rick and Morty cartoon tv…
Today I'll show you how to draw Morty from the Rick and Morty cartoon tv…
Today I'll show you how to draw the spunky little rabbit, Kuromi, from My Melody…
Today I'll show you how to draw this cute "bean duck" that I found on…
Today I'll show you how to draw Sosuke and Ponyo in a bubble (chibi /kawaii…
Today I'll show you how to draw a Boo from Super Mario Bros in Kawaii…
View Comments
Thank you so much, I've been looking all over for something comprehensible, and this does it's job perfectly. Thank you again!
hi,
this drawing its very simpley and so very cool, my drawing its for my daddy
Thanks for nice guidance... Really help full 🙏
Thanks this helped me pass in visual arts. Now my drawing looks cool.
I was so confident this wouldn't work but I tried just to see... This is great!! It's amazing how much easier this makes it!!!
This was really helpful, thanks!
this is so cool i have never drawn so realisticaly ever
Thank you so much for this very helpful tips. I have never drawn faces and feel confident to now to have a go at this. I am pleased with my first attempt using your valuable instructions.