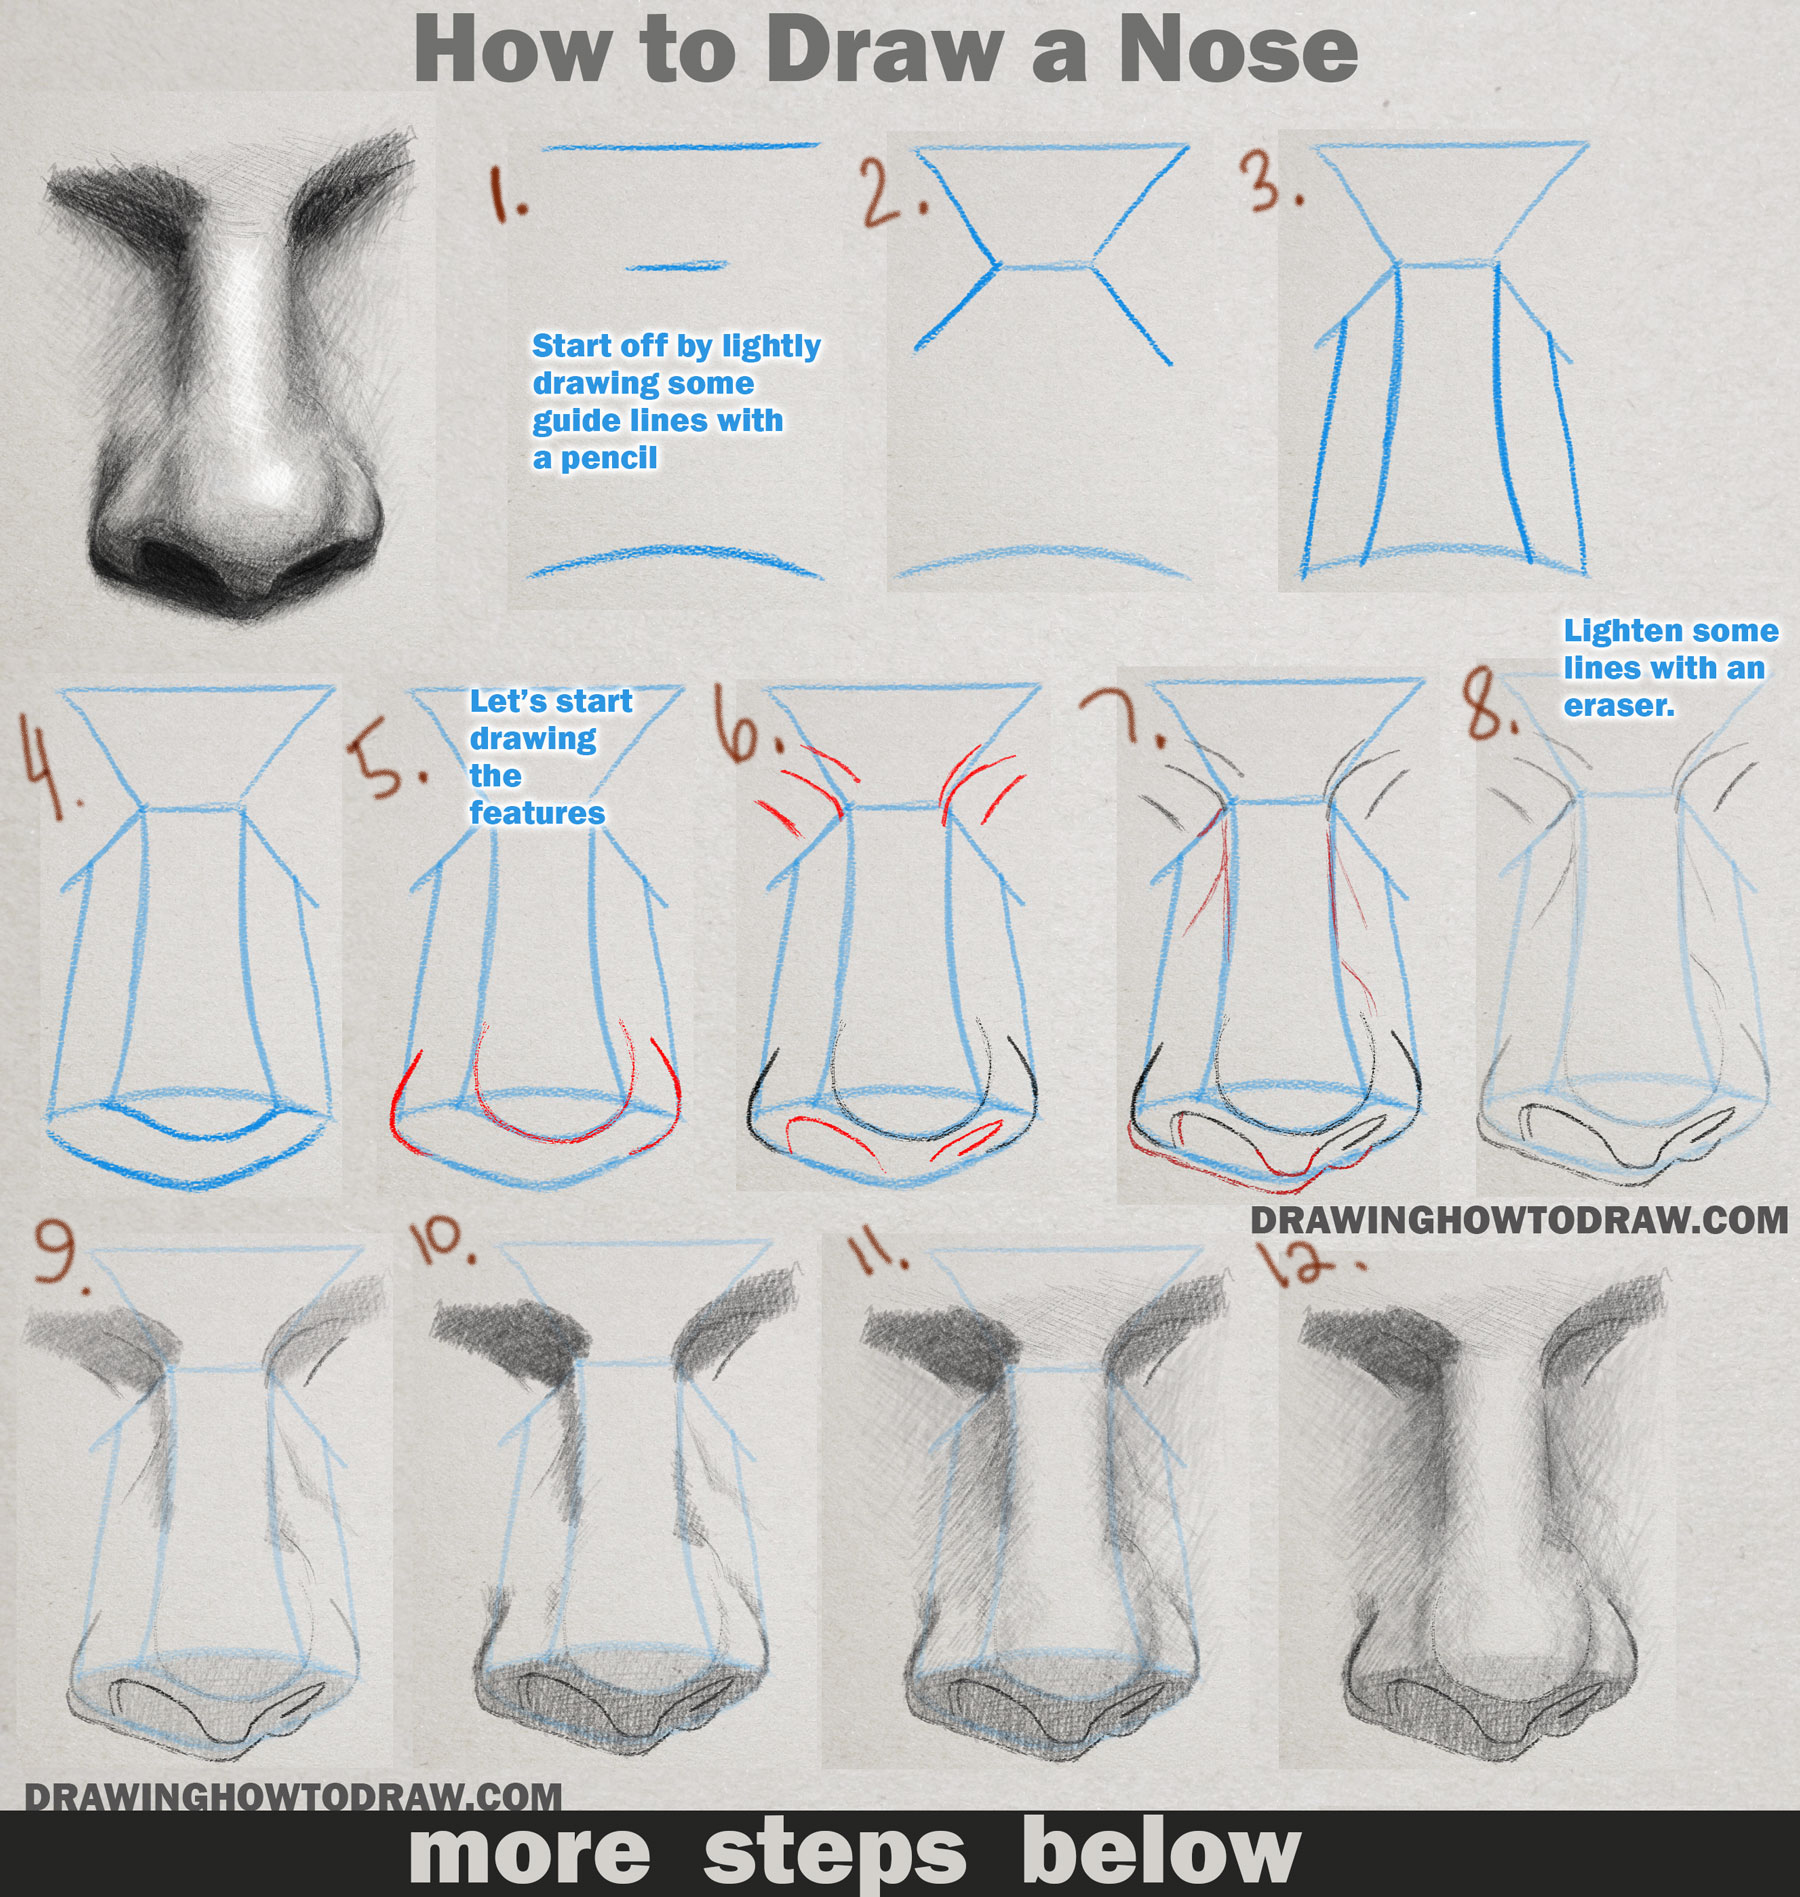
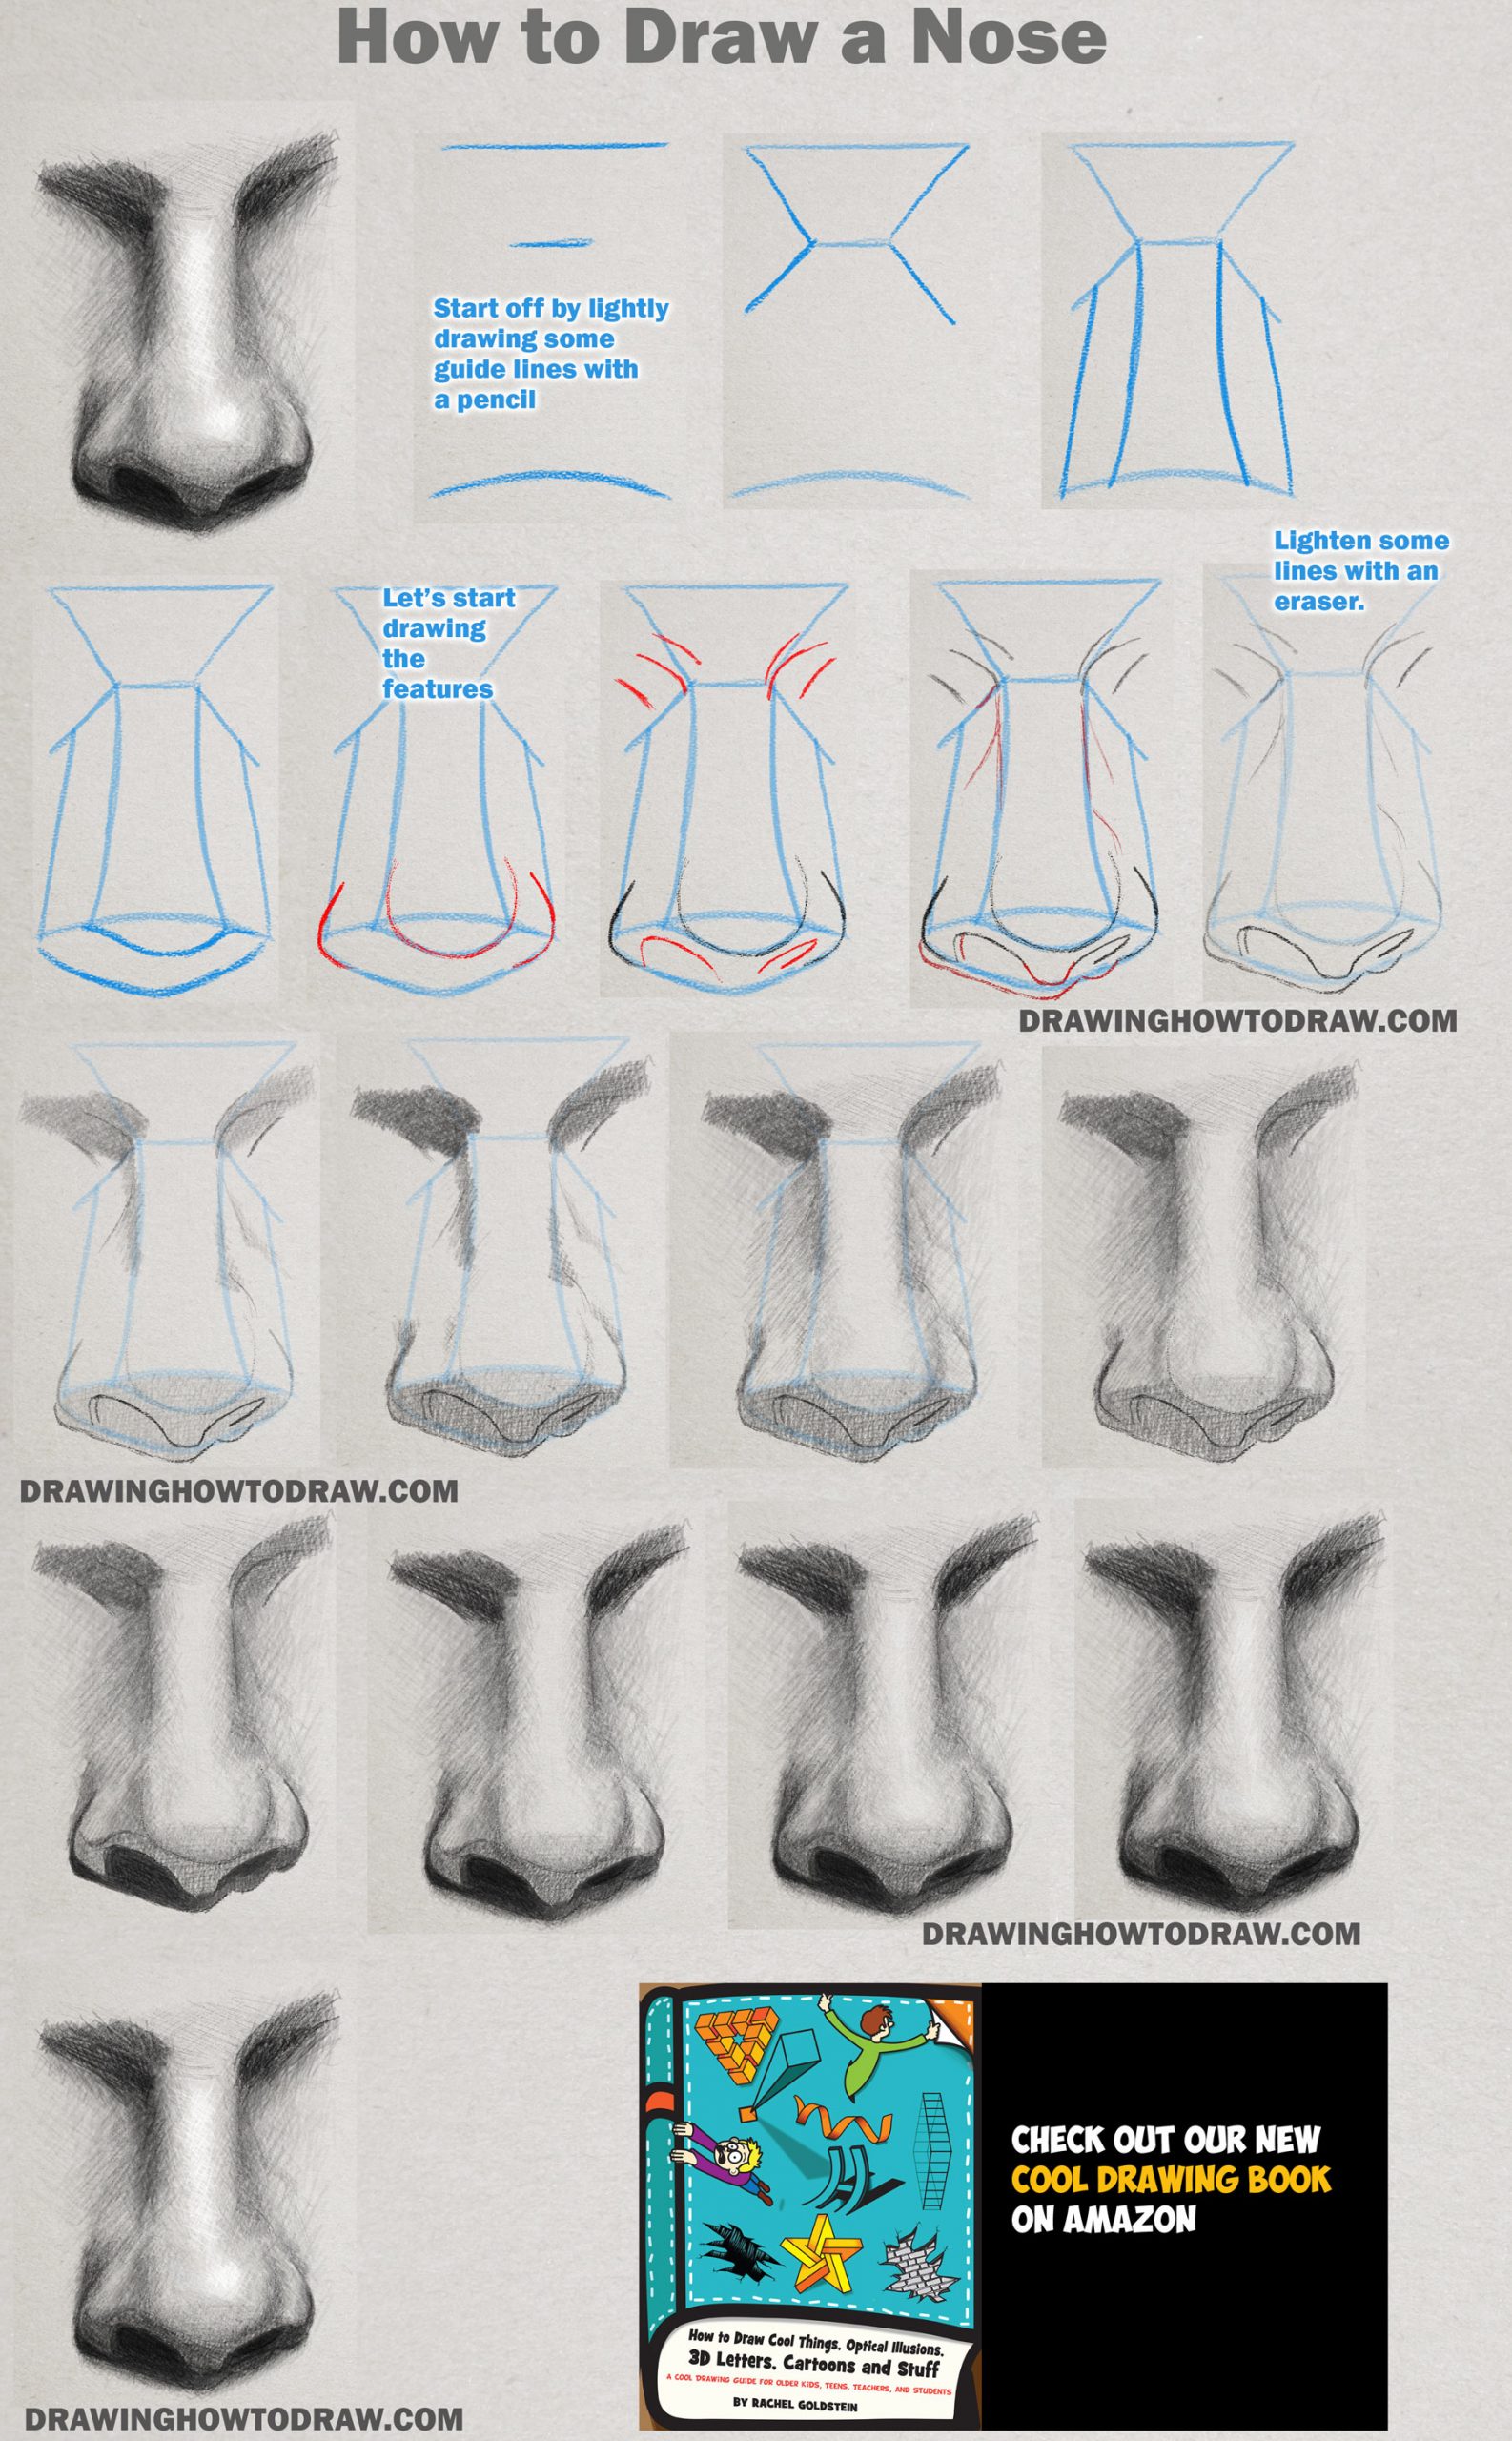
Here is a step by step tutorial for drawing realistic noses with pencils / graphite pencils. If you ever wondered how to use shading to turn a flat drawing of a nose into a realistic drawing of a nose, then look no further. This tutorial will help you learn how to shade a nose properly. This drawing method is called The Loomis Method (It’s an old book, but you can get it here if you really want it.)
(1) Graphite pencils are optional but preferred. I got this cheaper set of graphite pencils and I actually like them a lot.
(2) Gray paper is optional. It is much easier to draw a tinted paper when it comes to facial features. Here is a good gray-toned drawing pad.
(3) Eraser. I usually use types of erasers. I use (a) A white drawing eraser and (2) Kneaded eraser
I find that it is easier to draw people’s faces and facial features on gray or tan paper. You don’t have to though. This is optional.
(Steps 1-4) The first step is drawing guidelines for the nose. These guidelines will help you figure out where to draw the lines of the nose, as well as where to shade. Even though my guidelines are in blue, you should either draw them with a pencil or an HB graphite pencil.
(Step 5) You should lighten these lines as much as you can with an eraser. I have to keep my lines darker so that you can still see them.
Now, let’s start drawing the features of the nose. Use the guidelines to help you figure out where to place them.
(Step 6) Draw the nostrils. Also, draw some curved lines at the top of the nose.
(Step 7) Draw the center of the nose and a bunch of curved lines as well. There will be a shadow under the nose, you should draw that too.
(Step 8) I have lightened some of the lines a bit. Dark lines won’t look realistic. A kneaded eraser works well for this.
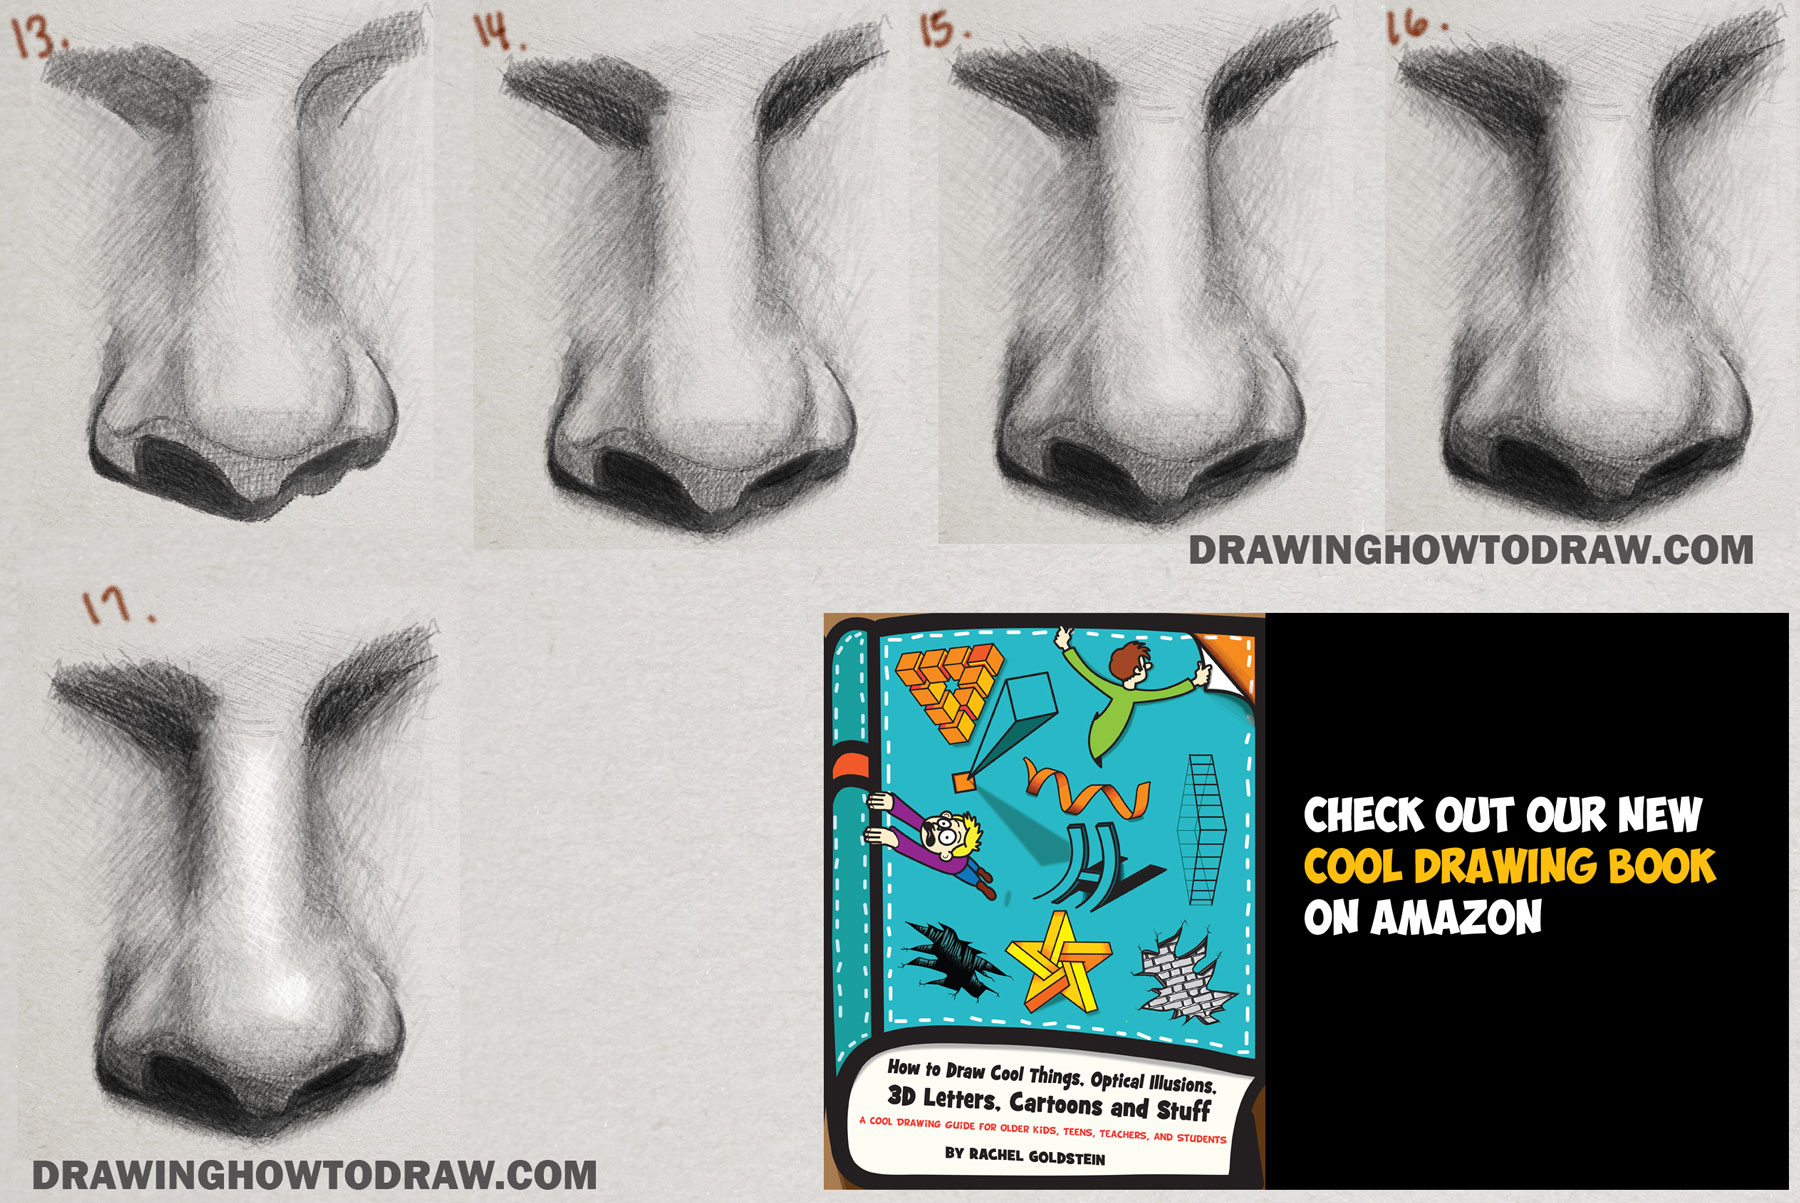
(Step 9) Now we will start adding shadows. Let’s first start shading the darker shadows. I use a crosshatch method where I draw lines in different directions on top of each other. If using graphite pencils, use a 2B.
(Step 10) Continue to add the darker shadows.
(Step 11a) When going from dark to light or vice versa, try to make a gradient by getting the values to almost match up. Do this by lightly drawing more lines until it is almost as dark as the line next to it.
(Step 11b) Now let’s add some midtones and lighter shading. If using graphite, use an HB pencil.
(Step 12) Add some slightly darker midtones.
(Step 13) We are going to go pretty dark here, so either press down very hard with your pencil or use a 4B or higher graphite pencil.
(Step 14) Continue adding more dark shading. The more contrast you get, the better.
(Step 15) Do a bit of crosshatching below the dark shadow to make it fade out a bit. Shadows rarely have just a hard edge.
(Step 16) Just keep working on the picture to make shadows blend together better so that they look like a gradient.
(Step 17) The nose is done, I hope yours turned out great!
Now you are done, I hope you enjoyed this tutorial.
Technorati Tags: noses, nose, realistic, loomis method, how to draw a nose, how to draw noses, realistic noses, shading noses, how to shade a nose
Today I'll show you how to draw Rick from the Rick and Morty cartoon tv…
Today I'll show you how to draw Morty from the Rick and Morty cartoon tv…
Today I'll show you how to draw the spunky little rabbit, Kuromi, from My Melody…
Today I'll show you how to draw this cute "bean duck" that I found on…
Today I'll show you how to draw Sosuke and Ponyo in a bubble (chibi /kawaii…
Today I'll show you how to draw a Boo from Super Mario Bros in Kawaii…