Most resident art schools start the student to work on casts or still life drawings, and some schools expect you to confine yourself entirely to such work for a year or two.
While such work helps greatly in teaching you to see correctly it is apt to become very monotonous.
The modern art teacher is waking up to the real importance of sketching. It is far better and more interesting to make hundreds of sketches of interesting things, than a few stiff precise drawings to be coldly criticized by a busy teacher.
Usually the student needs encouragement rather than someone to find fault.
Twelve or more years ago I started to take an eighty-five dollar correspondence course, how well I remember some of the “red ink criticism” on my work.
One copy of a girl’s head came back with this notation “The hair looks more like a door mat,” and like notations on other drawings such as “very poor” etc.
It is very well to show a student where he can improve his work, but to simply tell him it is “very poor” is far from being either helpful or encouraging.
Arranging simple objects, such as kitchen utensils, fruits, etc., to make a pleasing composition is very good training for a student. Following are a few simple rules of composition which will prove helpful in your advanced work, as well as in still life.
Pictures should not usually be perfectly square, but are more pleasing when made oblong or larger one way than the other.
There should usually be some one object in the picture as the center of interest, this need not be the largest object in the picture but its color or the leading lines of the picture should tend to draw attention to it.
Neither should the principal object be in the center of the picture, but rather above, and slightly to one side of the center. (This is not necessary, but merely suggested as better than the center.)
The upper left hand part of the picture makes a good position for the center of interest, because we are in the habit of looking there in reading.
If your picture consists of sky and water, do not let the sky-line come in the center of the picture, but rather make more sky, or else more water than sky.
And in this same picture, a boat would form the center of interest, while some clouds in the background would add to the composition.
There are many things that must be taken into consideration in picture composition, for instance, a human figure in a picture will usually be the center of interest.
In a group of animals, a horse or deg, would probably be the center of interest, because the human race has known these two animals as friends for thousands of years.
An odd number is more interesting than an even number. If we were to show three birds flying in the distance it would be better than two.
Also pictures should contain a certain amount of harmony and contrast. For instance a group of objects should contrast somewhat in size, color, and shape, but they should harmonize in relationship. Thus a round and a square object of different sizes would make a better composition than two round objects.
Fruit, and dishes, make a good composition, but fruit and an old shoe would make a poor composition. It is best to break the long straight lines of a picture, as they lead the eye out of the composition. Usually all the pictures in a book are kept more or less in harmonious rendering. (We must necessarily violate the rule in this book in order to illustrate the different styles and methods of working.)
Action is also a way of attracting attention, to show a figure in extreme action, will attract attention to that part of the picture.
Light and shade, is one of the most important things to master. In drawing an object always consider where the light is supposed to come from, and make your highlights and shadows accordingly.
Reflected lights must be taken into consideration as well as the principal source of light. Unusual and pleasing effects are produced by exaggerating the effects of light and shade. This gives brilliancy to your work.
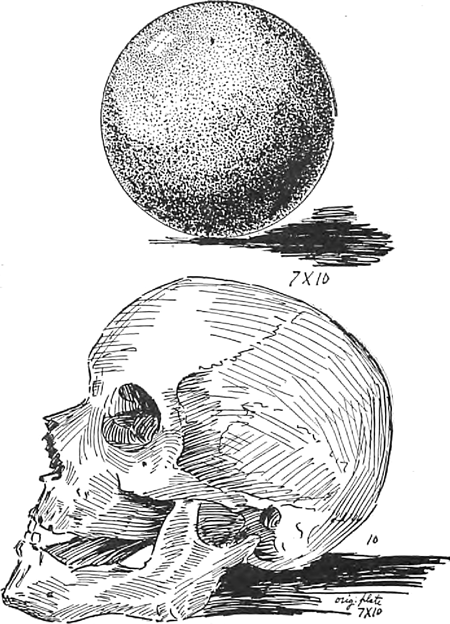
Notice the picture of the ball, this is simply a circle drawn on the paper, and the round effect is produced by light, and shade.
Practice drawing a ball, and try to make it look ready to roll off the paper. This is very important as a knowledge of this simple light and shade effect will enable you to make your pictures look natural and not like distorted diagrams.
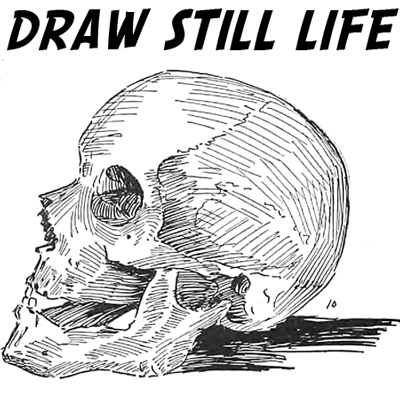
The skull is an important study, as it is the foundation for all pictures of heads.
The dotted finish on the ball is called pen stipple. It is made by hand, and is a very simple way of getting different tones in a black and white drawing.
The skull is a freehand pen drawing made without a preliminary sketch. This makes good pen practice, but is not practical for regular use.
You can get books devoted entirely to still life if you are especially interested in the work. But for our present purpose it seems advisable to devote the space to subjects not usually found in the regular school drawing book.
Technorati Tags: drawing still life, drawing still lives, still life drawings, how to draw, drawing lessons, drawing tutorials, drawing
Today I'll show you how to draw Rick from the Rick and Morty cartoon tv…
Today I'll show you how to draw Morty from the Rick and Morty cartoon tv…
Today I'll show you how to draw the spunky little rabbit, Kuromi, from My Melody…
Today I'll show you how to draw this cute "bean duck" that I found on…
Today I'll show you how to draw Sosuke and Ponyo in a bubble (chibi /kawaii…
Today I'll show you how to draw a Boo from Super Mario Bros in Kawaii…