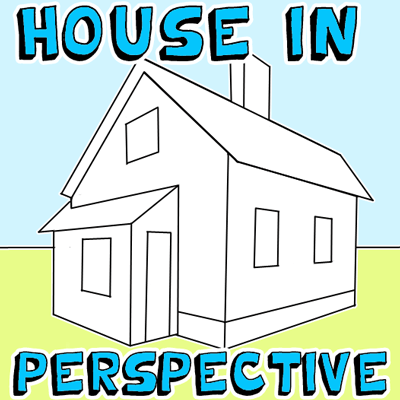
Do you want to learn how to draw a house in correct perspective so that it really looks like it is 3-dimensional? Here is an easy to follow tutorial that will help you not only draw houses, but also anything else that you want to draw in correct 2 point perspective.
Here are More Perspective Drawing Tutorials
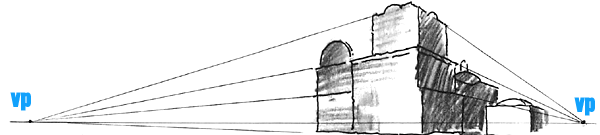
We draw with perspective drawing techniques in order to make a more realistic 3-dimensional object. In this technique, every set of parallel lines has its own vanishing points.
More specifically, when we are drawing or viewing something in 2 point perspective, we are seeing the object at a corner, and the 2 sets of parallel lines are moving away from us to the vanishing points….as you see above (vp stands for vanishing points). Here is a Basic 1 Point and 2 Point Perspective Lesson and Here is an Intro Lesson to Perspective.
Below we will show you how to draw a house in Two Point Perspective.
Like I mentioned above, we will be drawing this house in two point perspective. We will be using 2 vanishing points (vp) to create this 3-dimentional house.
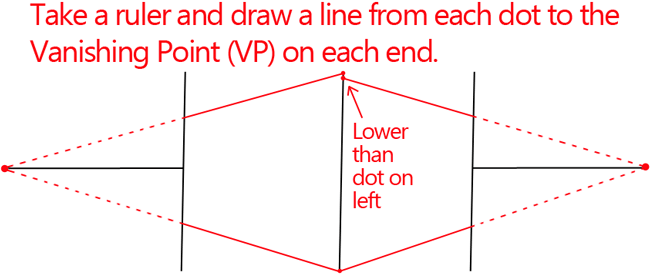
You will want a wide piece of paper. Draw a dot on both sides of this wide paper…these will be the vanishing points (vp). Use a ruler to draw a line from one dot to the other.
Use a ruler to draw 3 vertical lines along the line…as seen above.
(optionally) If you have a T-Square…use this, as it is a great tool to ensure the lines are vertical.
Now take a ruler and draw a line from each dot to the vanishing point on both ends. Notice that one of the dots is lower than the other.
You can erase the parts of the lines that are below or above the lines that you just drew.
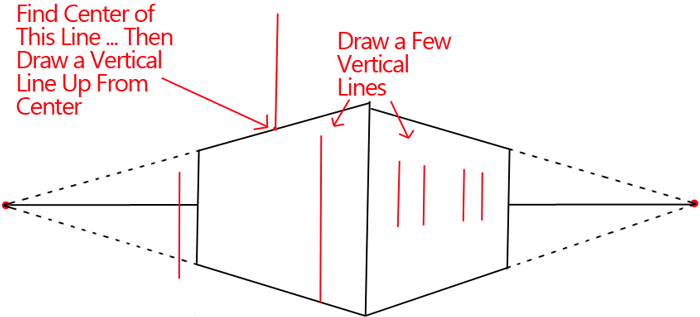
Find the center of the top-left line. Then Draw a vertical line there.
Also draw a few other vertical lines, as seen above.
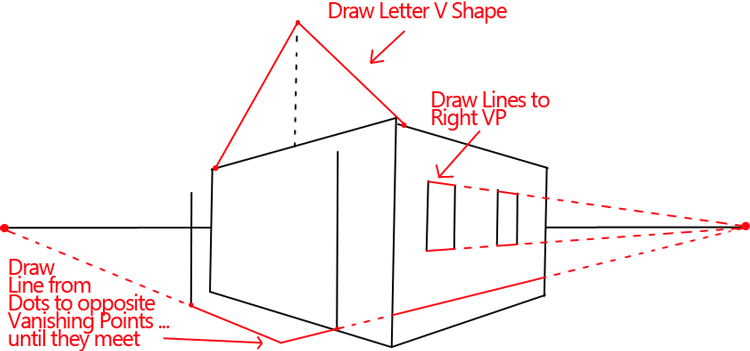
– Draw a line from the left-most line to the left vanishing point….extend it further (as seen in the picture above). Then draw a line from the right vanishing point to the 2nd left-most vertical line that you drew in the last step….also extend it further. Both those lines will meet (as seen in the picture above).
– Draw lines toward the right vanishing point for the windows on the right wall.
– Draw a triangle-like shape from the top point of the roof to the left wall and the right wall…but extend it a bit further to touch the next wall.
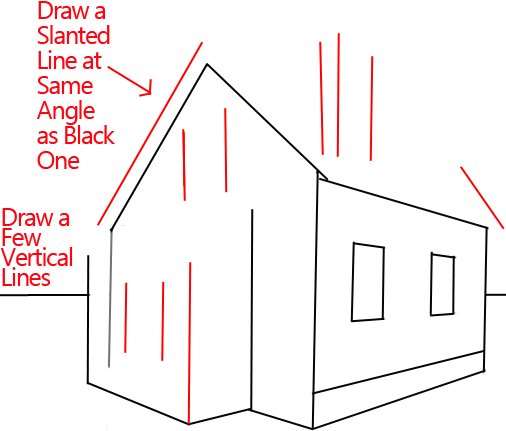
– Draw a few vertical lines.
– Draw two slanted lines for the sides of the roof.
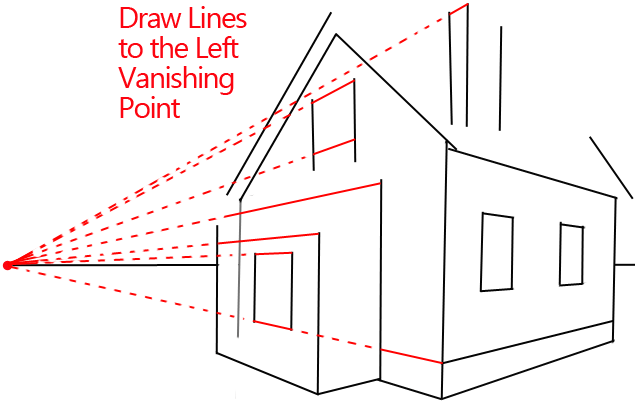
Draw lines over to the left vanishing point.
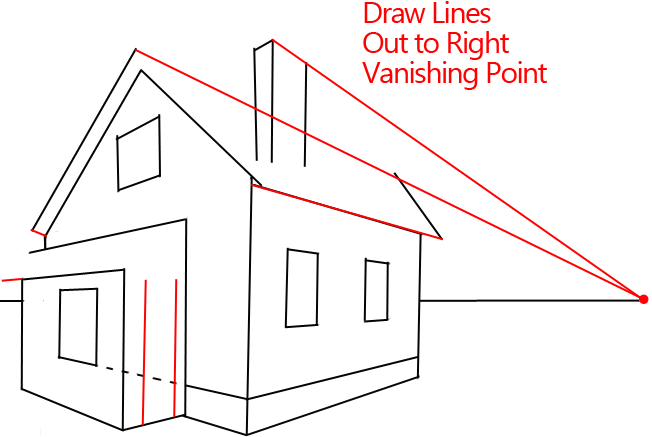
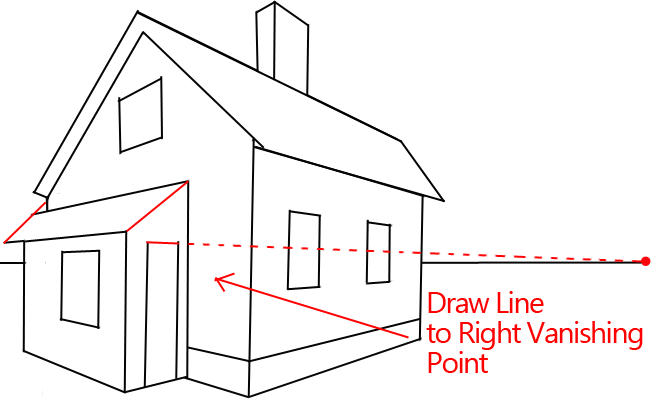
– Draw lines out to the right vanishing point.
– Extend one of the walls a bit (I erased it by accident in one of the previous steps.
– Draw 2 vertical lines.
– Draw a line over to the right vanishing point.
– Draw slanted lines for the lower roof.
Erase any lines that you don’t need any more.
Here are More Perspective Drawing Tutorials
Technorati Tags: 2 point perspective, two point perspective, how to draw a house, drawing houses, house in perspective, perspective drawing
Today I'll show you how to draw Rick from the Rick and Morty cartoon tv…
Today I'll show you how to draw Morty from the Rick and Morty cartoon tv…
Today I'll show you how to draw the spunky little rabbit, Kuromi, from My Melody…
Today I'll show you how to draw this cute "bean duck" that I found on…
Today I'll show you how to draw Sosuke and Ponyo in a bubble (chibi /kawaii…
Today I'll show you how to draw a Boo from Super Mario Bros in Kawaii…
View Comments
This has really helped me for my homework. Thank you so much. It's really cool how it all comes together. The 2 point perspective is really good and useful for drawings.
Thanks for so many wonderful tutorials, from the fundamentals like this one, to the much more complex human form. I’ve only started drawing within the last six months, so your site has been like walking into Chanel with a black Amex. Thanks again!
that is awesome
Also, can you make a tutorial about putting the details in it too
can you please do more advanced ones. My art teacher thought us this but it was too easy, so please do hard ones for non-beginners. Thank You
Thank you, because I needed to draw another 2 point perspective house.
but i really enjoyed it demonssssssssssssssssssssssssssssssssss
Hey wassup danica😏. You look like my type. SUcky SUcky
but i really enjoyed it was what i was trying to say my friend was playing around
it is easier to learn when someone is demonstrating in front of you
Wow! Thanks so much, great starter. Please do some more detailed houses, like modern ones, as that is what I need to be an architect - More great inspiration, please! Thanks ever so much again.
our art teacher did an entire lesson using this site.it was so much fun.
That is soooooo cool! Thanks for letting me know, it cheered me up! <3
WHy didn't you CHUCK ME A LOVE HEART????????!!!!!!?????