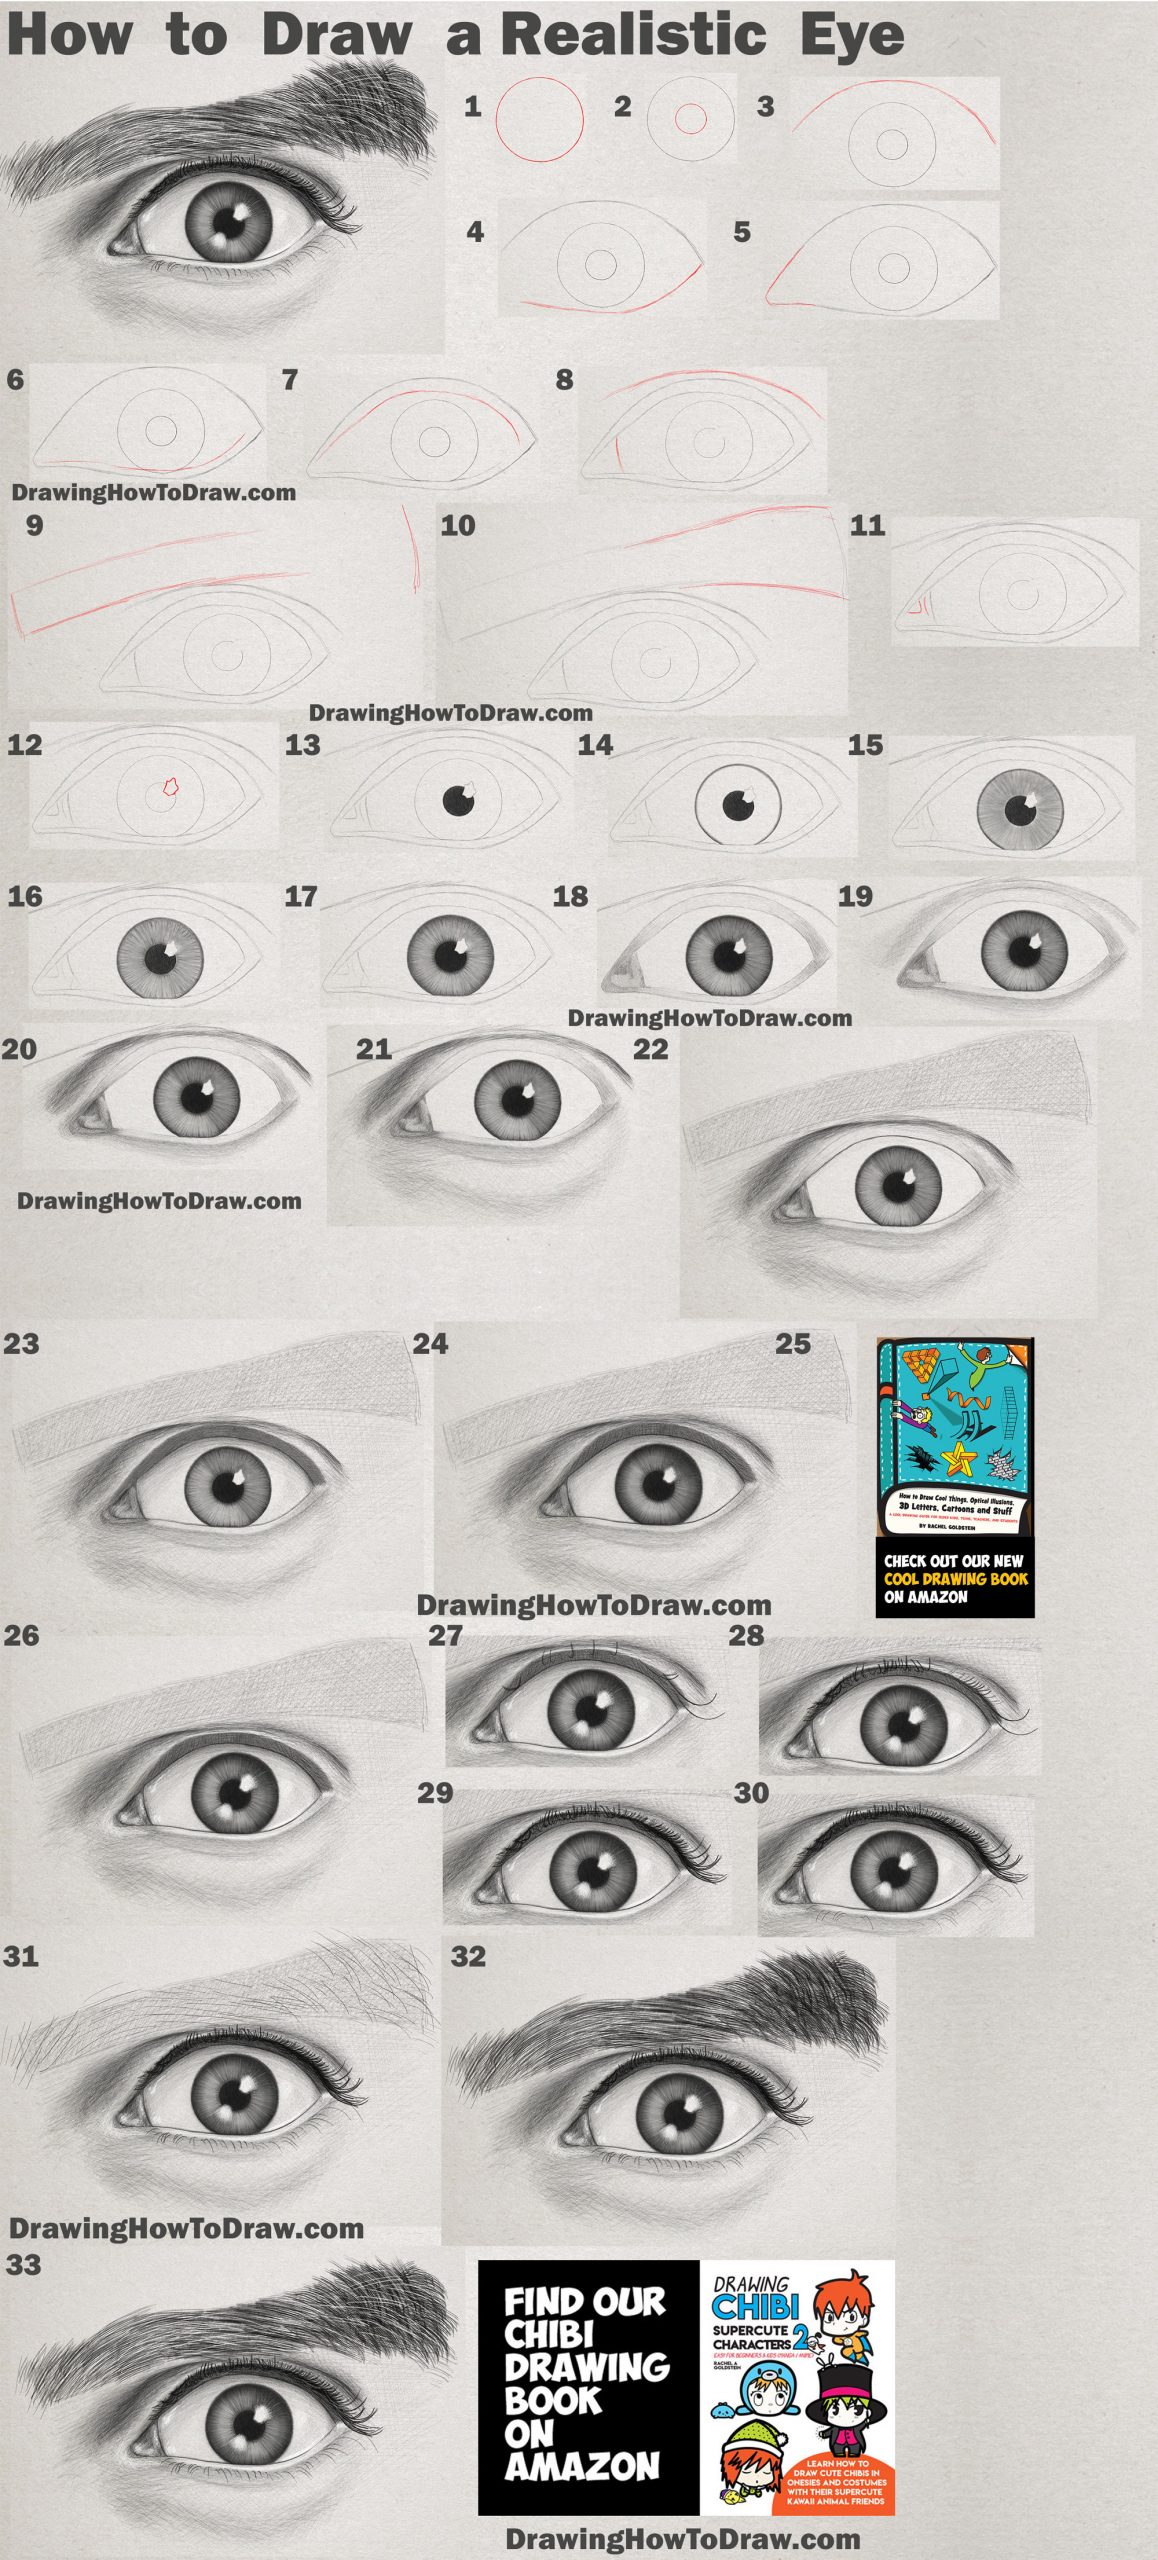
Here is an easy-to-follow, step by step drawing tutorial for sketching out a realistic eye and eyebrow. You can use a normal pencil, graphite drawing pencils, or even use your computer’s drawing tablet. Drawing eyes is not an easy thing to do, that’s why I broke down the tutorial into 33 steps. Hopefully, by seeing how I drew it, you will be able to do so as well. Follow along with the tutorial below.
(1) Graphite pencils are optional but preferred. I got this cheaper set of graphite pencils and I actually like them a lot.
(2) Gray paper is optional. It is much easier to draw a tinted paper when it comes to facial features. Here is a good gray-toned drawing pad.
(3) Eraser. I usually use types of erasers. I use (a) A white drawing eraser and (2) Kneaded eraser
I find that it is easier to draw people’s faces and facial features on gray or tan paper. You don’t have to though. This is optional.
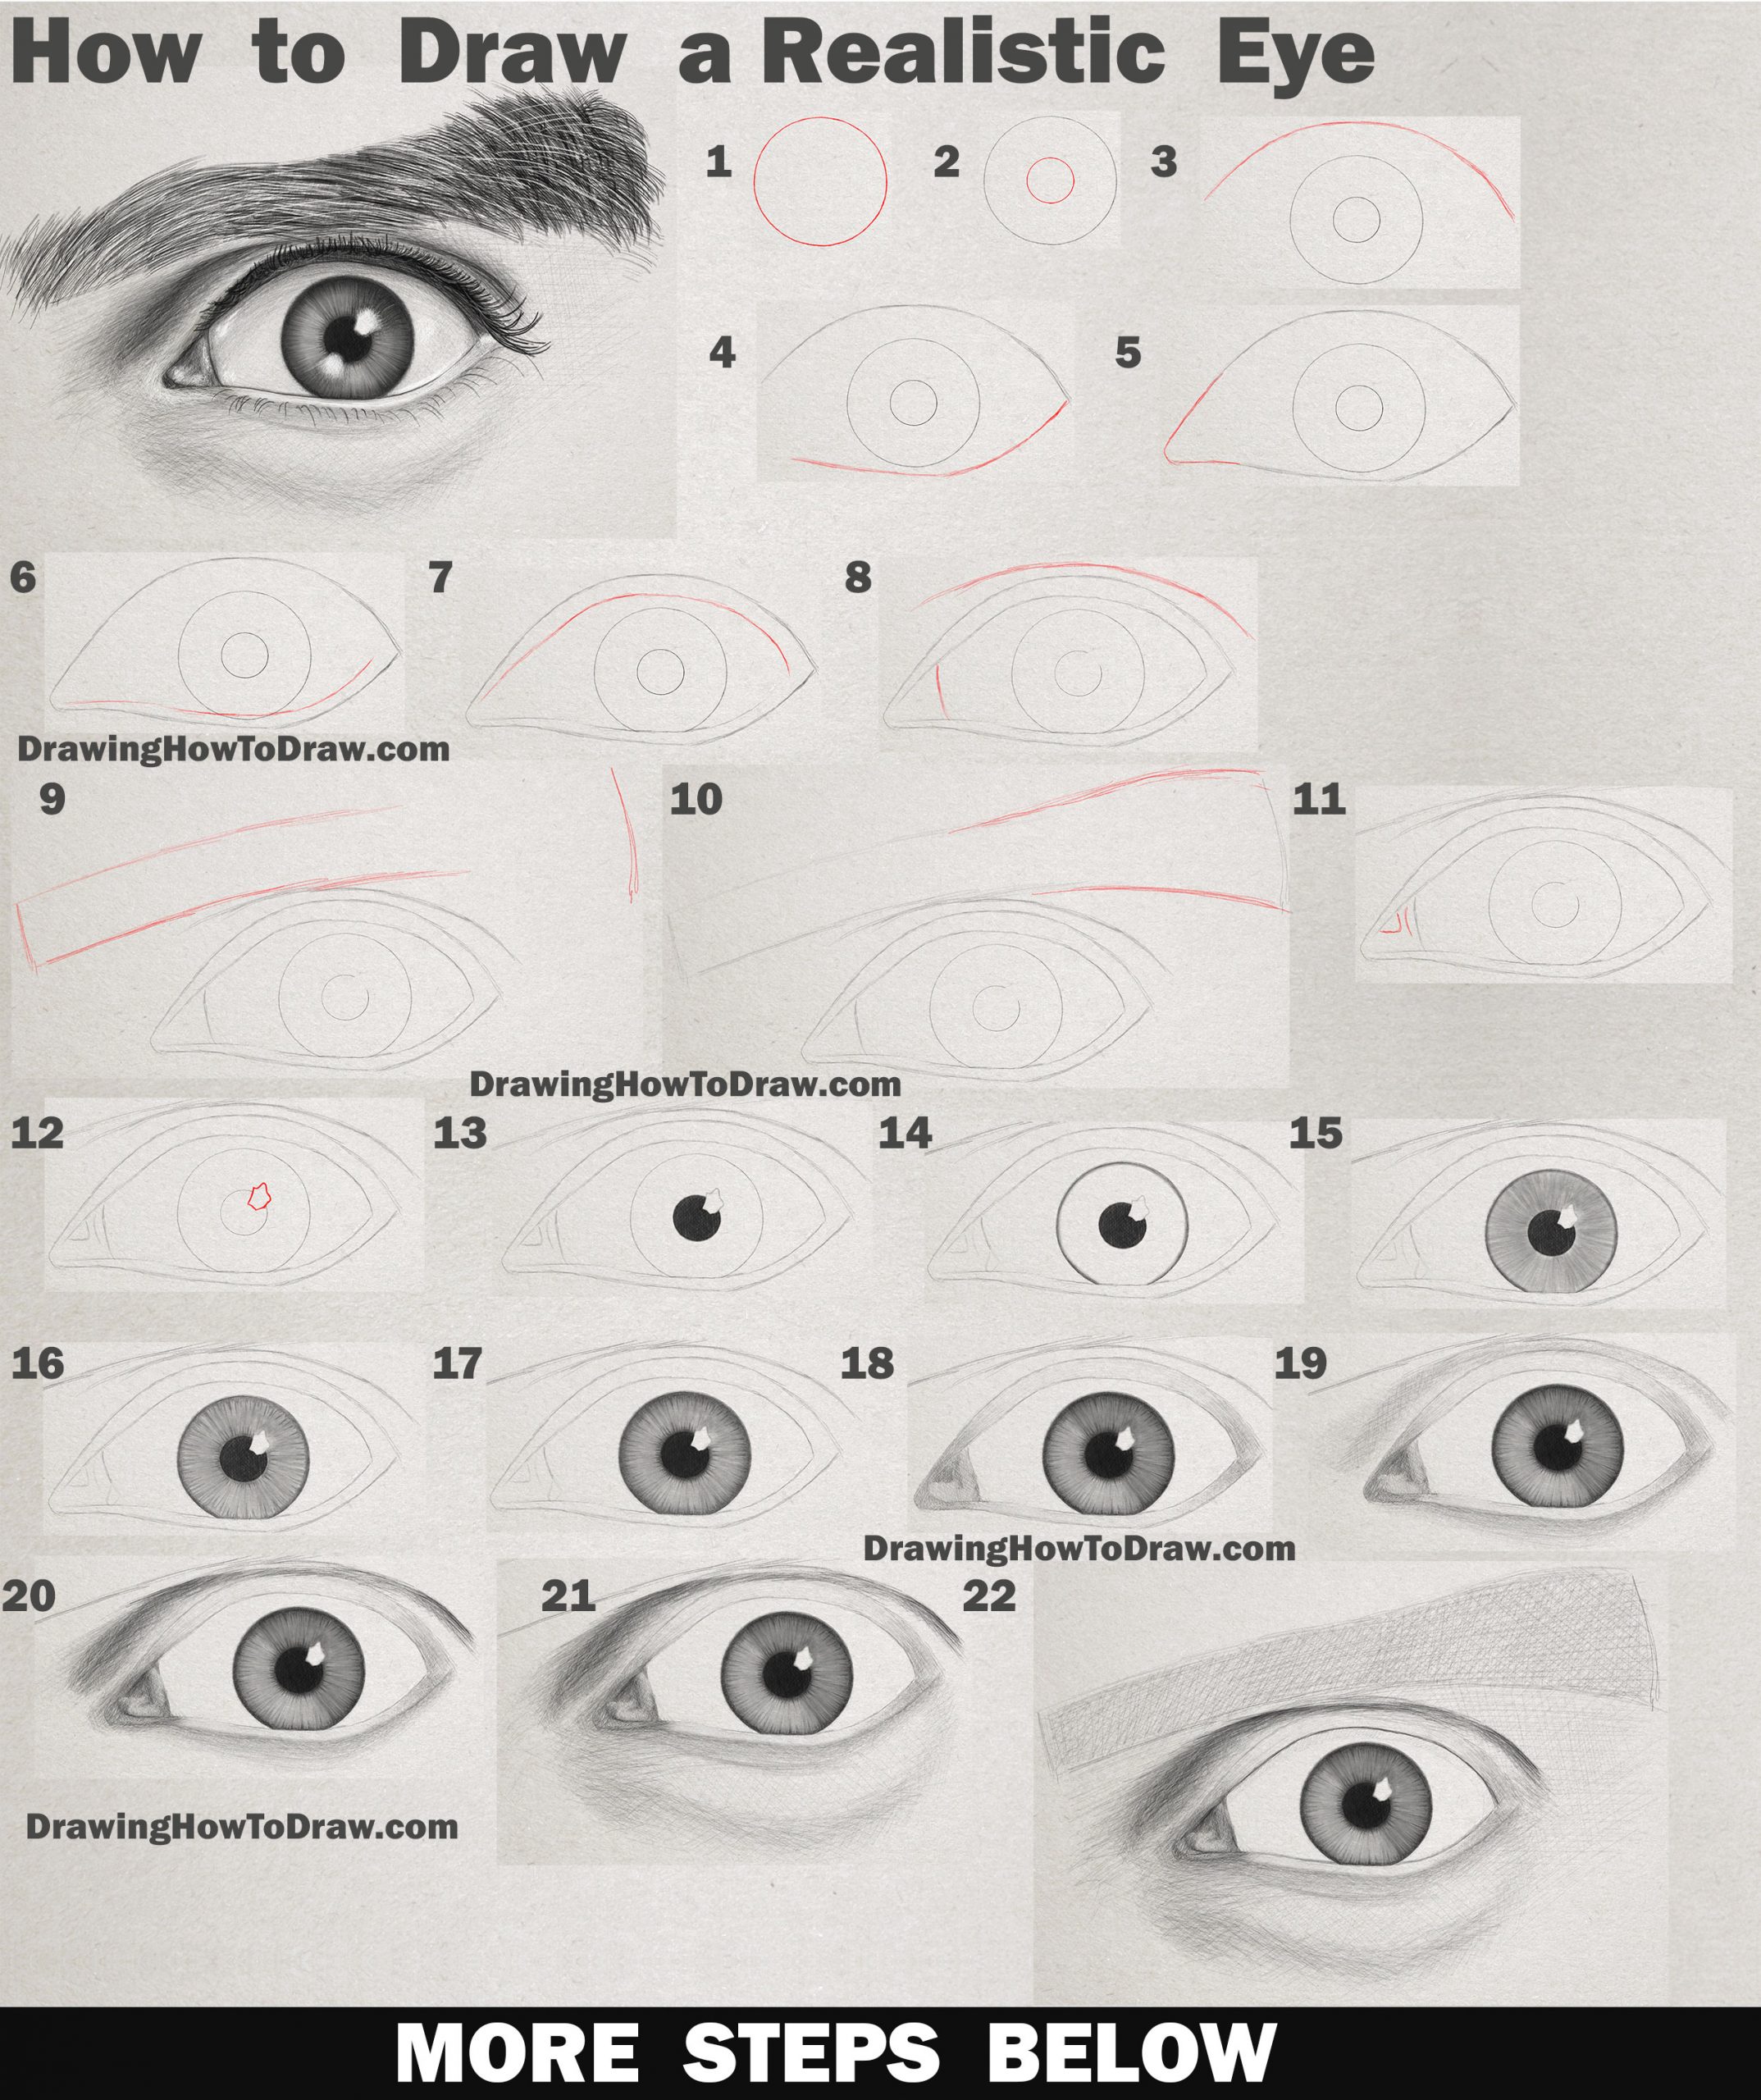
(Step 1) Draw all the lines lightly. Start by drawing a circle.
(Step 2) Draw a smaller circle inside of the 1st one.
(Step 3) Draw a curved line over the circles.
(Step 4) Draw the bottom of the eye. The outer shape is almost like a leaf now.
(Step 5) Draw the inner eye.
(Step 6) Draw an inner line for the lower eye.
(Step 7-a) Erase the part of the circle (iris) that overlaps with the lower inner lid.
(Step 7-b) Now draw an inner outline of the upper eye.
(Step 8-a) Make sure the lines are light enough. You don’t want any dark lines.
(Step 8-b) Erase a part of the inner circle.
(Step 8-c) Draw 2 curved lines.
(Step 9) Let’s start drawing the eyebrow.
(Step 10) Close off the shape of the eyebrow.
(Step 11) Draw a “V”-like shape and a curved line in the inner, pink part of the eye.
(Step 12) Draw an irregular shape for the highlight. It can look different than mine.
(Step 13) Fill in the pupil (small circle of the eye).
(Step 14) Darken the outline of the iris. Then try to gradate it slightly so there isn’t a sharp line.
When going from dark to light or vice versa, try to make a gradient by getting the values to almost match up. Do this by lightly drawing more lines until it is almost as dark as the line next to it.
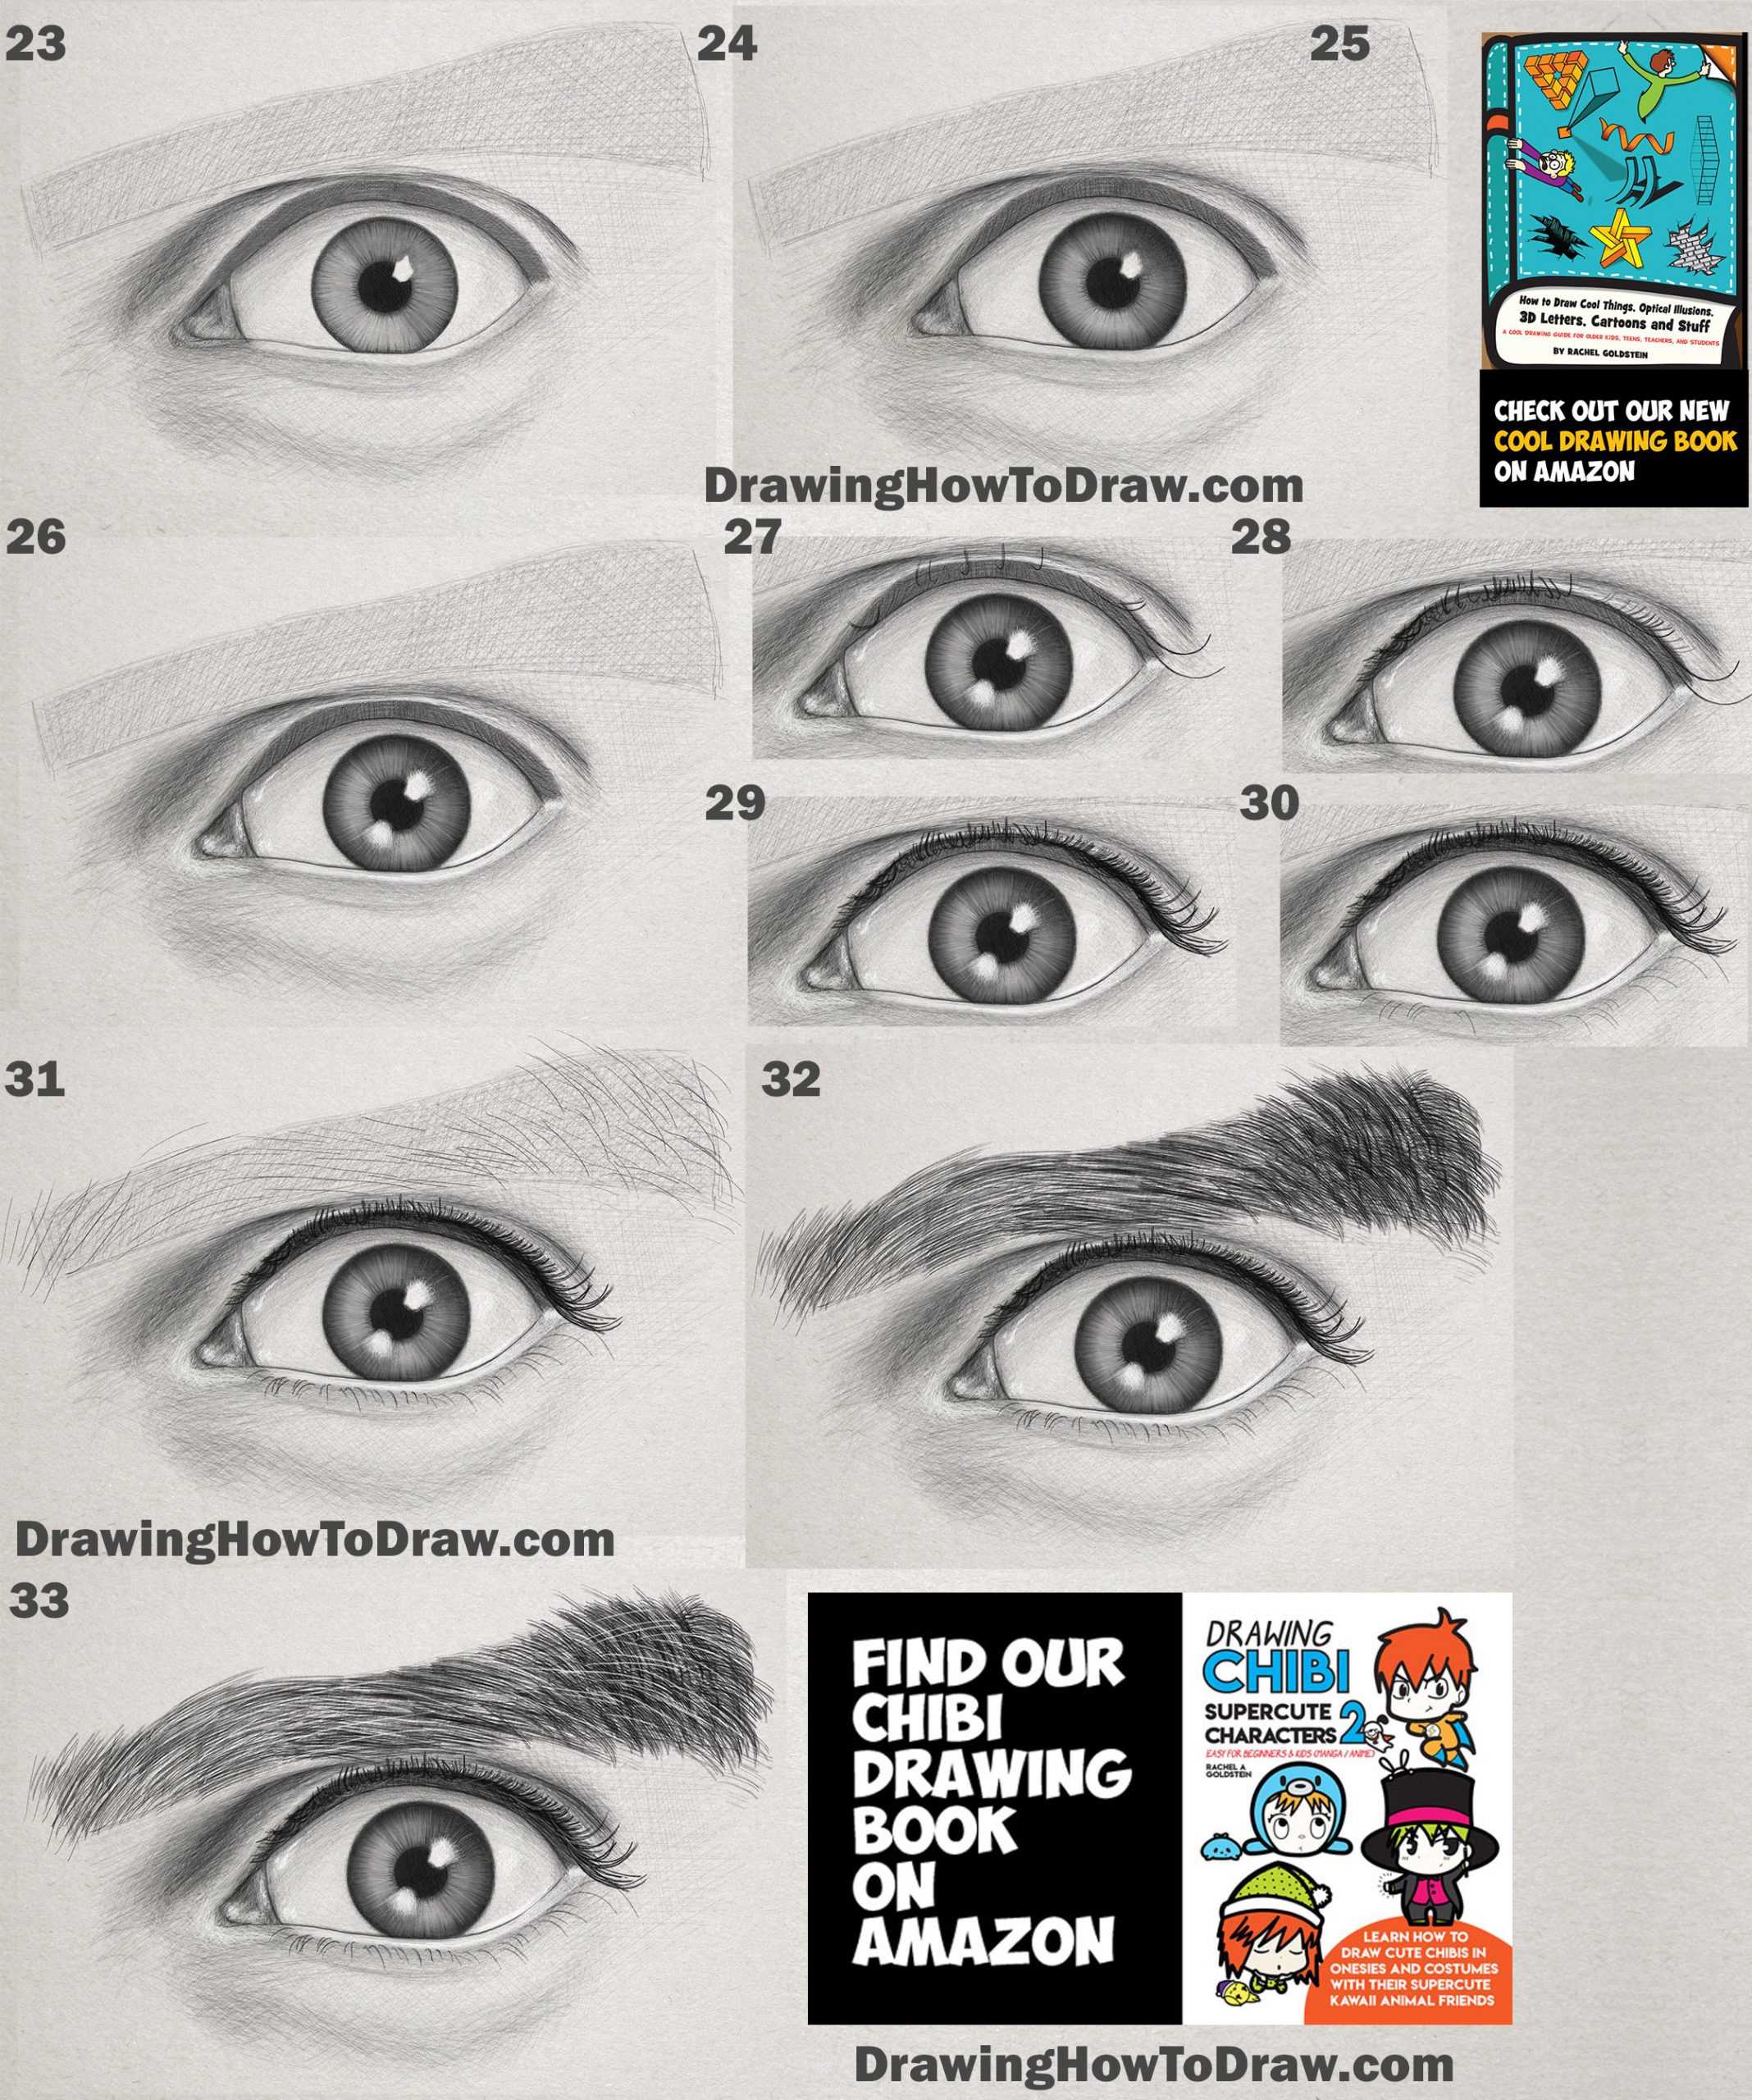
(Step 15) Shade the entire circle a light gray. Then draw lines all around the eye, as I have.
(Step 16) Draw little spikes or mountains all around the pupil and iris.
(Step 17) Lightly shade a gradient, darker around the iris’ edge and lighter as it goes towards the pupil.
(Step 18) Shade half of the iris so that it is darker than the other side. Then add some shadows to the inner lids and to the inner eye. Notice where it is darker?
(Step 19) Add some shading above and below the eye. Also, add a bit of shading in the inner eye.
(Step 20) Shade the inner eye the way that I have. Add shadows to the upper lid.
(Step 21) Now for below the eye.
(Step 22) Let’s draw some lighter shadows. Also, outline the inner eyelids.
(Step 23) Darken the inner upper eyelid. Lightly shade the whites of the eye.
(Step 24) Darken the gradient around the edge of the iris. Use an eraser to lighten up the shading around the inner eye. Darken the upper inner eyelid.
(Step 26) Looks like I messed up the numbering, so we’ll just skip #25 and go to #26. Use a white pencil to add some highlights.
(Step 27) The eyelash shape changed depending on where it is placed.
(Steps 28 + 29) Now that you know what direction the lashes should be going, fill in the lashes between.
(Step 30) Darken the inner upper lid. Start with the lower lashes too.
(Step 31) Continue with the lower lashes, and then start with the eyebrow hairs. The slant of each hair depends on where it is on the eyebrow.
(Step 32) Continue adding eyebrow hairs until it is strikingly dark.
(Step 33) Add some white highlights to the eyebrow and under the eyelashes. Also, darken the upper lid. Your eye is all done!
Technorati Tags: eye, eyes, realistic eye, realistic eyes, portraits, portraiture, male, male eye, mans eye, man, graphite, pencils, how to draw an eye, how to draw eyes, shading, shade
Today I'll show you how to draw Rick from the Rick and Morty cartoon tv…
Today I'll show you how to draw Morty from the Rick and Morty cartoon tv…
Today I'll show you how to draw the spunky little rabbit, Kuromi, from My Melody…
Today I'll show you how to draw this cute "bean duck" that I found on…
Today I'll show you how to draw Sosuke and Ponyo in a bubble (chibi /kawaii…
Today I'll show you how to draw a Boo from Super Mario Bros in Kawaii…
View Comments
Awesome eye, but you made one major mistake. You drew the wrong eyebrow, rofl. That’s a left eye, with a right eye eyebrow, lol.
I was waiting for somebody to say that. Actually, it is the correct eyebrow but it looks like the wrong one because the other eye is raised and this one is lowered. It really is an optical illusion if you don't see the other eye.