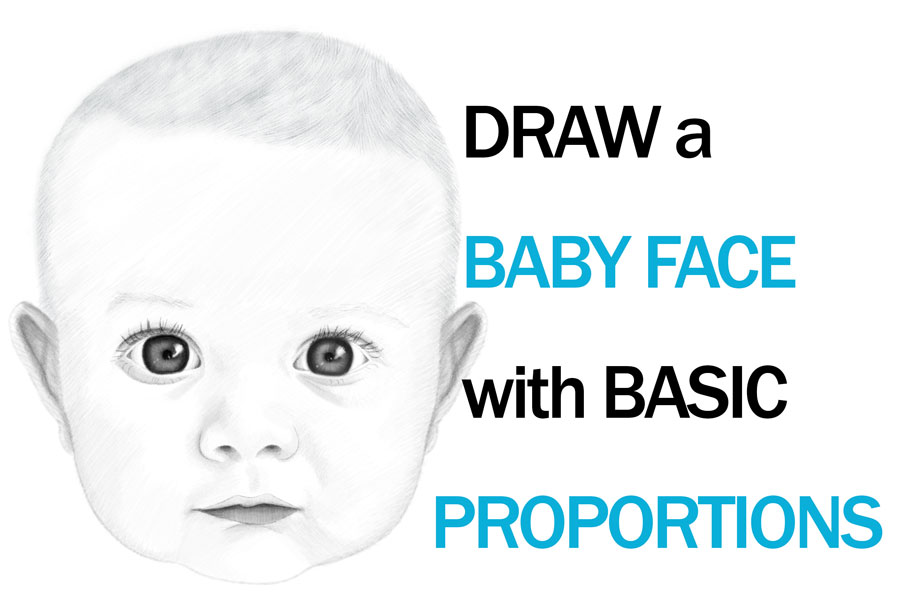
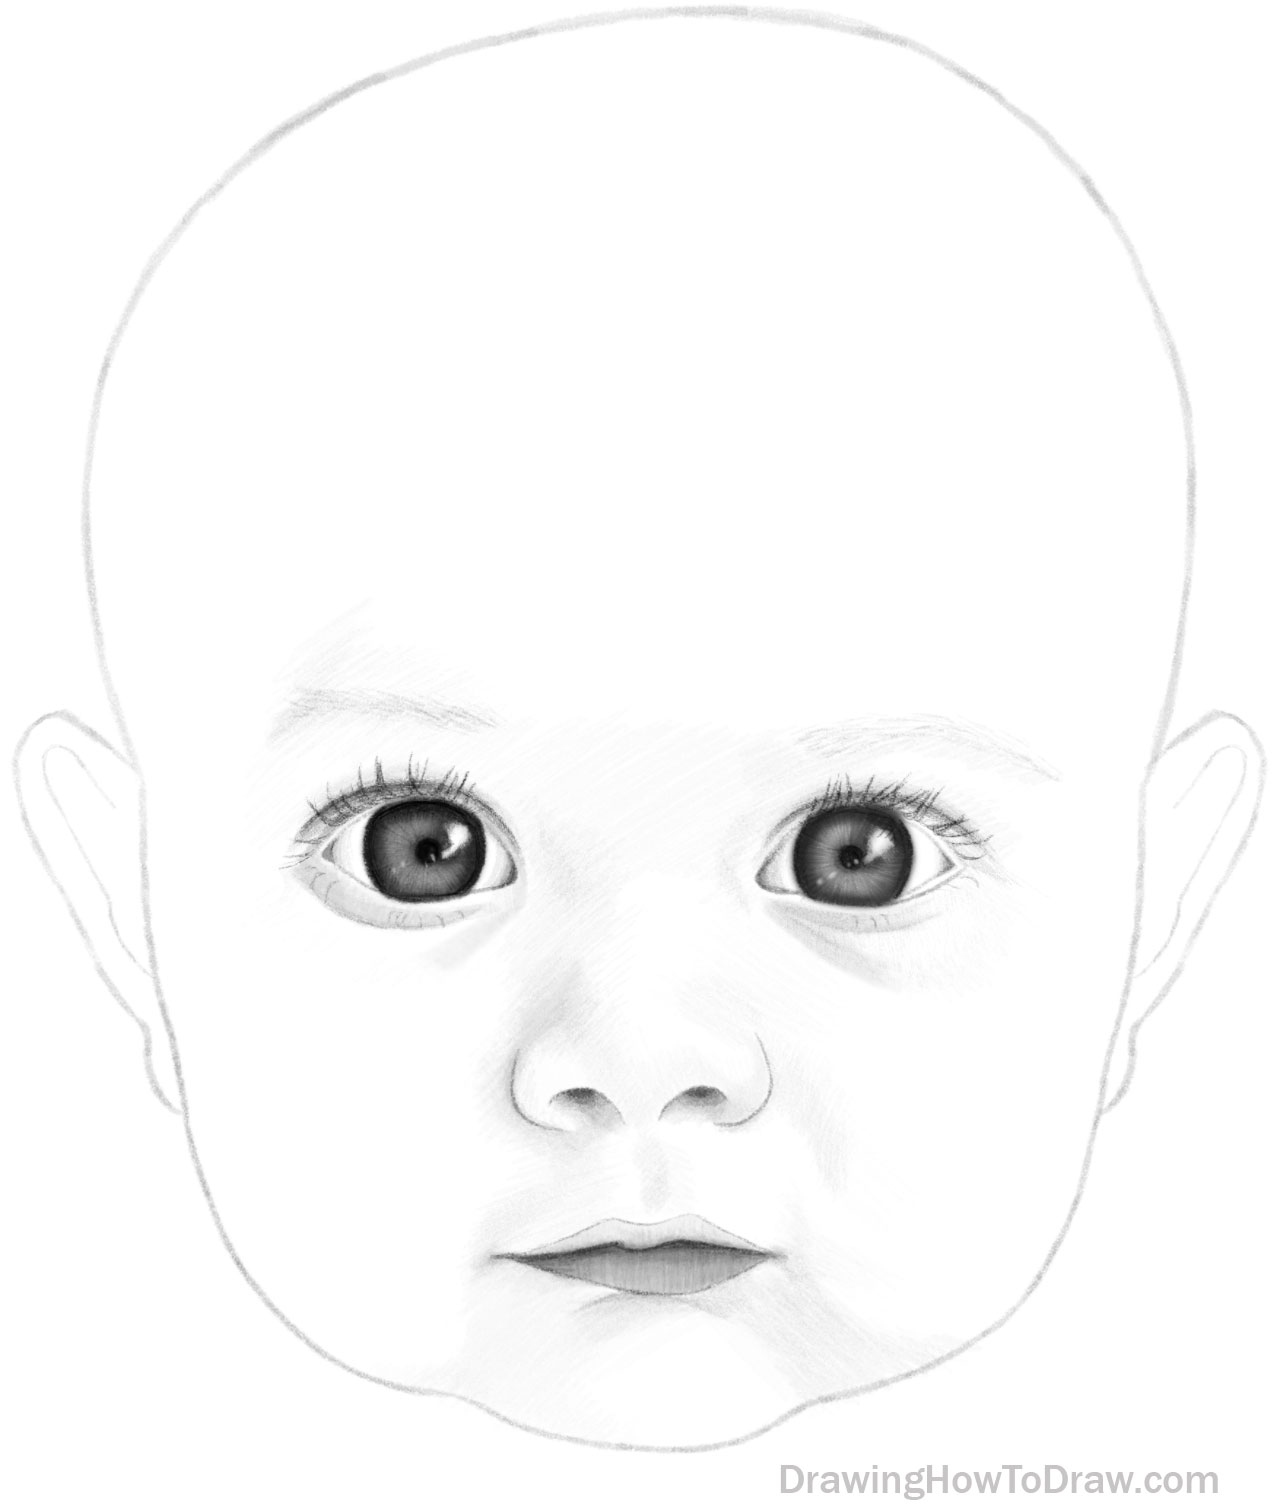
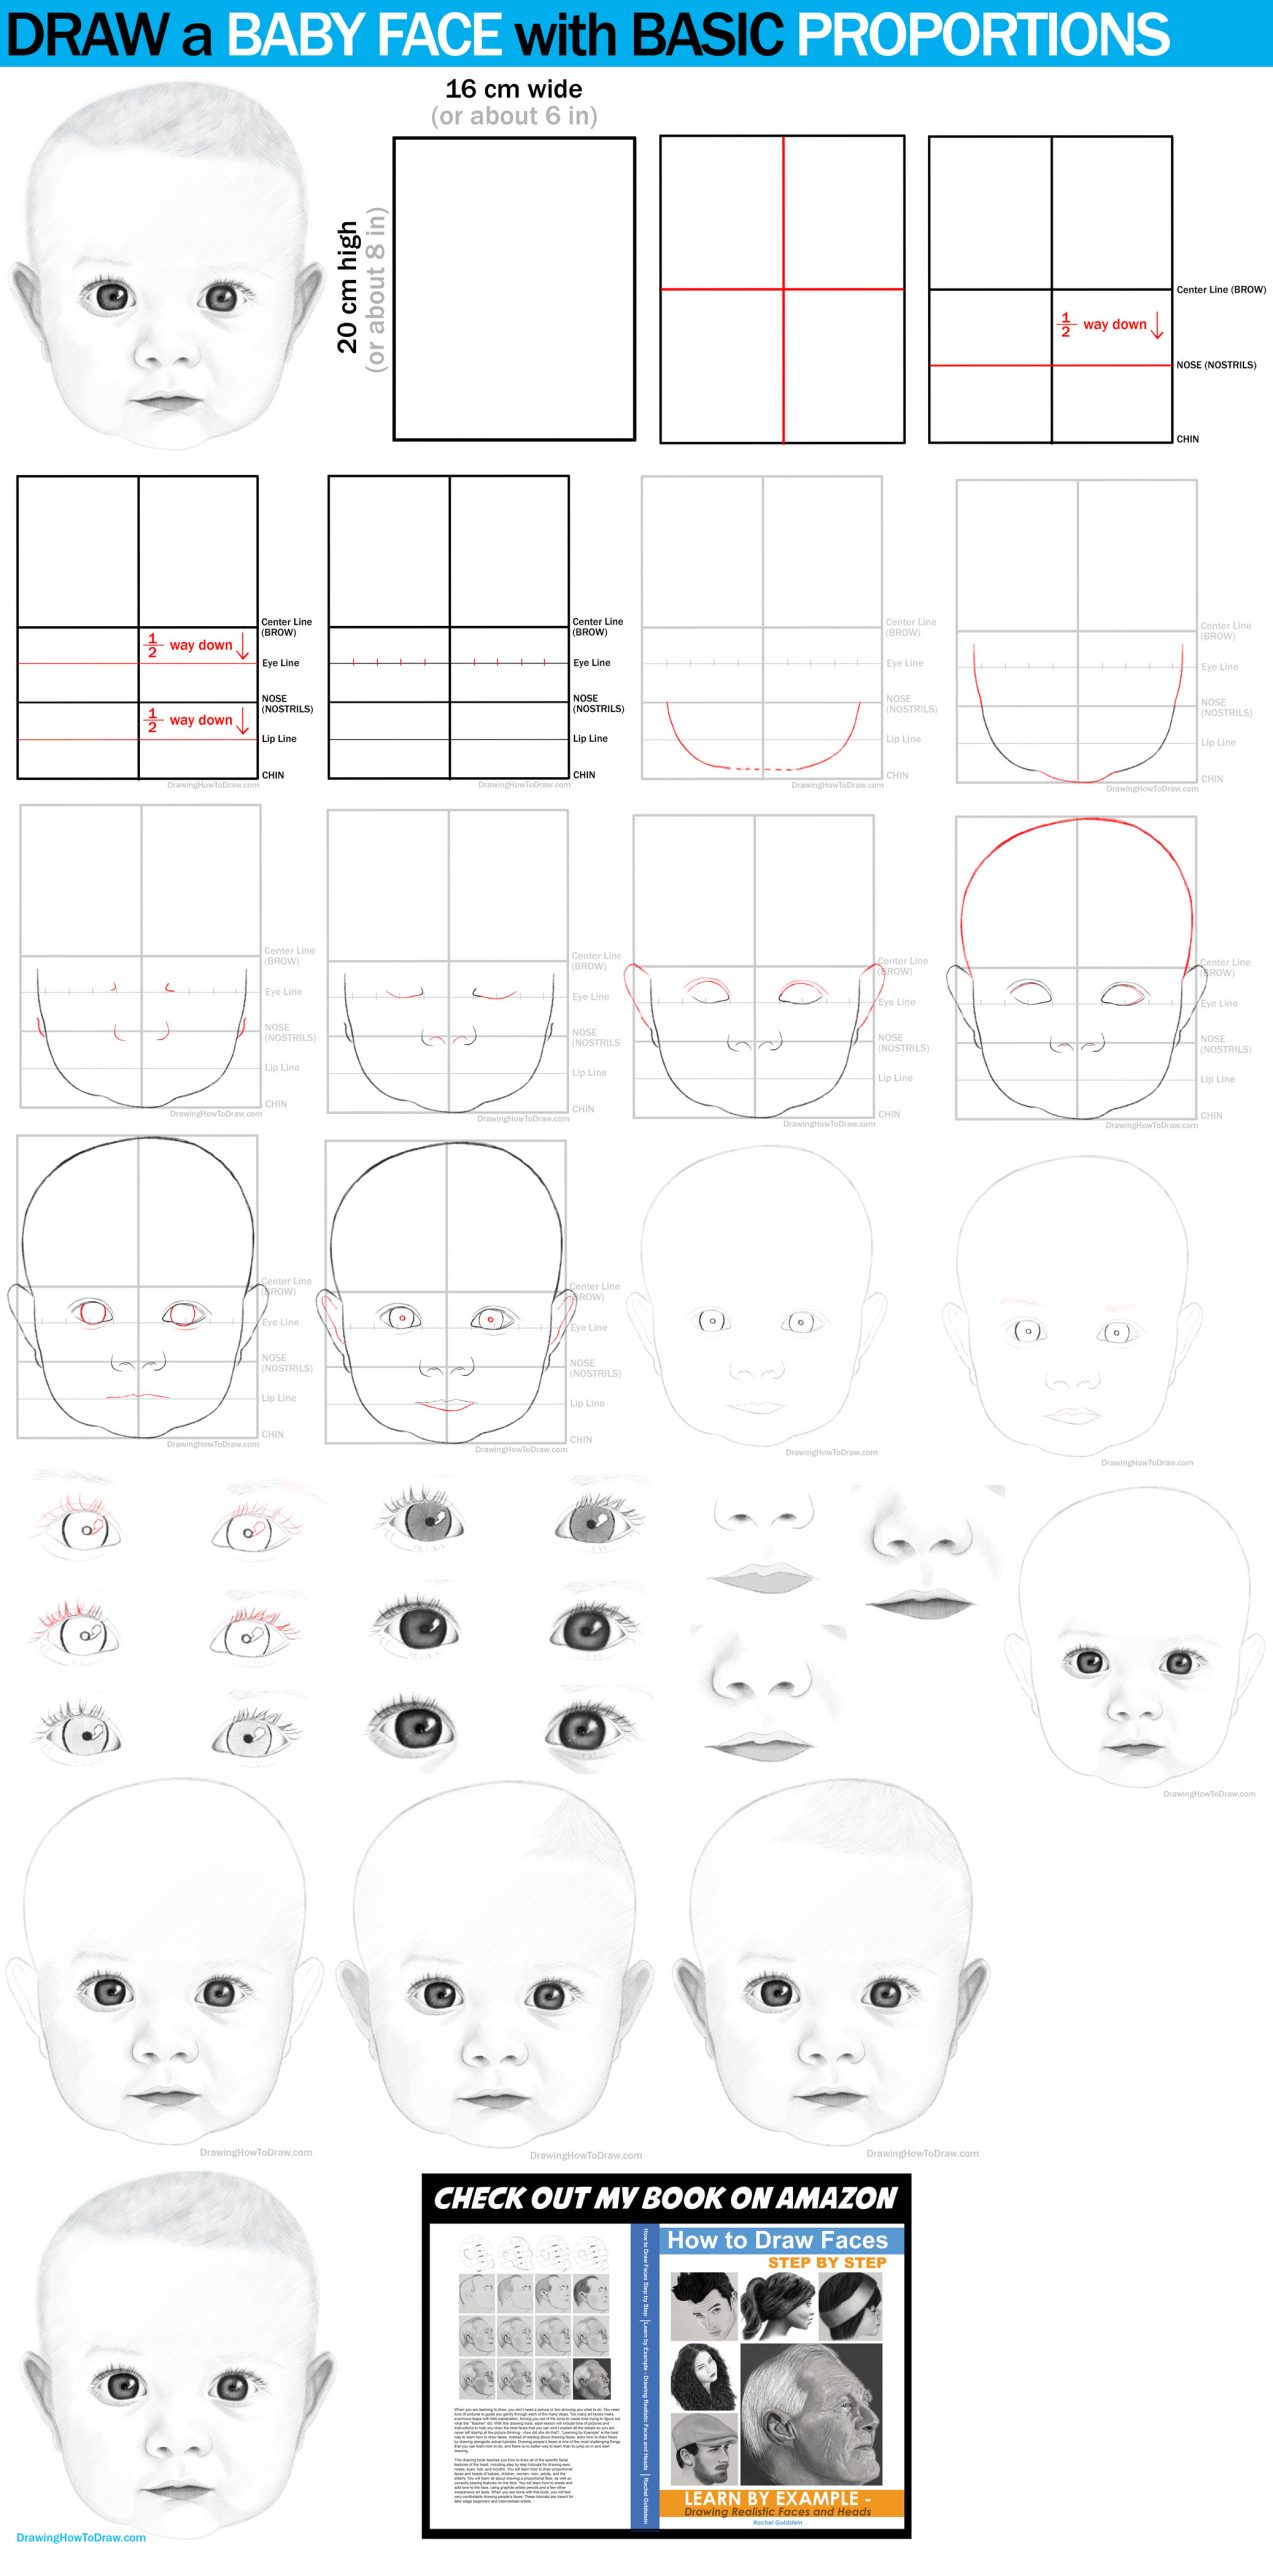
Learn how to draw a baby’s face, from the front, with basic proportions. This technique might look annoying, but it is reliable and really can be quick if you memorize how to draw babies’ faces. Drawing faces and heads really aren’t as hard as it appears to be. Follow this facial proportions tutorial and you will see how easy drawing baby faces can be. Happy Drawing!
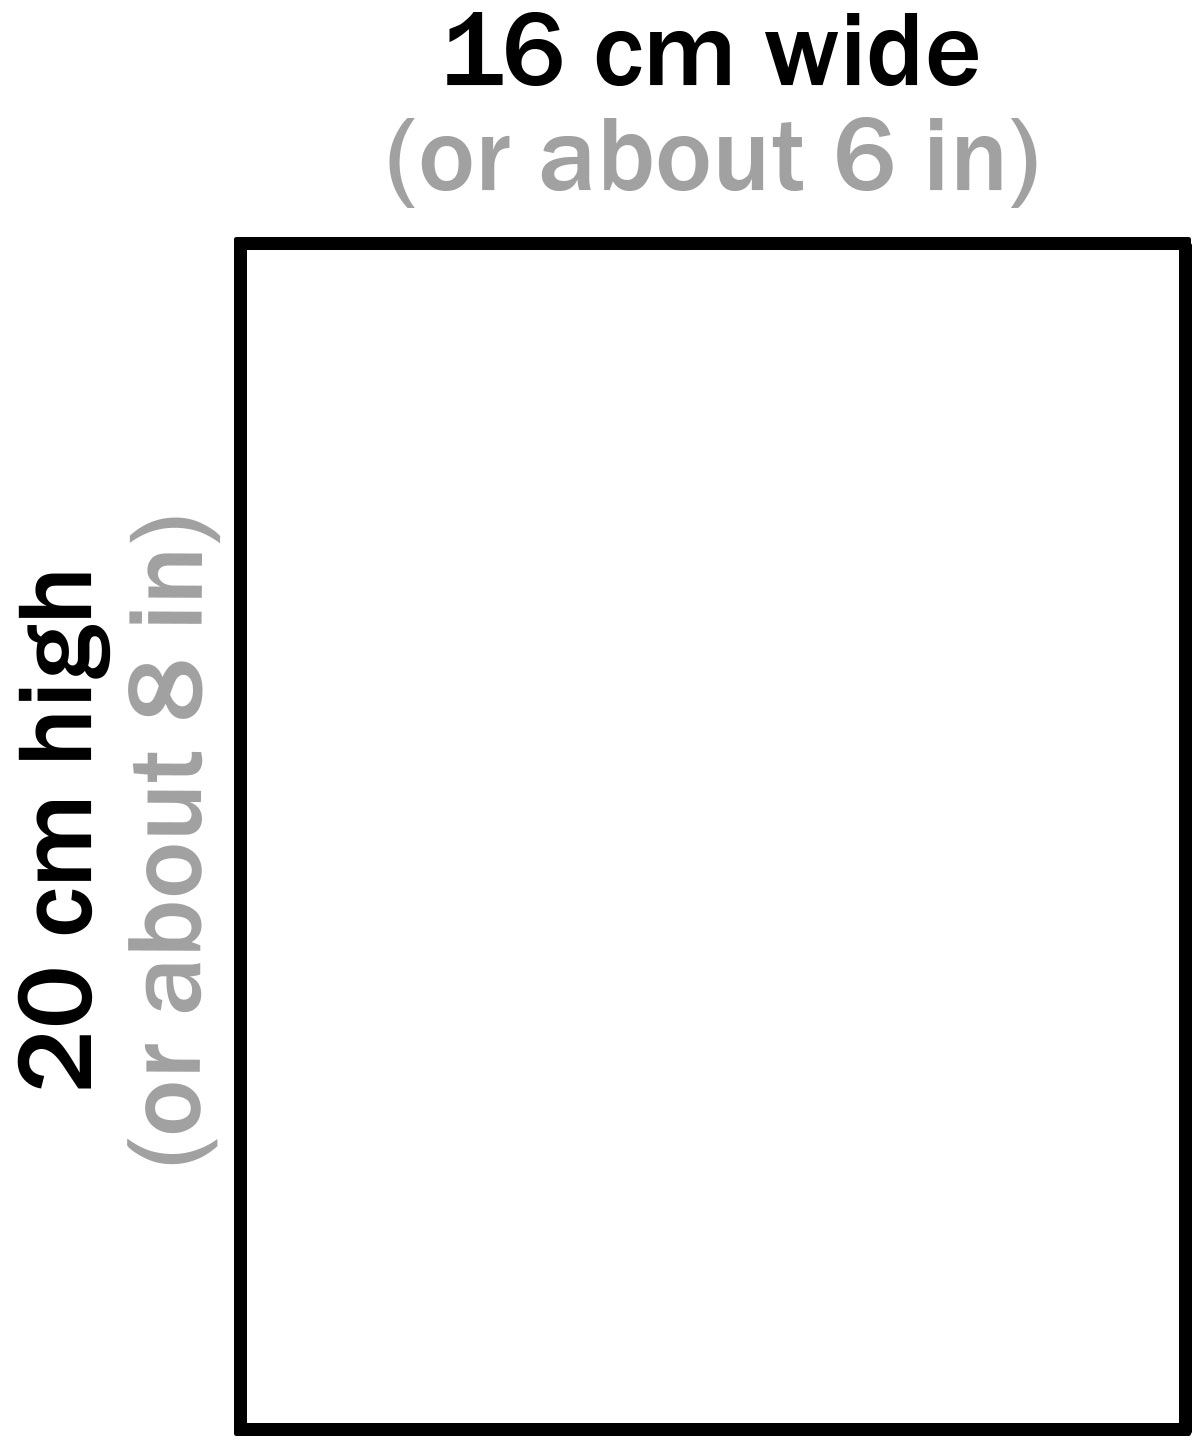
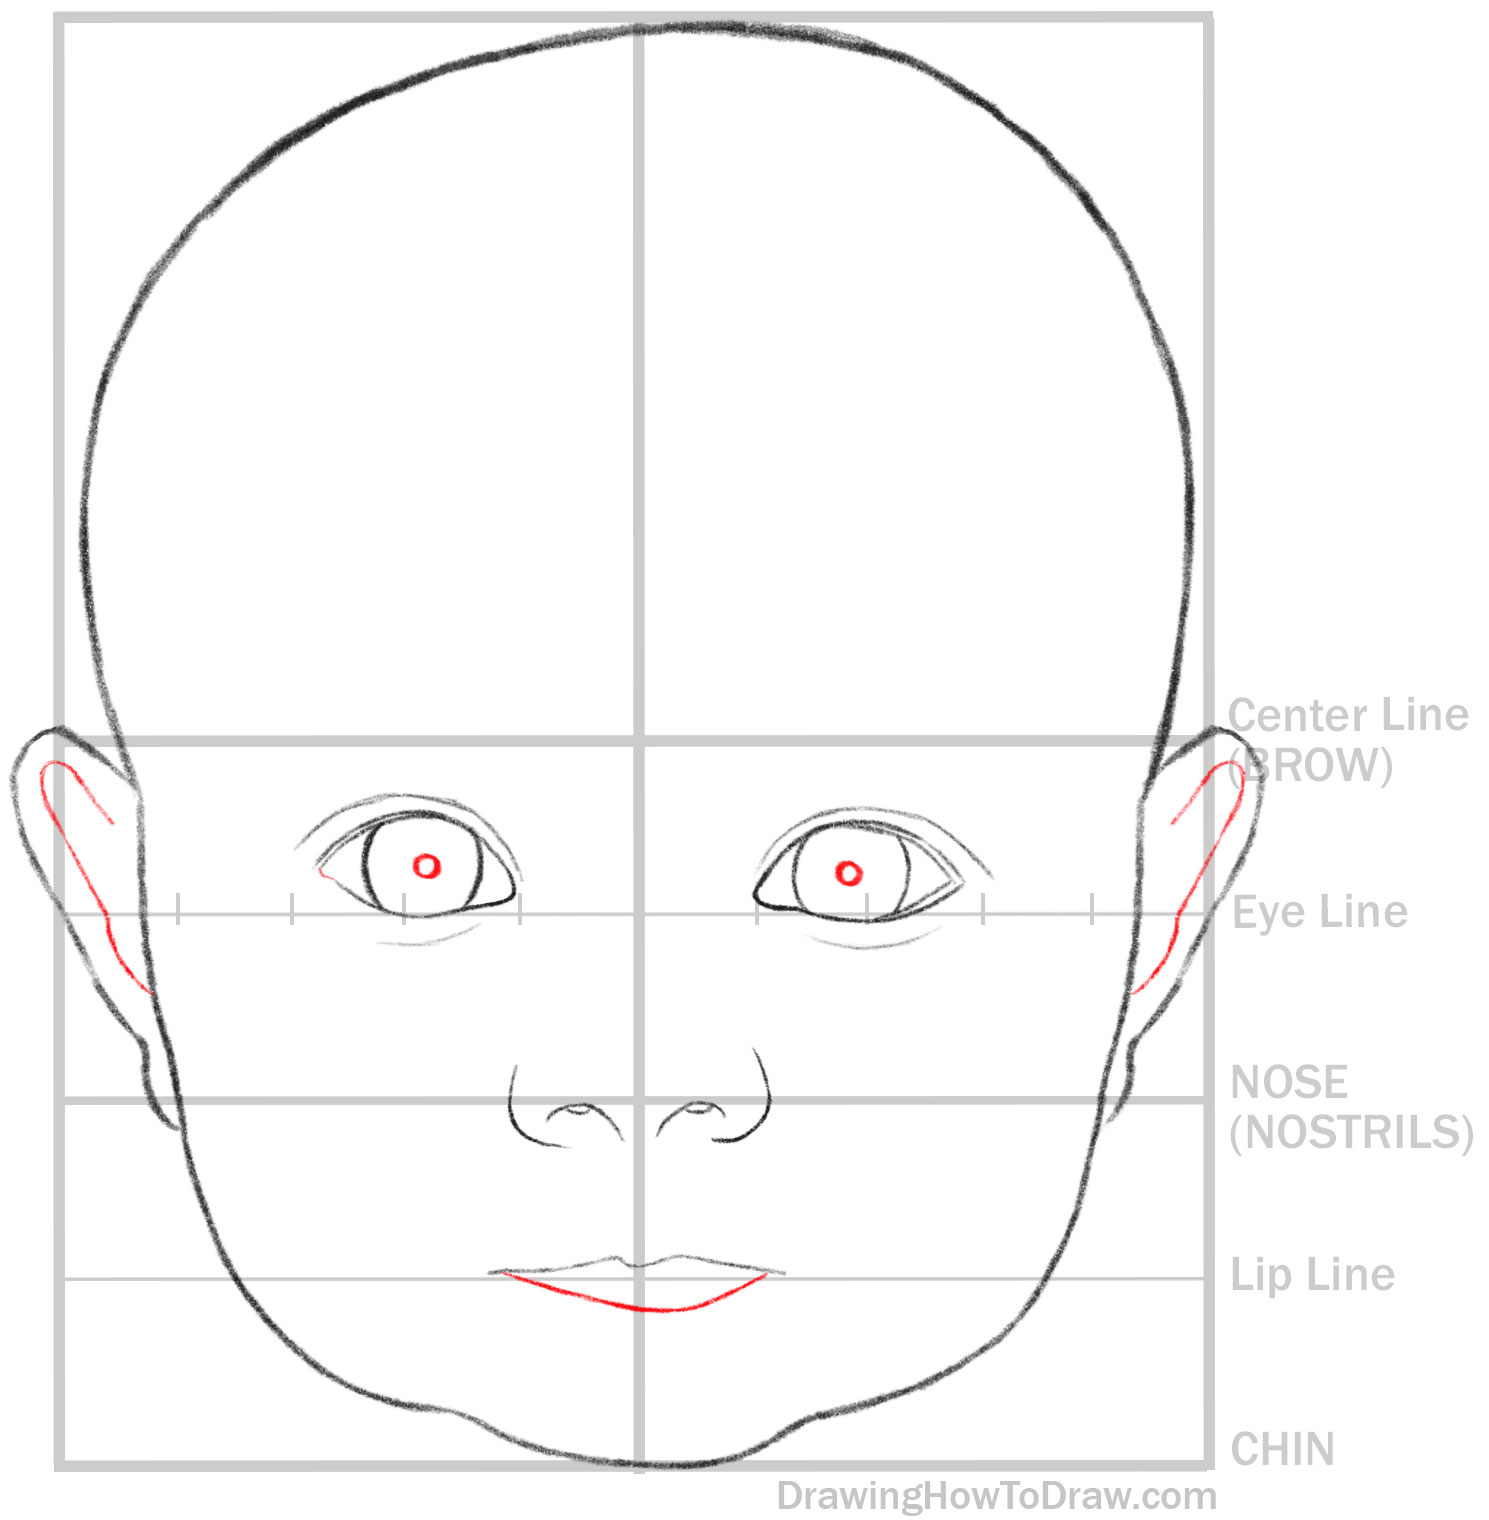
Lightly draw a tall rectangle. Babies’ heads are taller than they are wide, at about a 4:3 ratio (i.e. 4 inches x 3 inches, or 8 inches high x 6 inches wide).
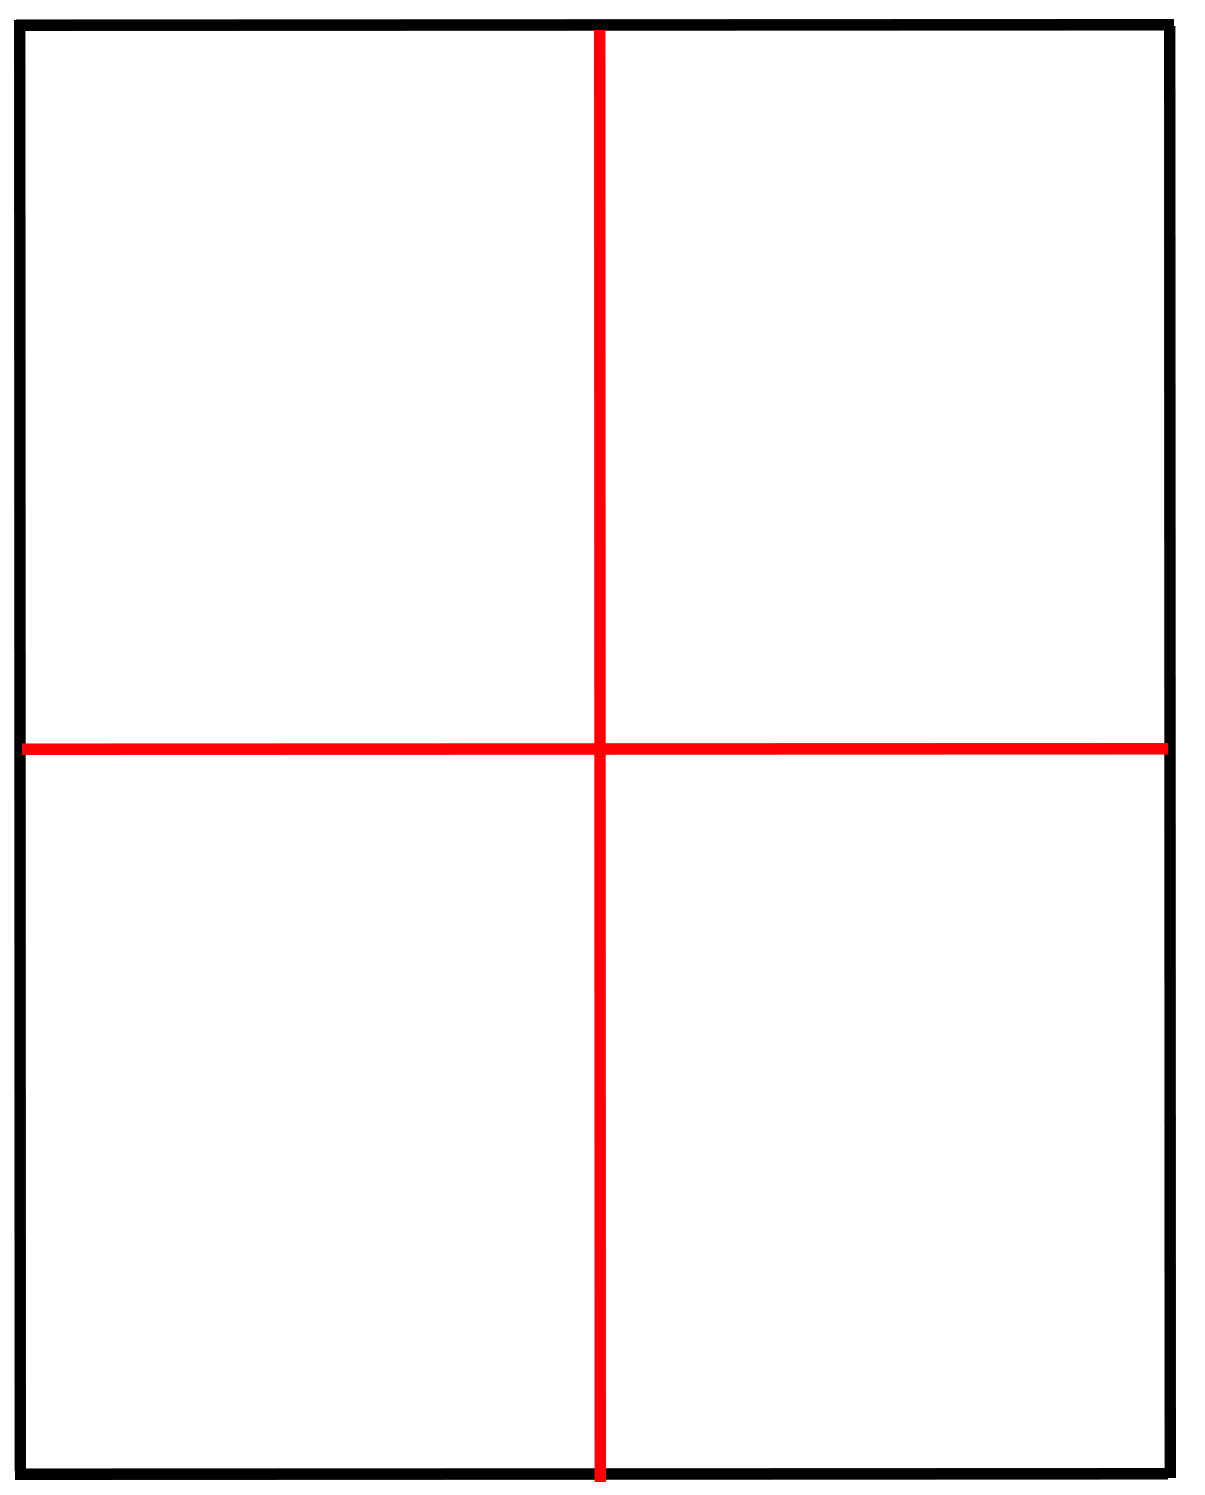
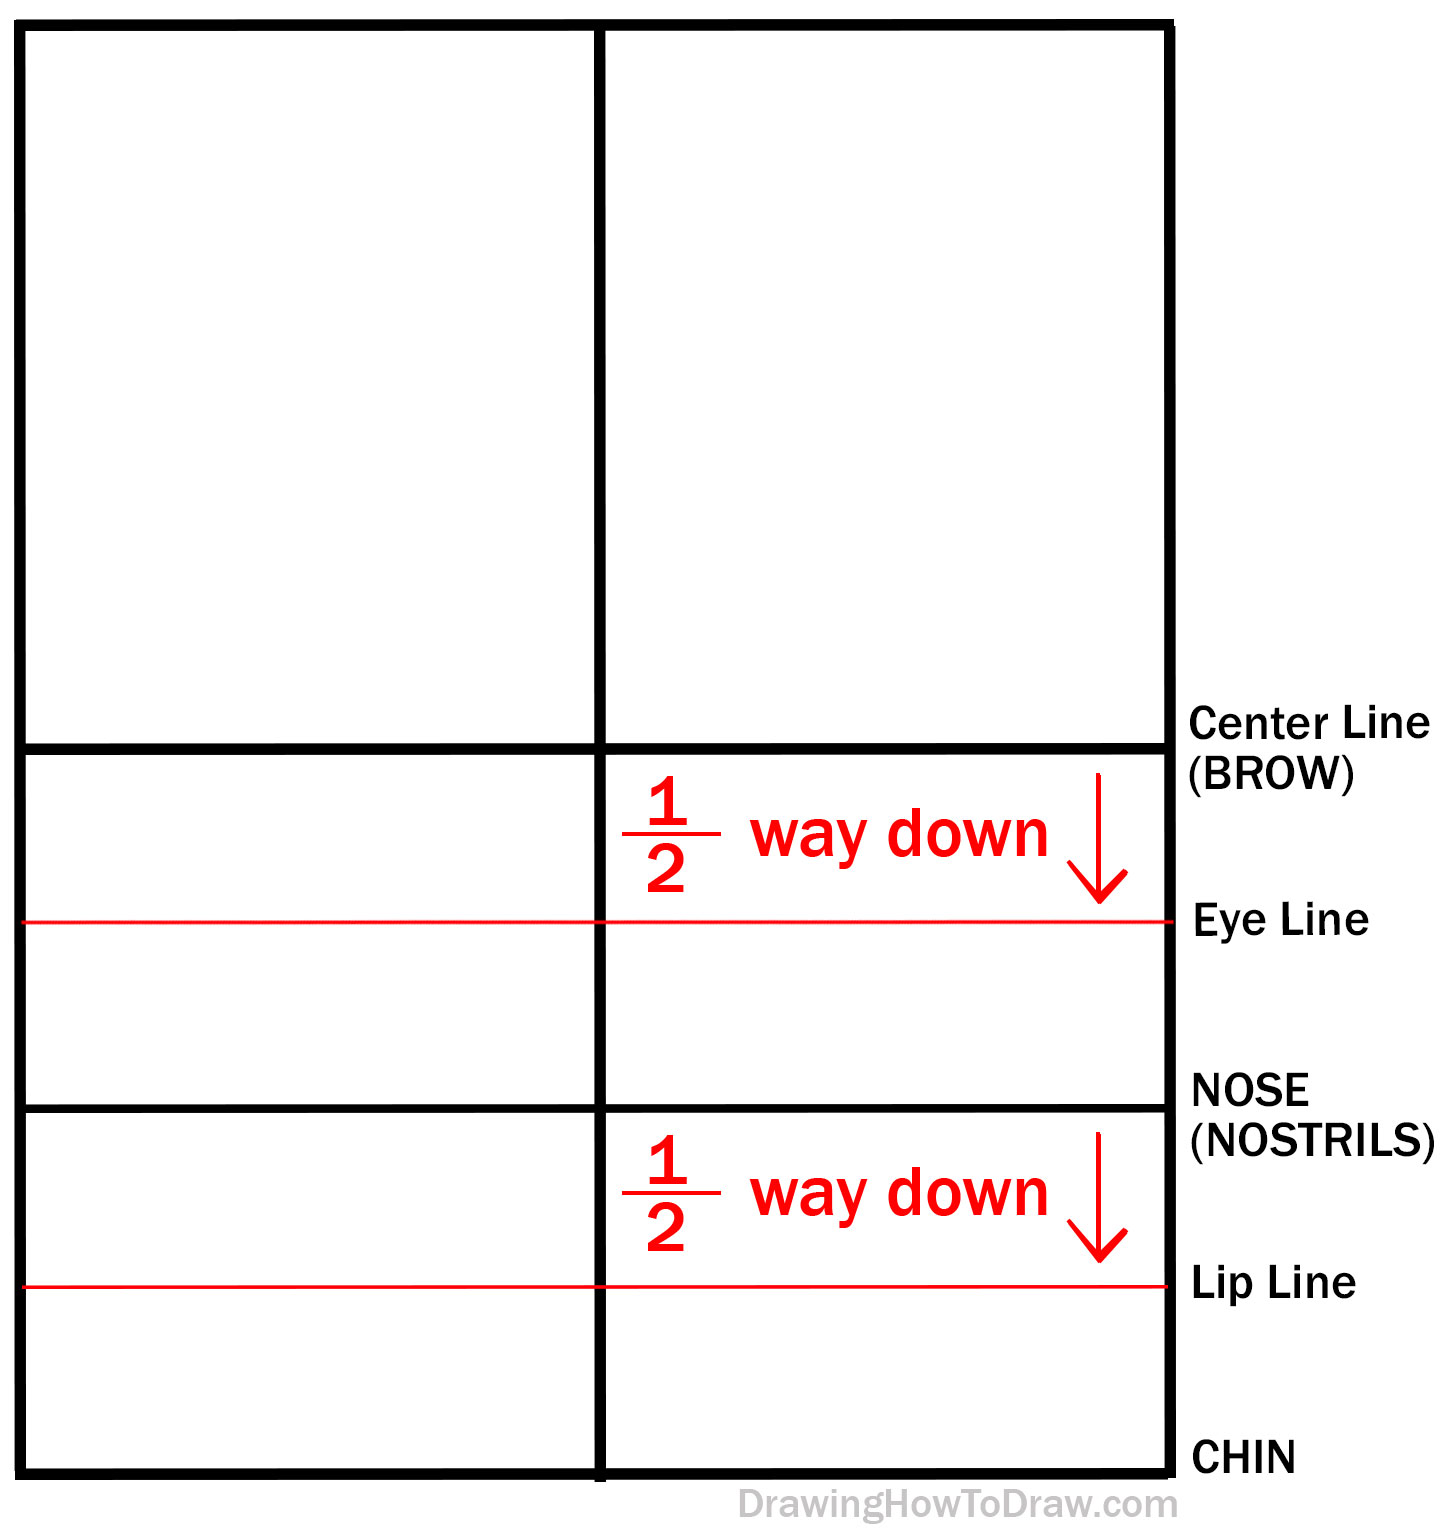
Lightly draw lines thru the center of the rectangle.
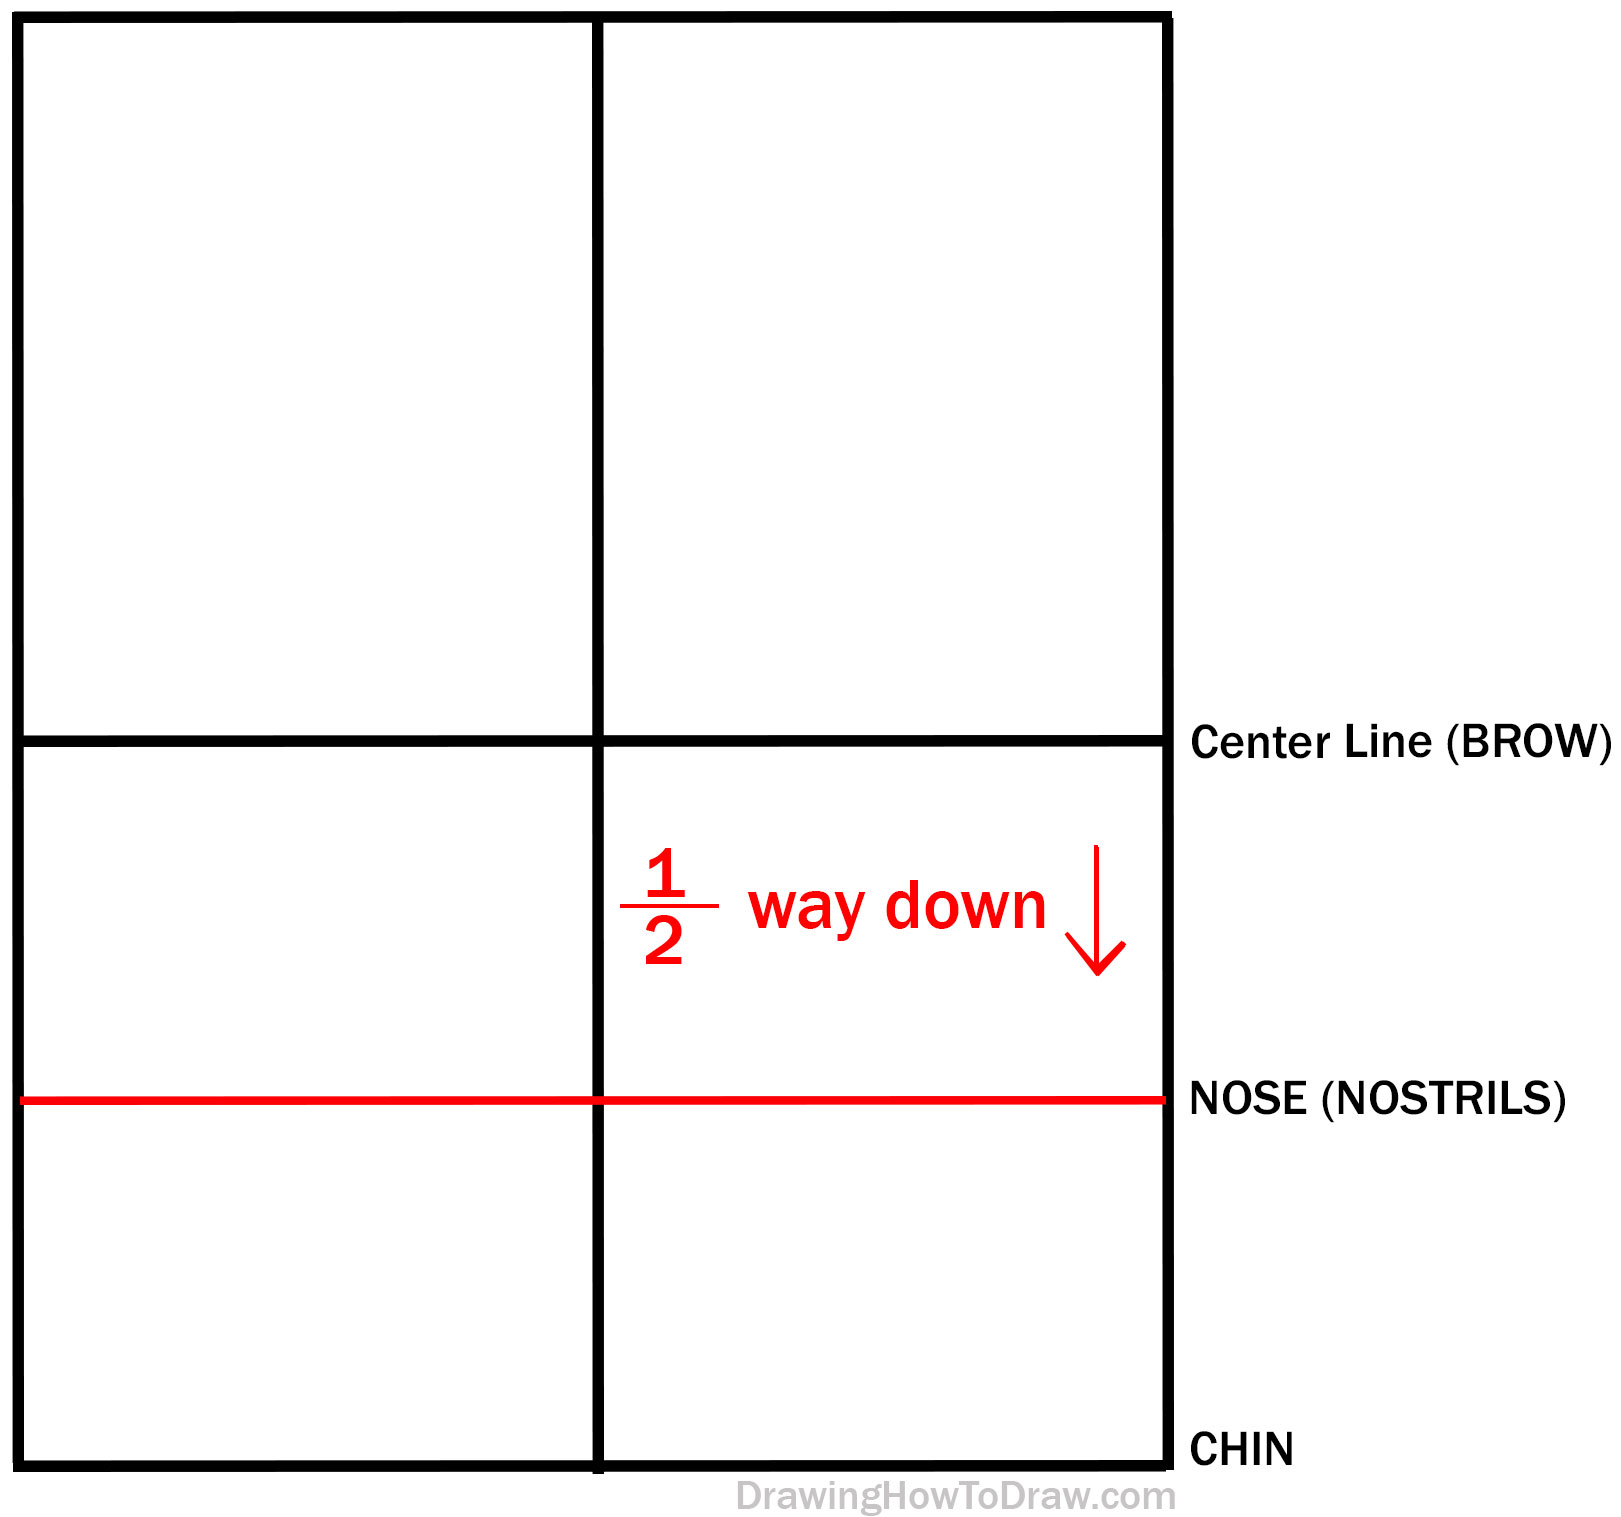
Lightly draw a guideline halfway between the center guideline and the bottom of the rectangle.
Go down 1/2 of the way from the “browline” to the “nose line” to find the “eye line”. Lightly draw a
guideline there.
Go down 1/2 of the way from the “nose line” to the bottom of the rectangle to find the “mouth line”.
Draw a guideline there.
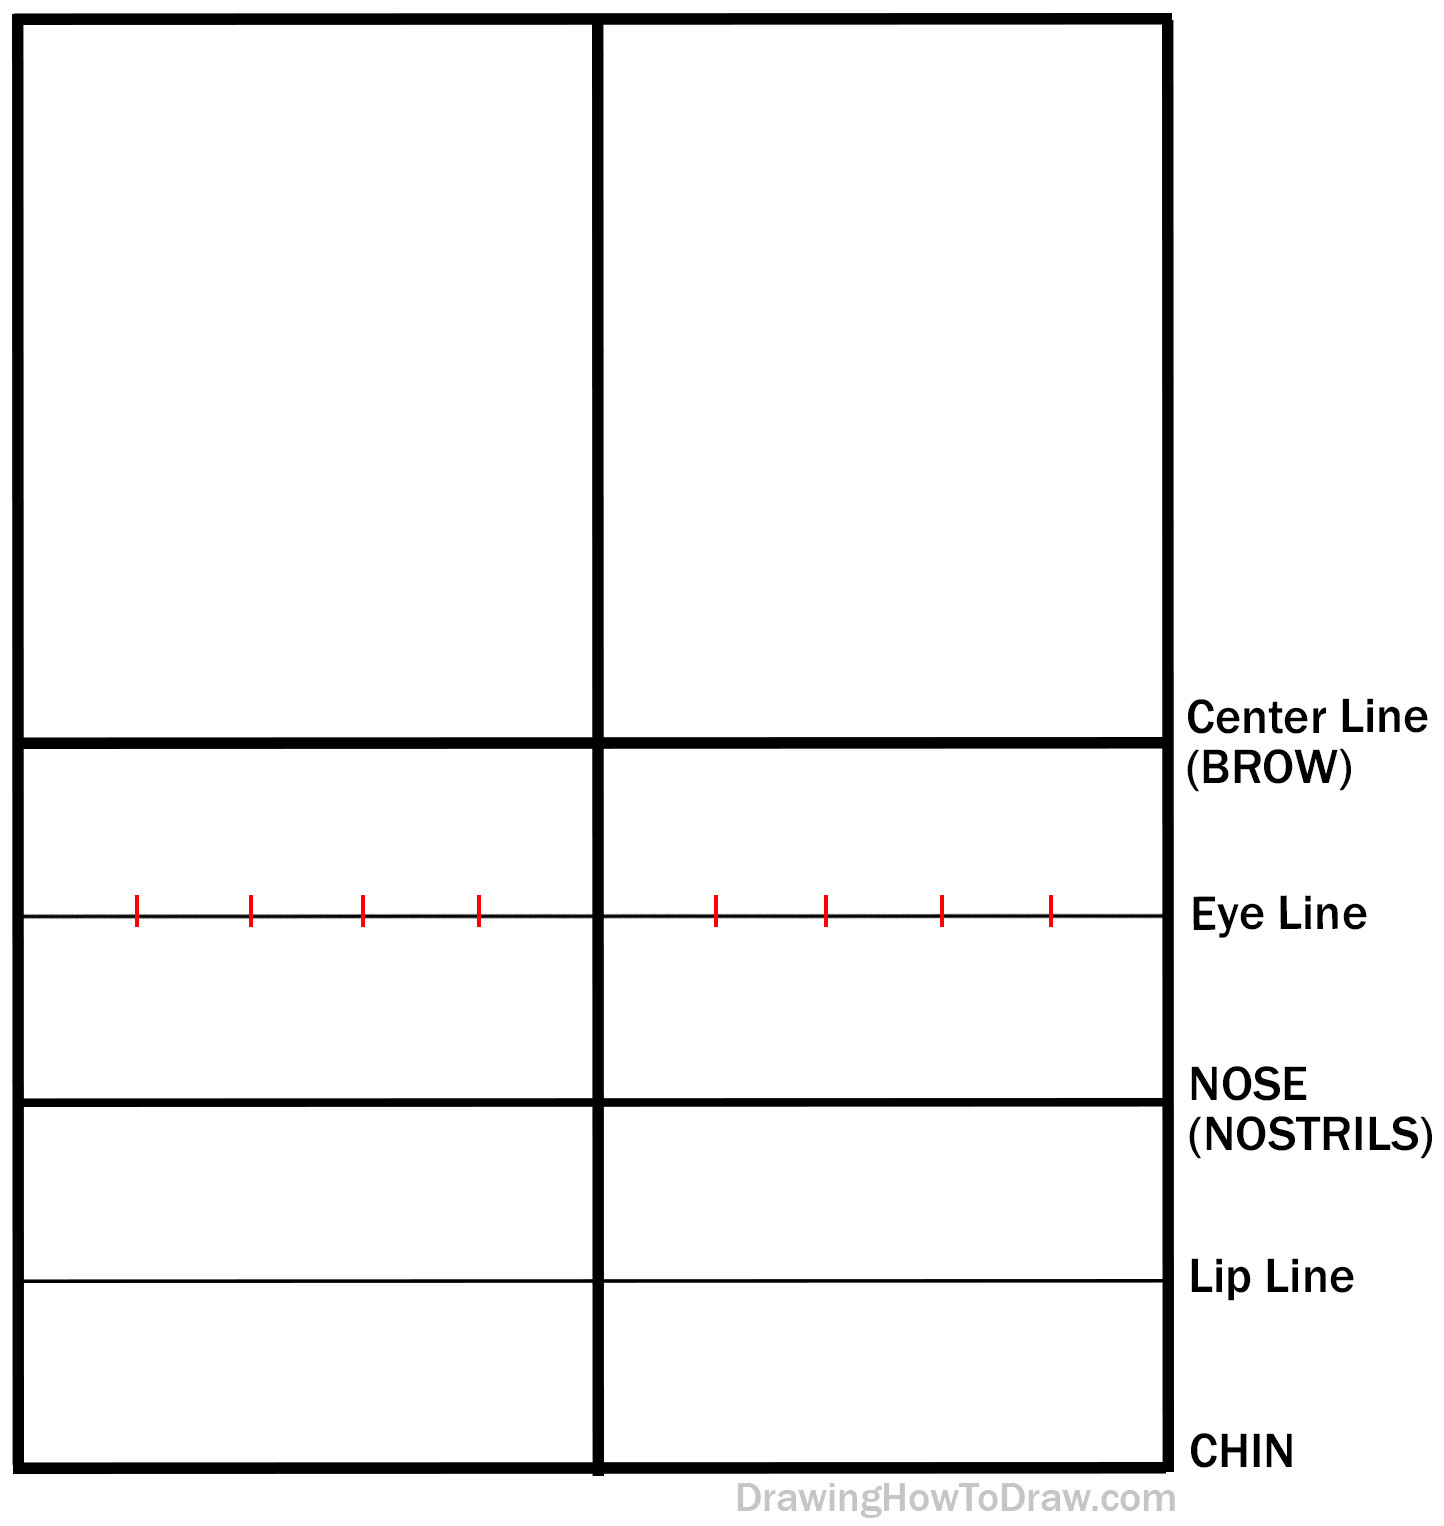
Separate the right side into 5 equal parts. Do the same for the left side. This may seem dumb, but it works.
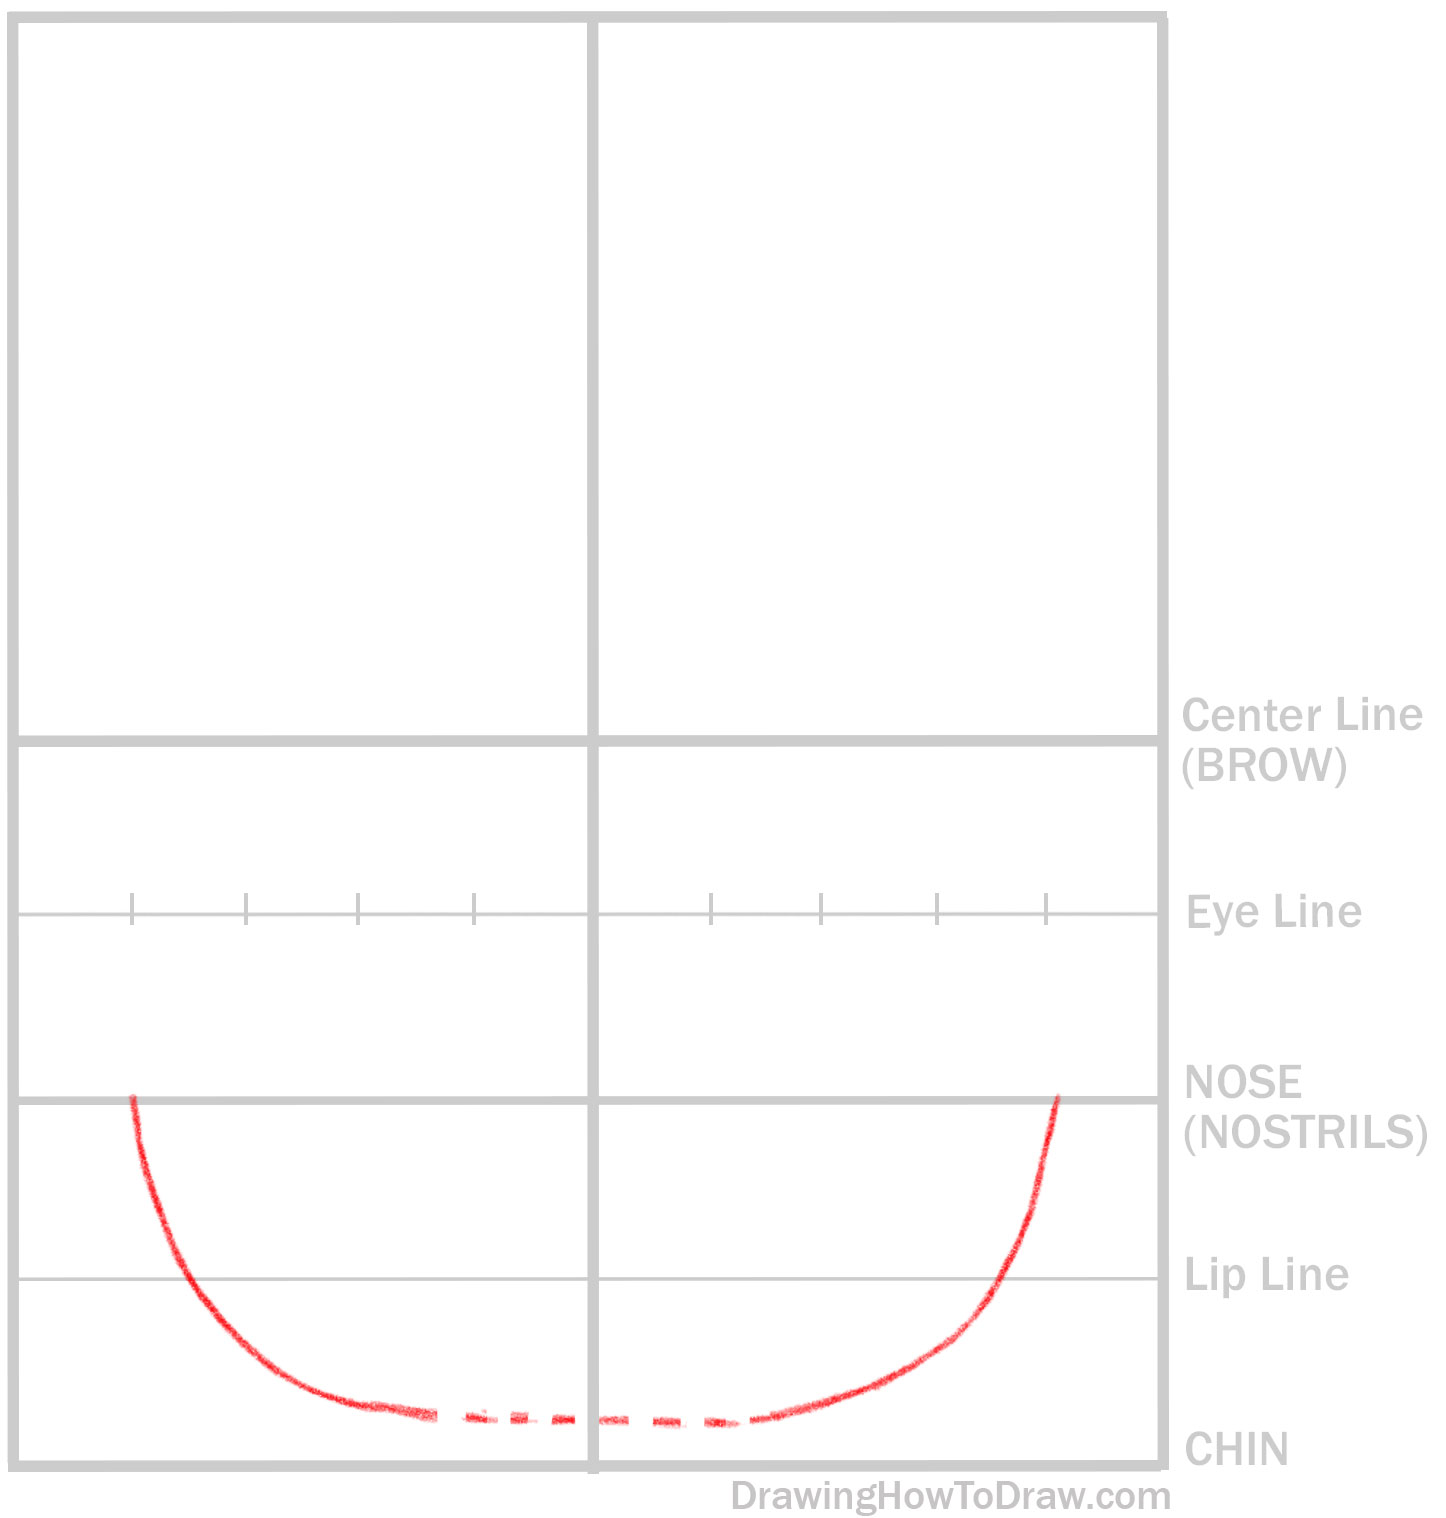
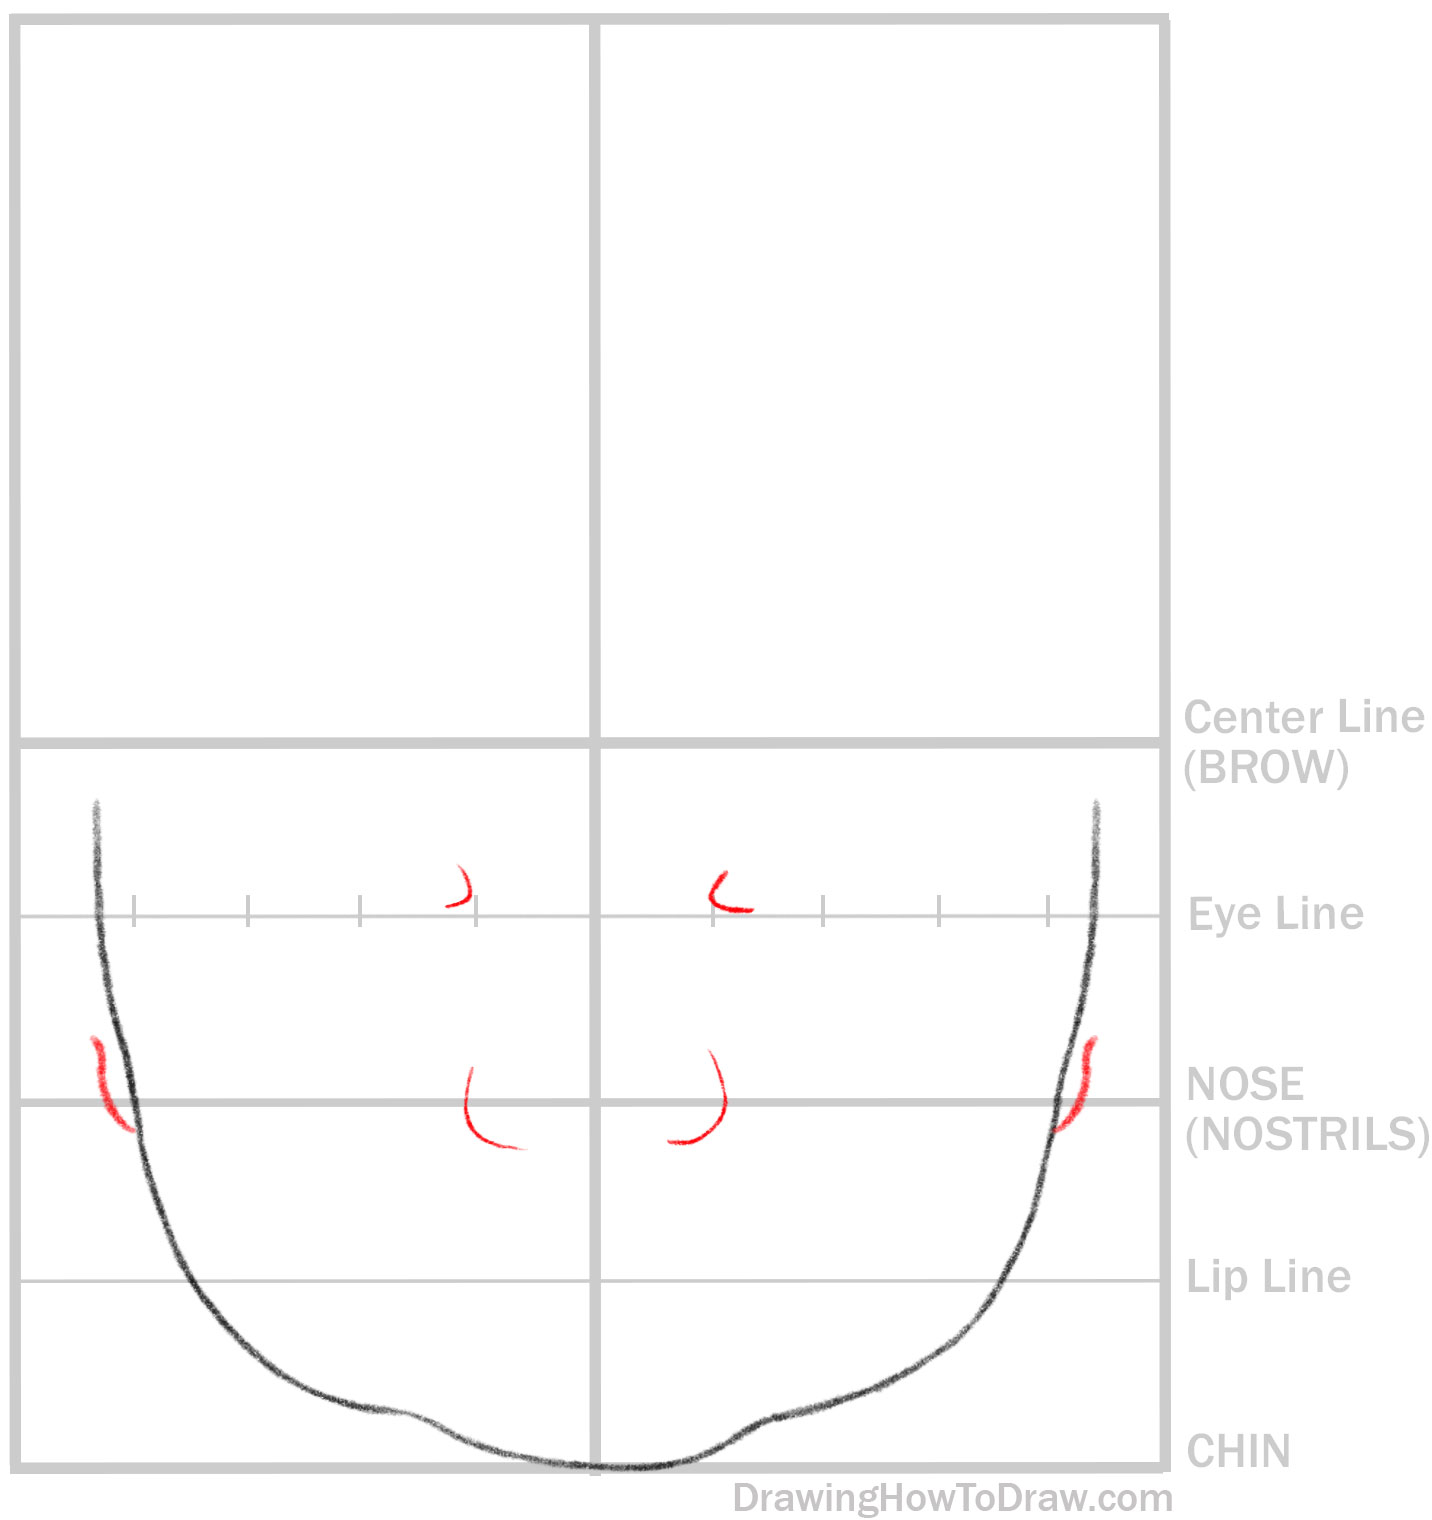
Use the guidelines to help you draw the bottom of the baby’s face. Draw a sideways “C” shape. The dotted line can be erased after you draw it.
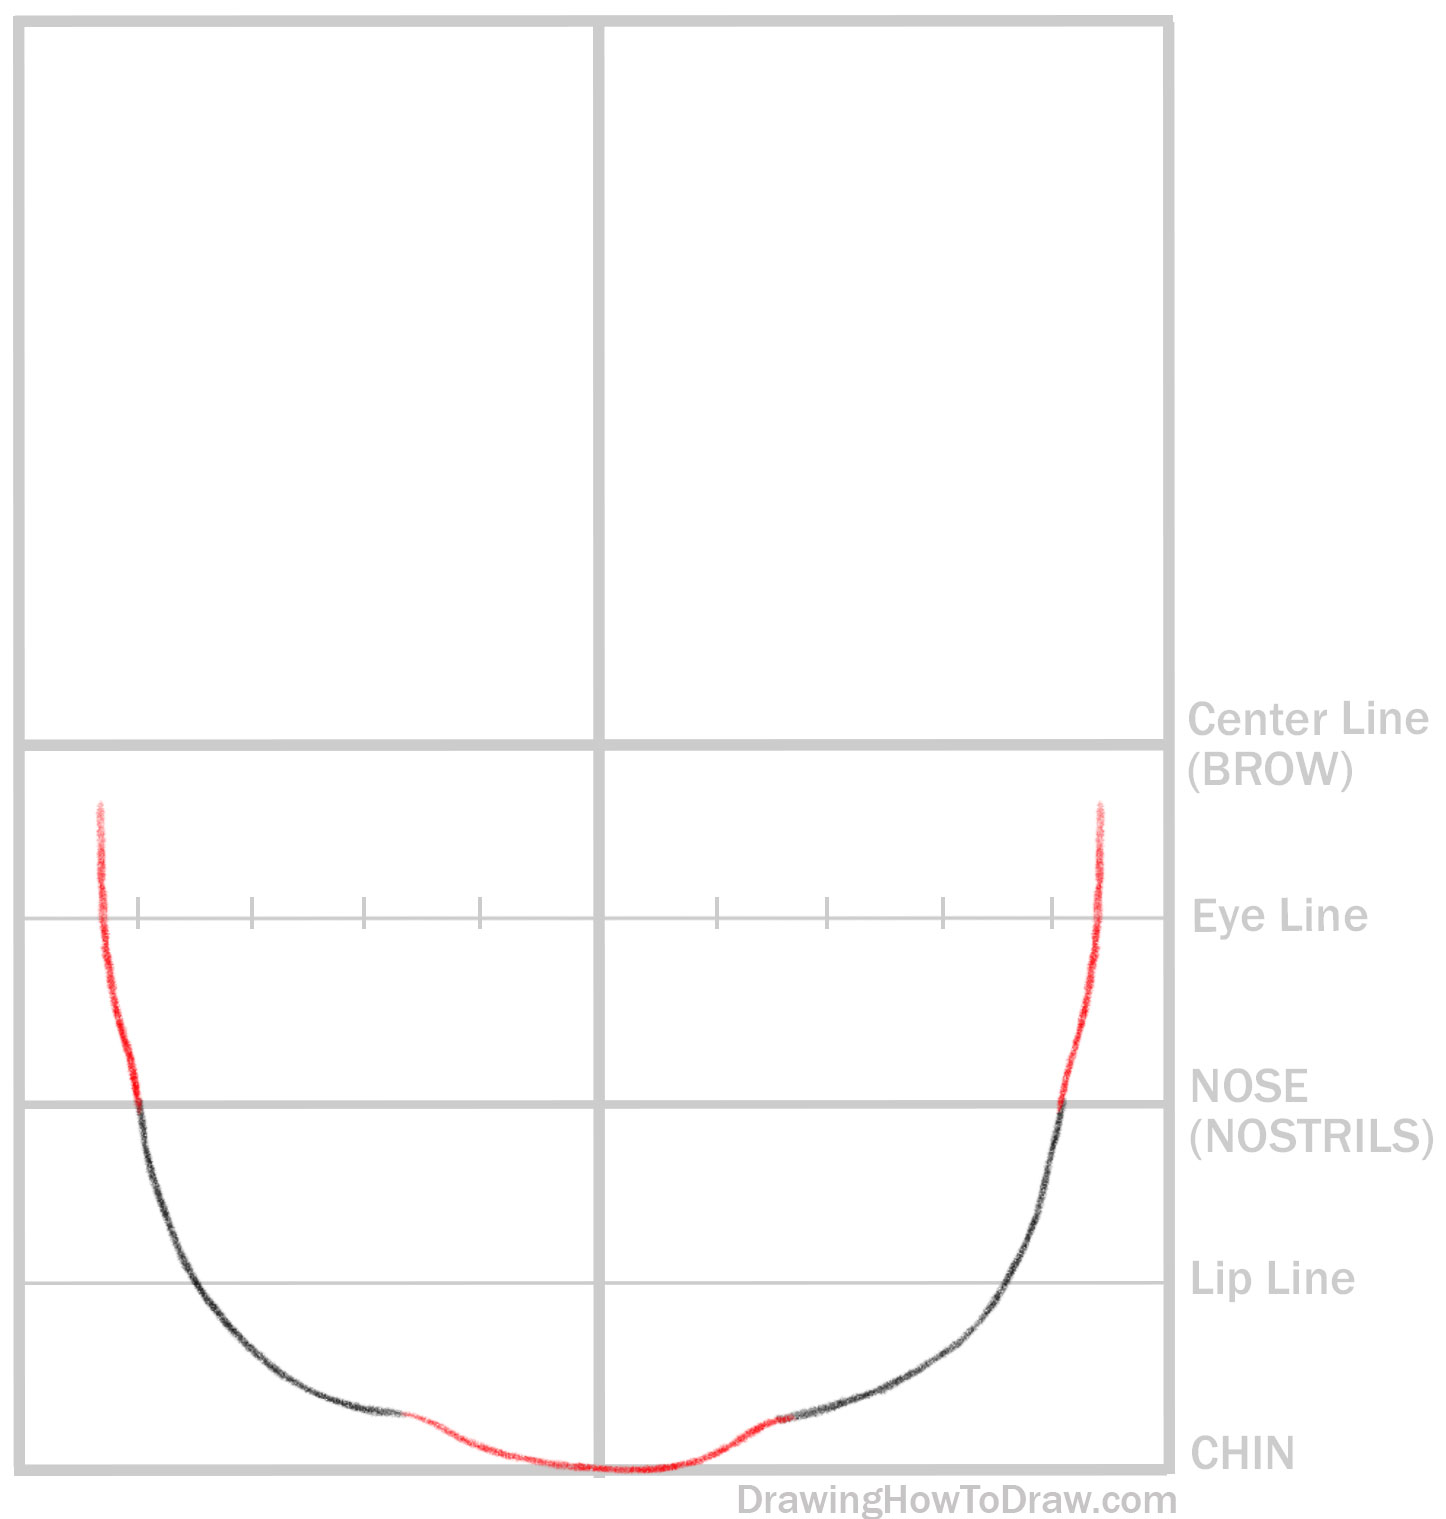
Draw a chin and the sides of his face.
Draw an “S” shape for each of his ears. Draw a “J” shape on both sides of his nose. Draw a sideways “V” shape for the start of each of his eyes.
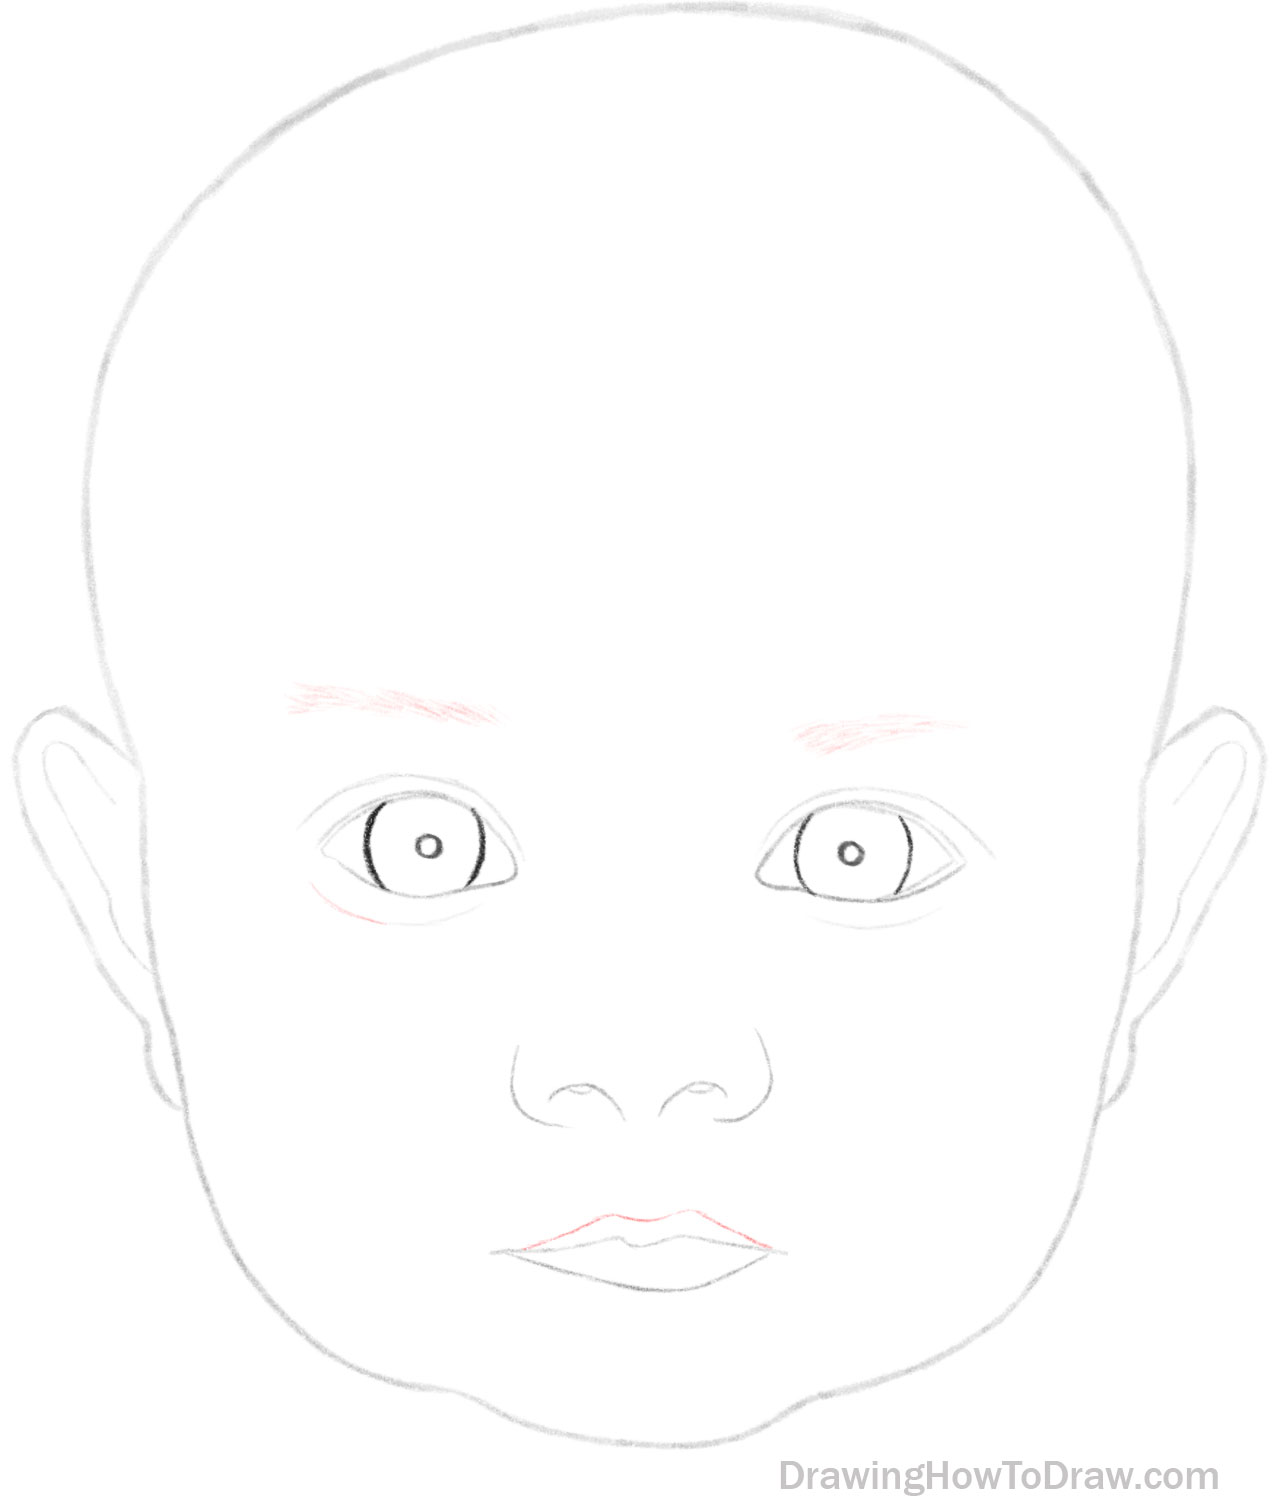
STEP 09
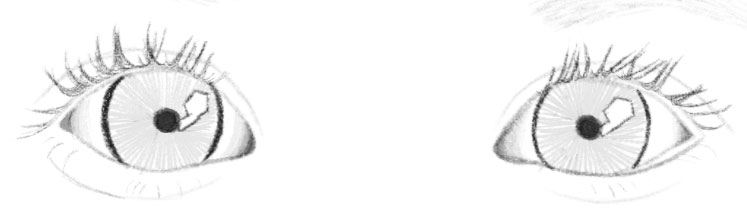
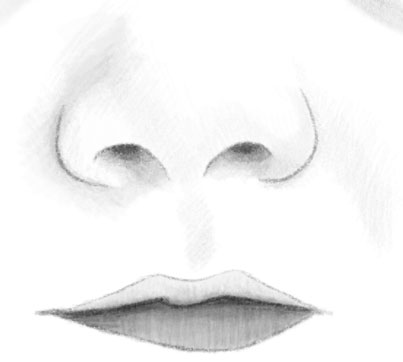
Draw a curved line for the lower part of each eye. Draw sideways “J” shapes for each of his nostrils.
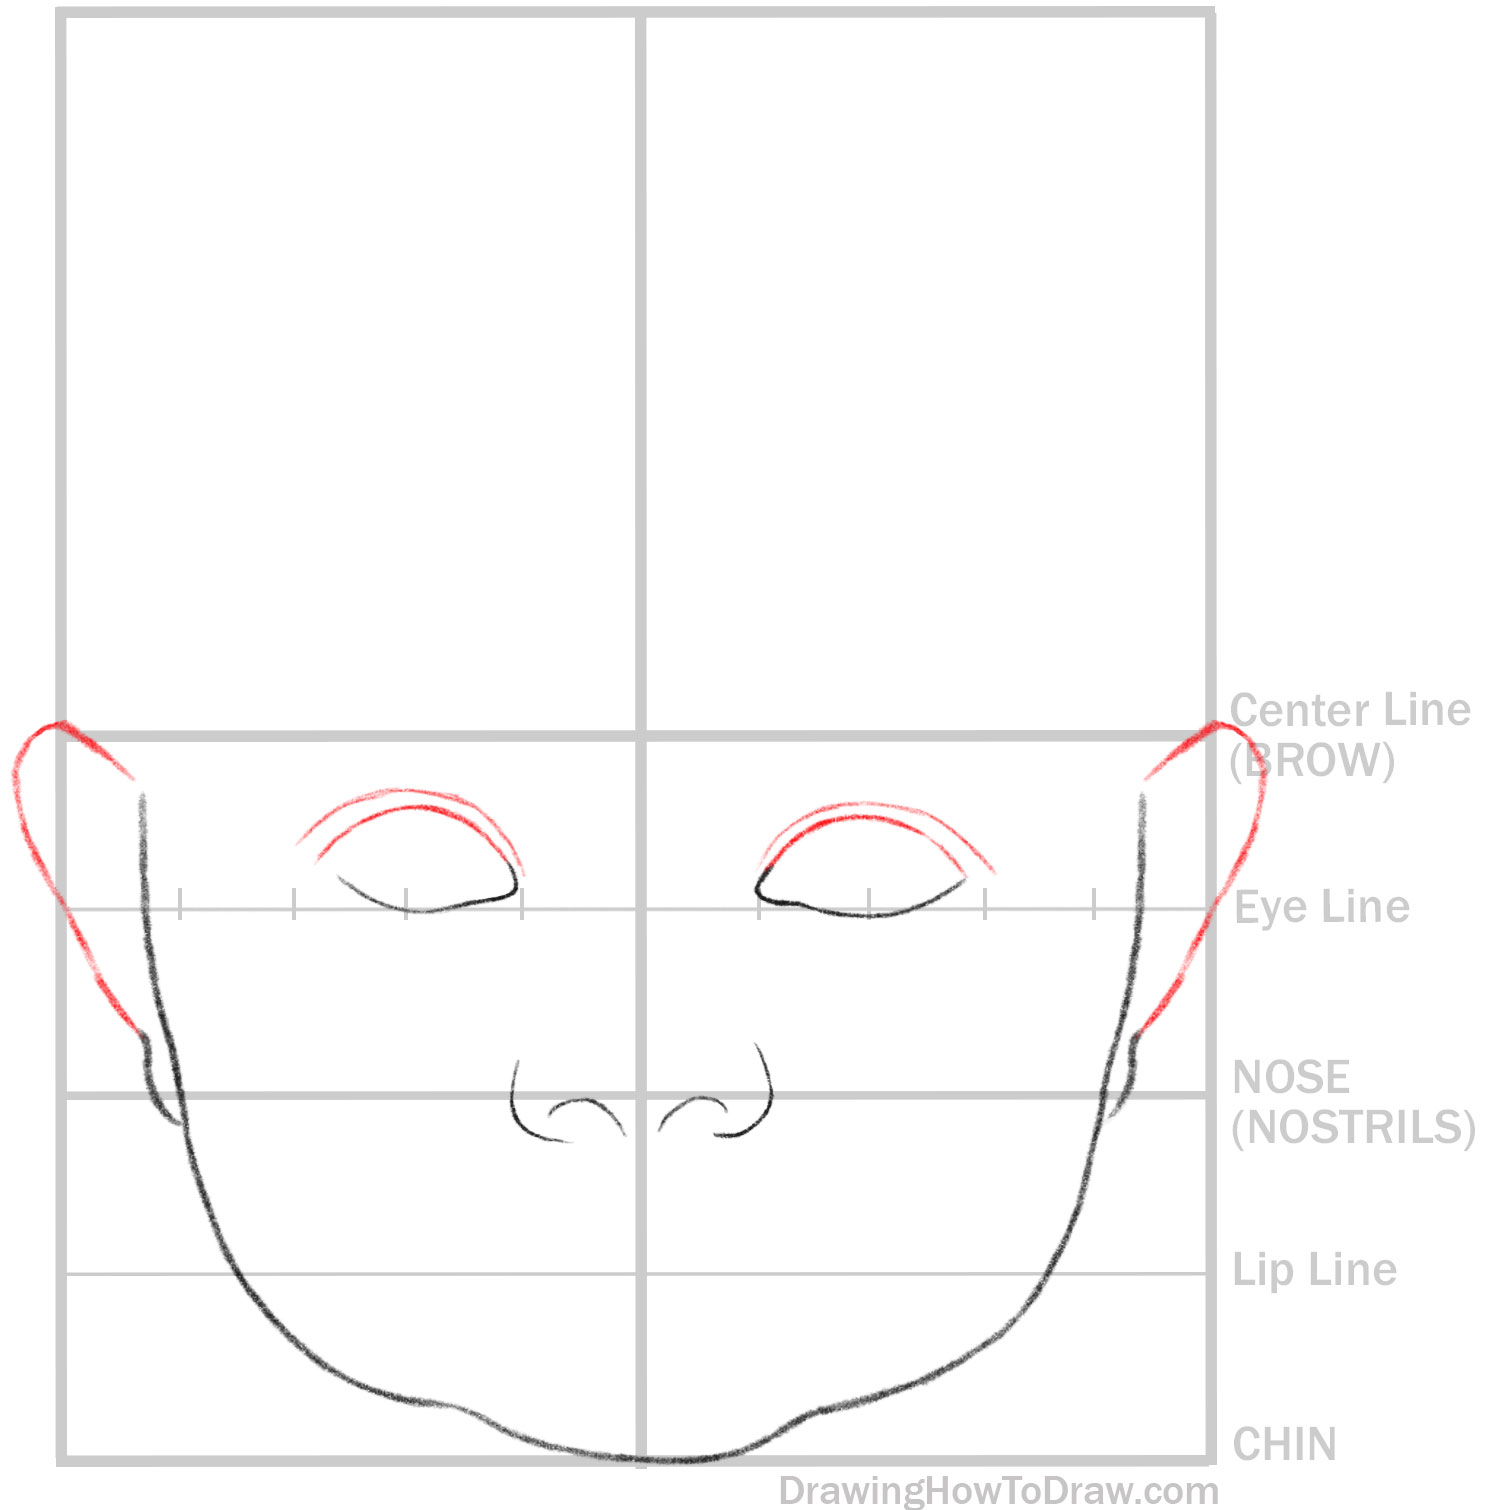
Draw curved lines for the top of the eye and eyelid. Draw upside-down “J” shapes for the tops of his ears.
Draw the inner outlines of his eyes. Draw a curved line for each of his inner nostrils. Draw a sideways “C” shape for the top of his head.
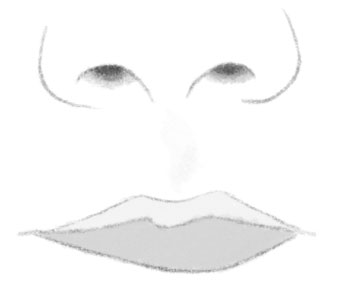
Draw a curved line under each eye. Draw a partial circle in each eye. Draw a flattened “M”-like shape for the mouth.
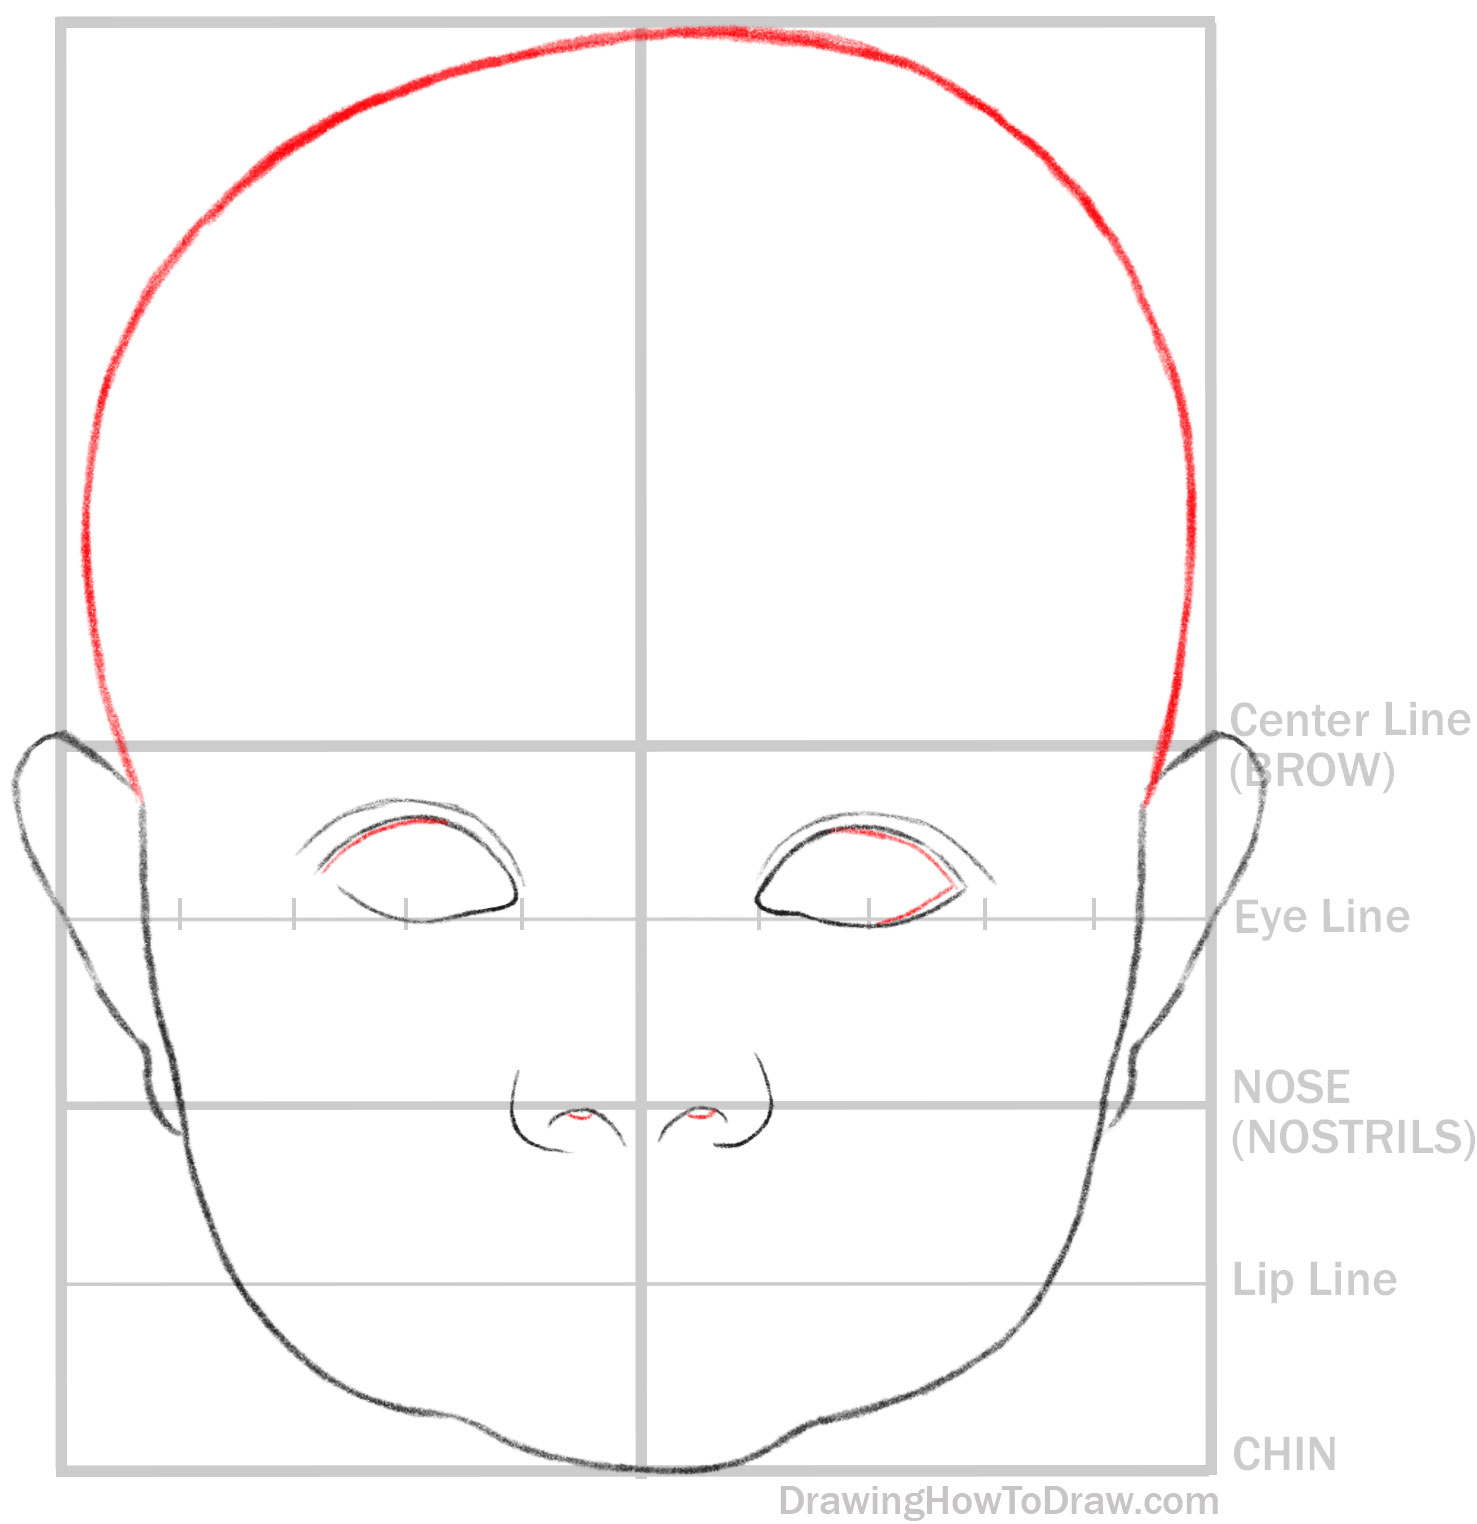
Draw a curved line for the lower lip. Draw a curved line on the left side of the left eye. Draw a circle for each pupil. Draw the inner ear.
Erase the lines so they are almost not visible.
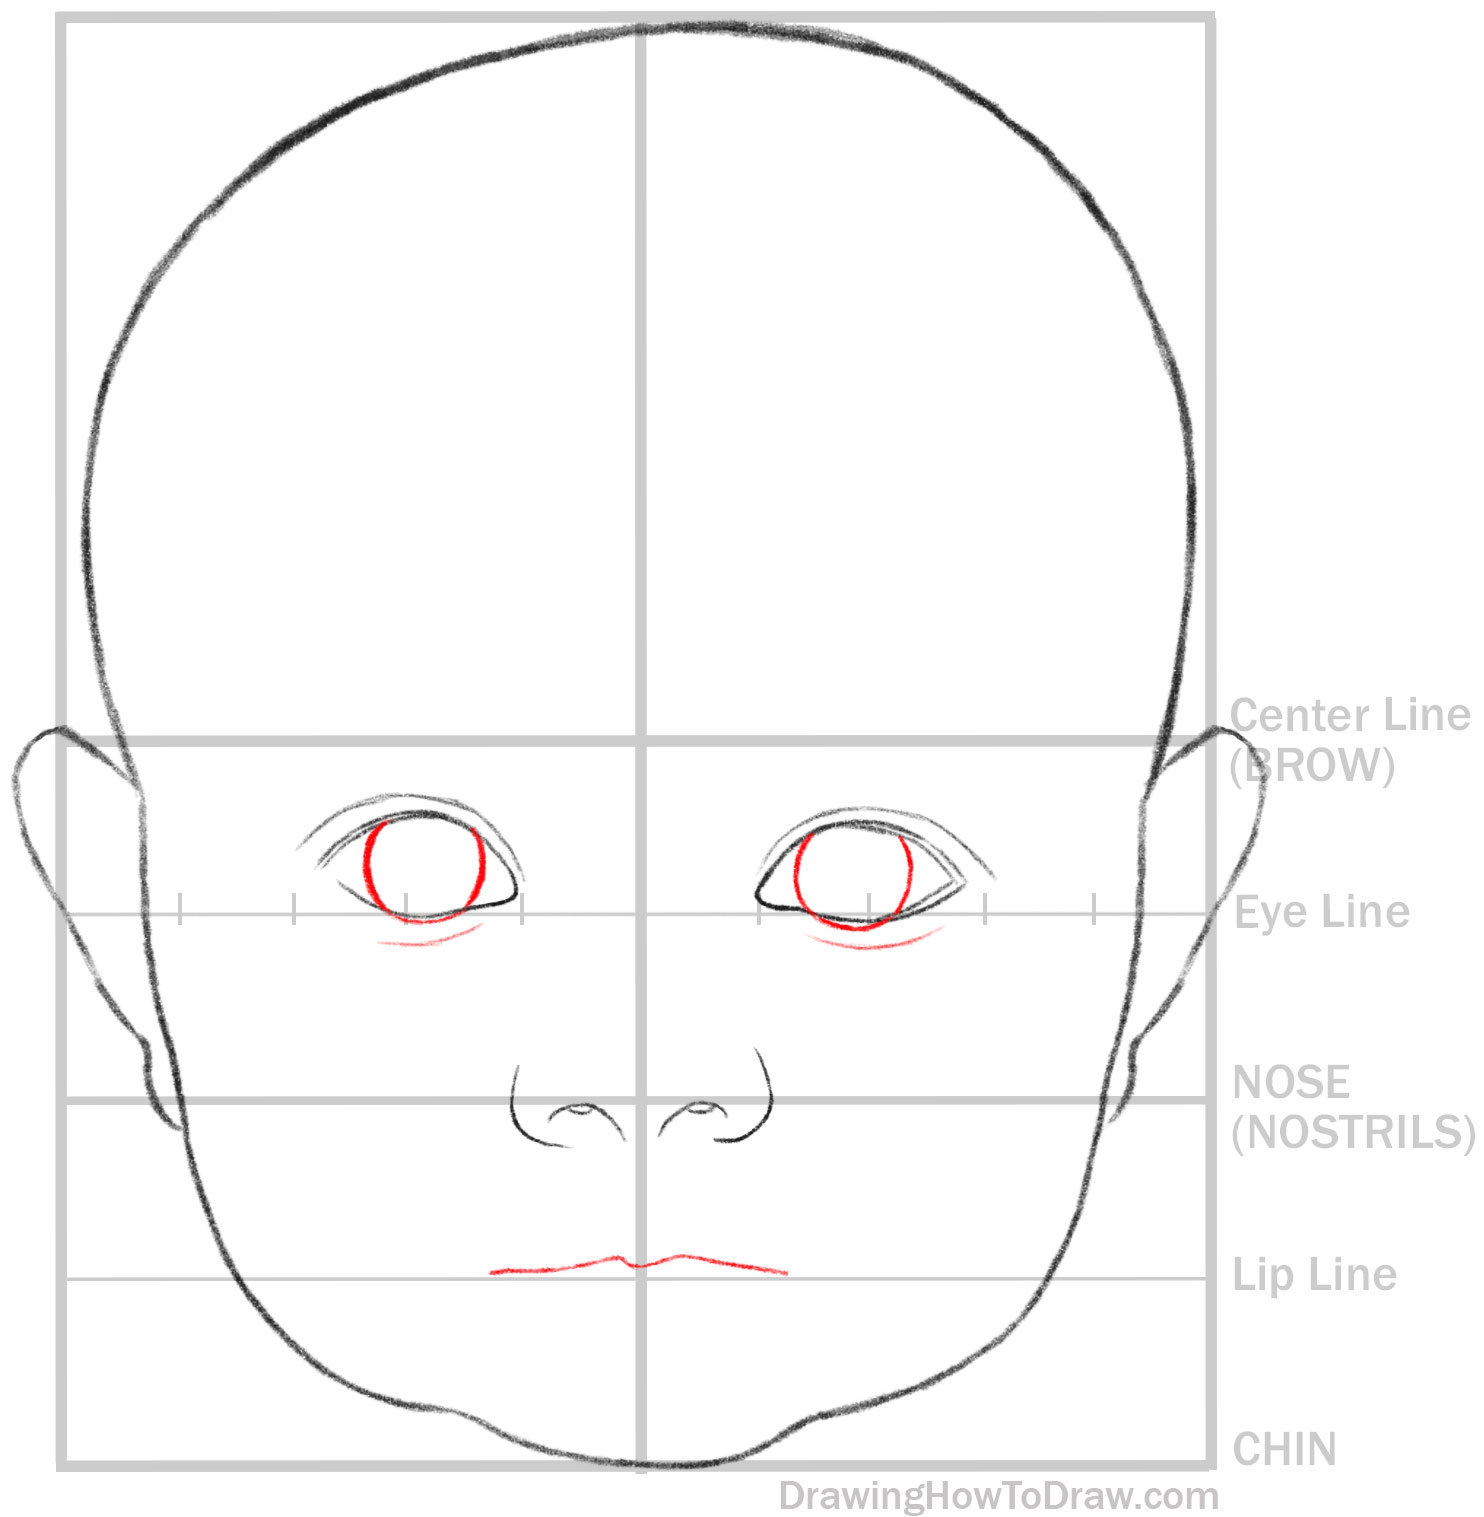
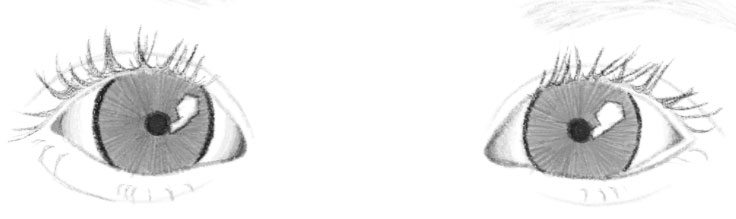
Draw little tiny lines for the eyebrow hairs. Draw another flattened “M”-like shape for the top lip. Also, finish drawing the curved line under his left eye. Somehow I didn’t finish the line.
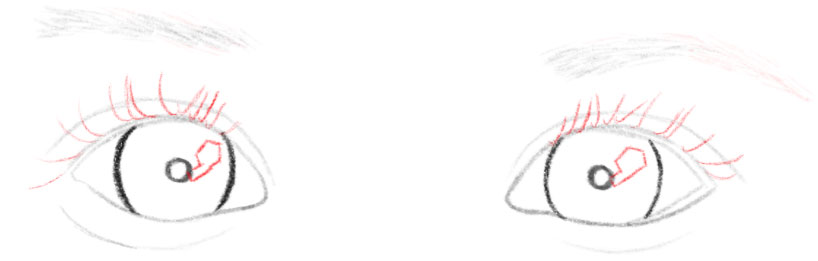
Draw more small lines for eyebrow hairs. Draw curved lines for eyelashes. Some of these are “J” shapes that are overlapping. Draw any shape you want for the highlights in his eyes, or just copy my shape.
Take the lashes that you drew in Step 16A and build upon them, making them thicker and shaped more like lashes. Draw a curved line on both sides of the left eye. Draw curved lines for lower eyelashes.
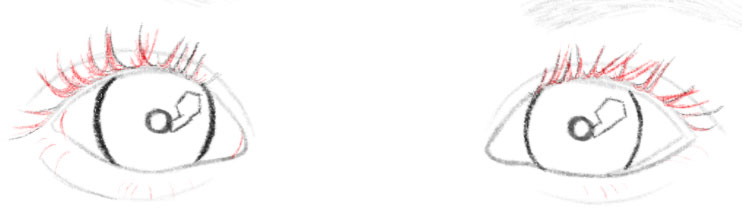
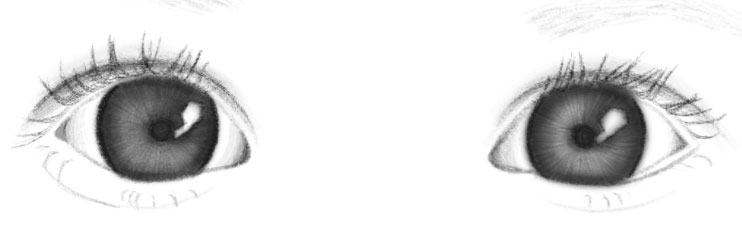
Draw lines radiating out from the pupil. Shade from the inner and outer eye, toward the iris.
Draw more lines radiating outward from the pupil. Then shade the iris more to give it a darker tint. Add to the lower eyelashes so they are thicker at the base.
Shade the upper eyelids. It should be darkest at the crease and lighten as the shadow gets further from the crease. Also, shade the iris so that it is darkest around the pupil and around the edge. Try to make it gradually gradate to a lighter tone.
Now use an eraser (or better yet, an eraser pencil such as Tombow Mono) to erase out highlights of the eye. Then darken the area around the highlight. Add shading around his eyes.
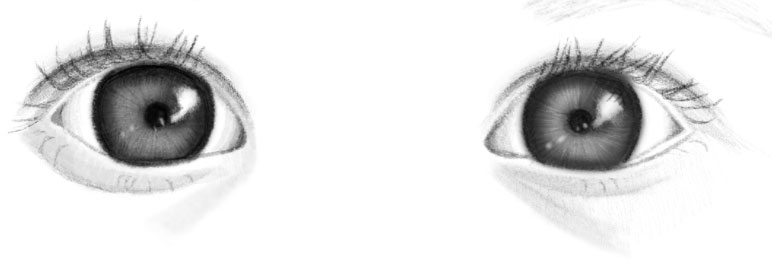
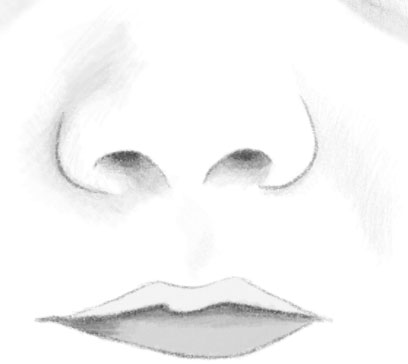
Shade the nostrils. They are darkest the further you go into the nostrils. Shade the divot below his nose. Shade the lips so they have a base color. The lower lip should be darker.
Start shading the nose and around the nose. Also, shade the lighter areas of the nostrils. Start shading the lip as well.
Shade the lighter tones of the nose. Shade the divot below the nose. Draw lines to the lips and continue shading them.
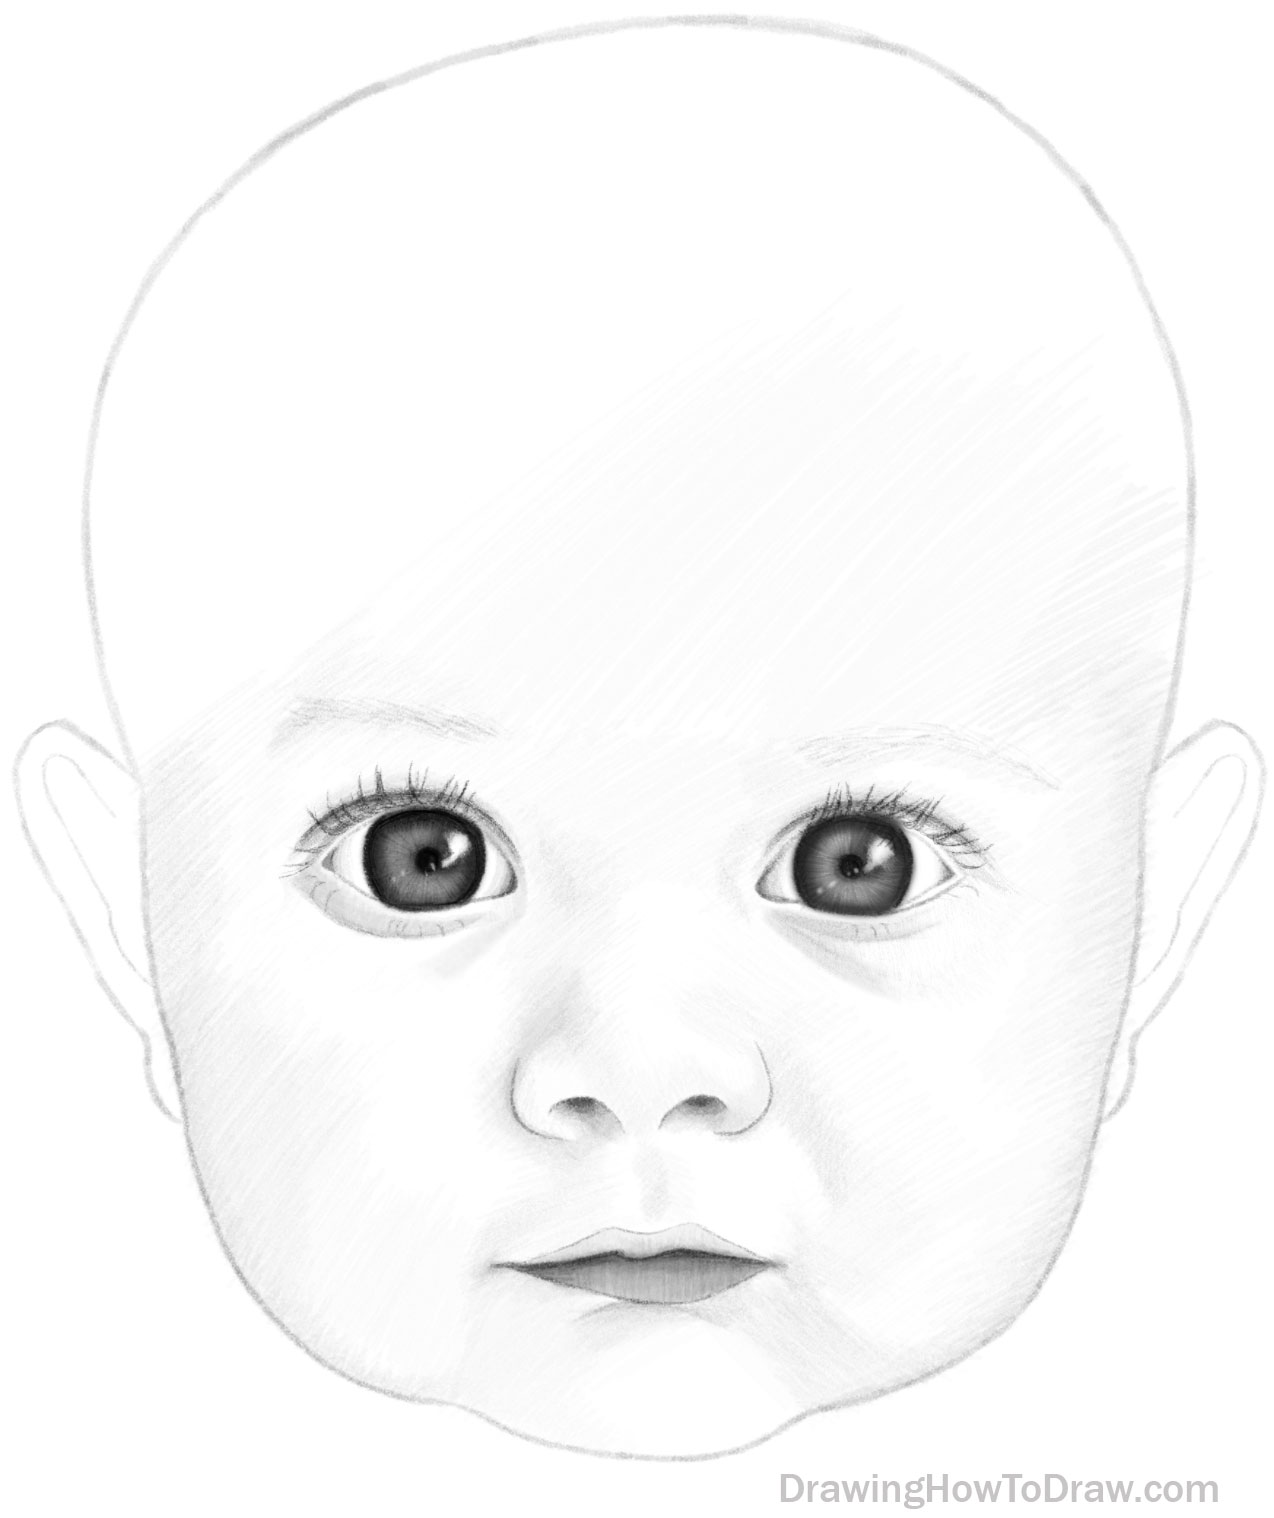
Shade the center of this face a bit.
Shade more of the face. It should be darkest on the edges and gradually gradate out toward the lighter tone in the center of his face.
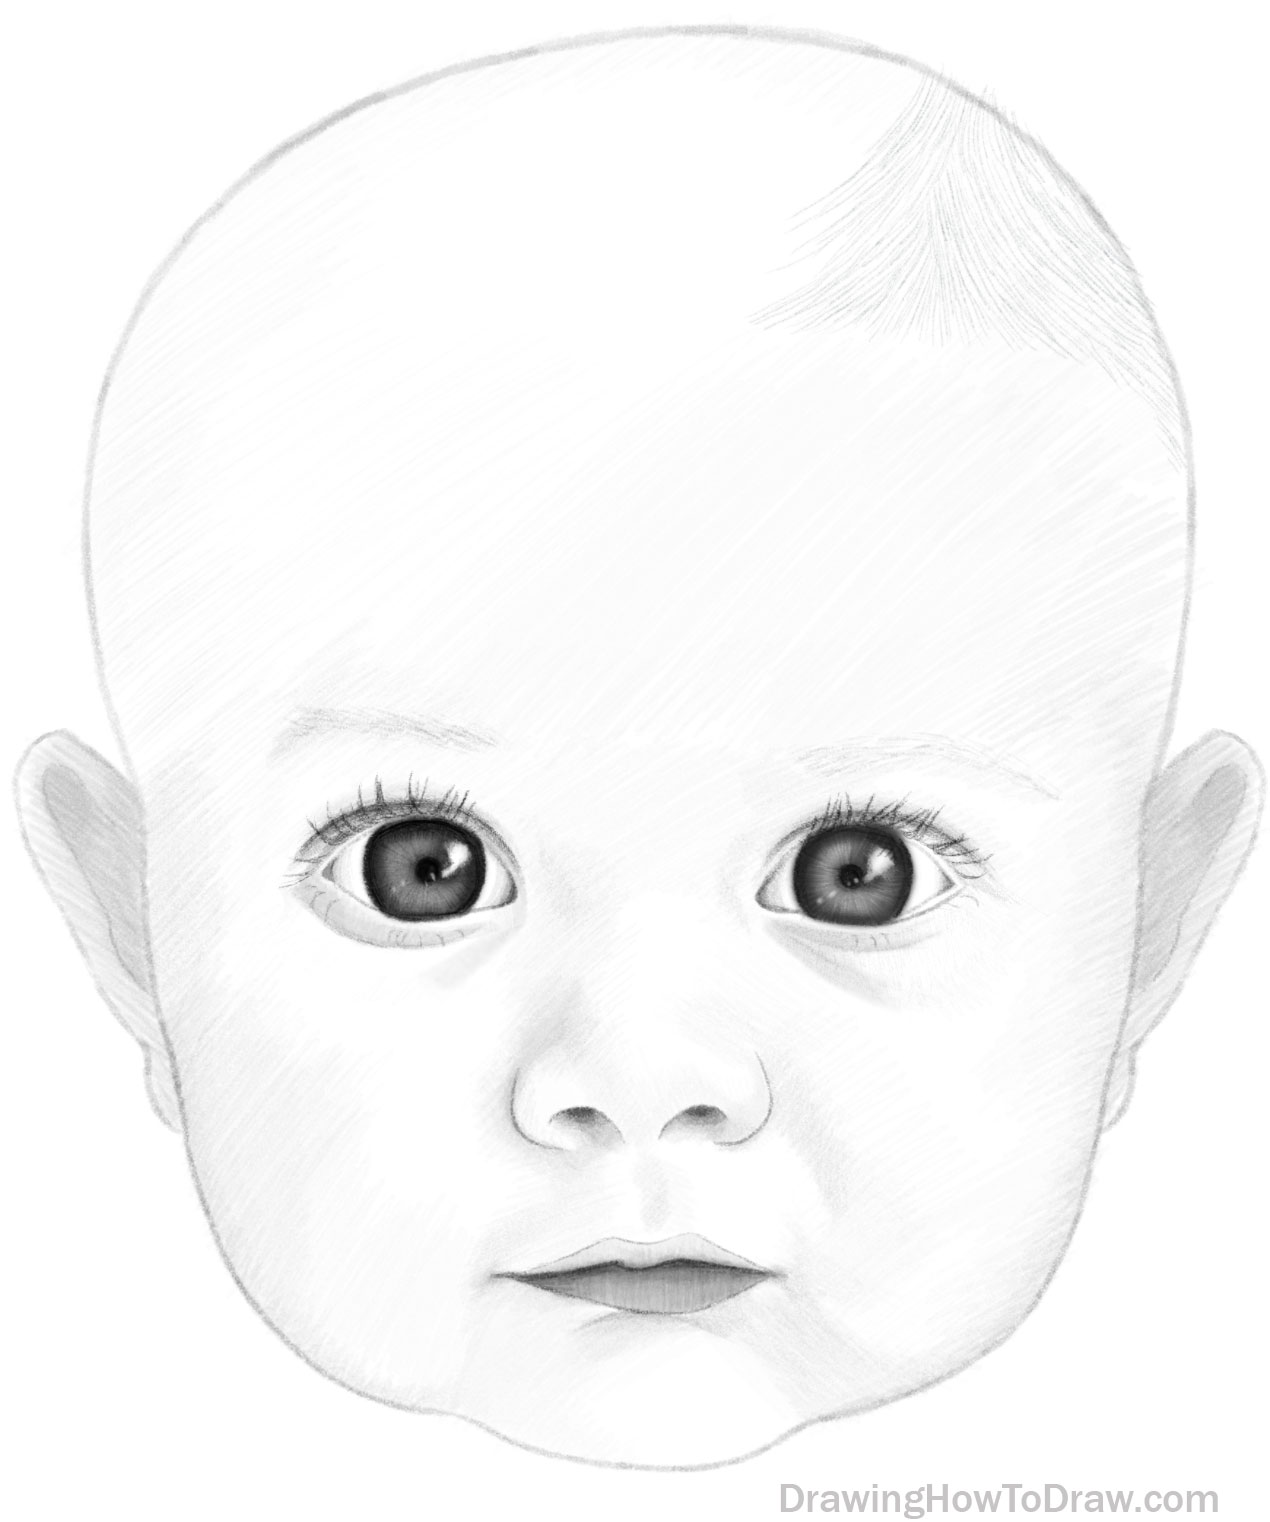
Shade the upper part of the head a bit and then start to lightly draw hair. Baby hair is very patterned, so try to follow the hair pattern I have drawn. Add some base tone to the ears.
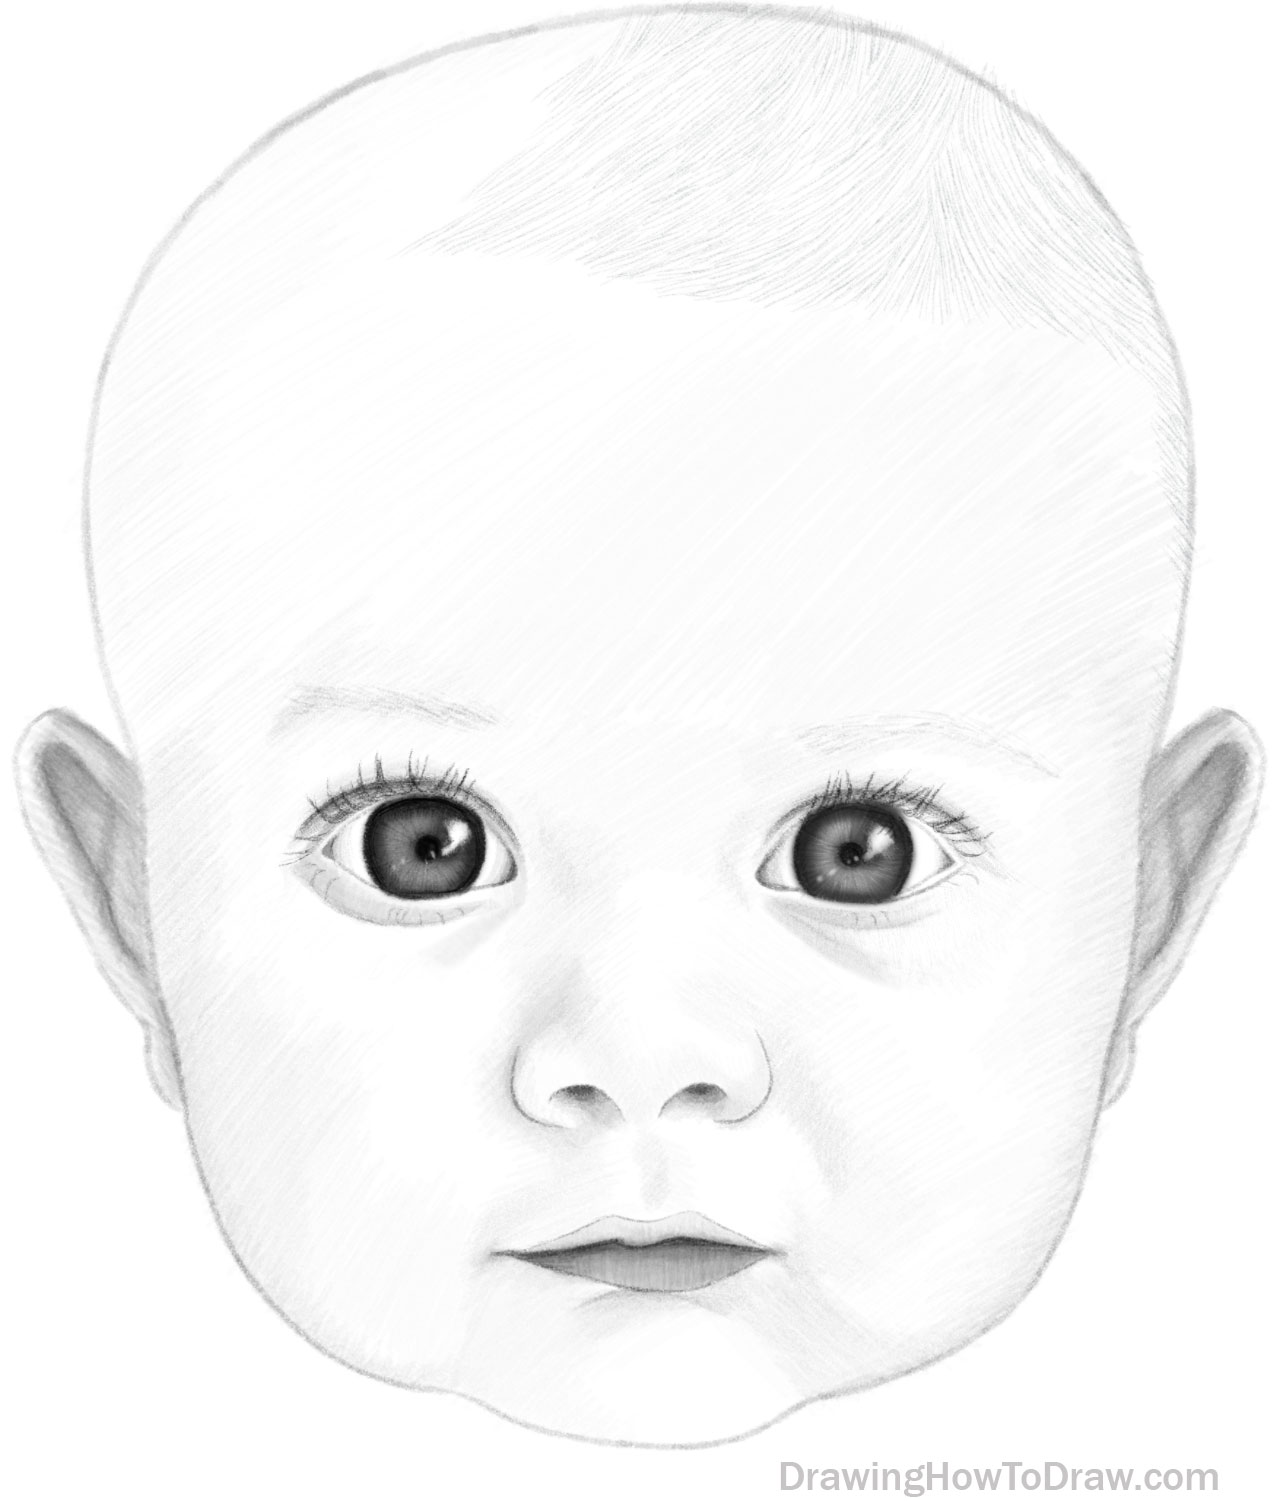
Continue shading his ears. Also, continue drawing the hairs, taking note of the pattern I am drawing.
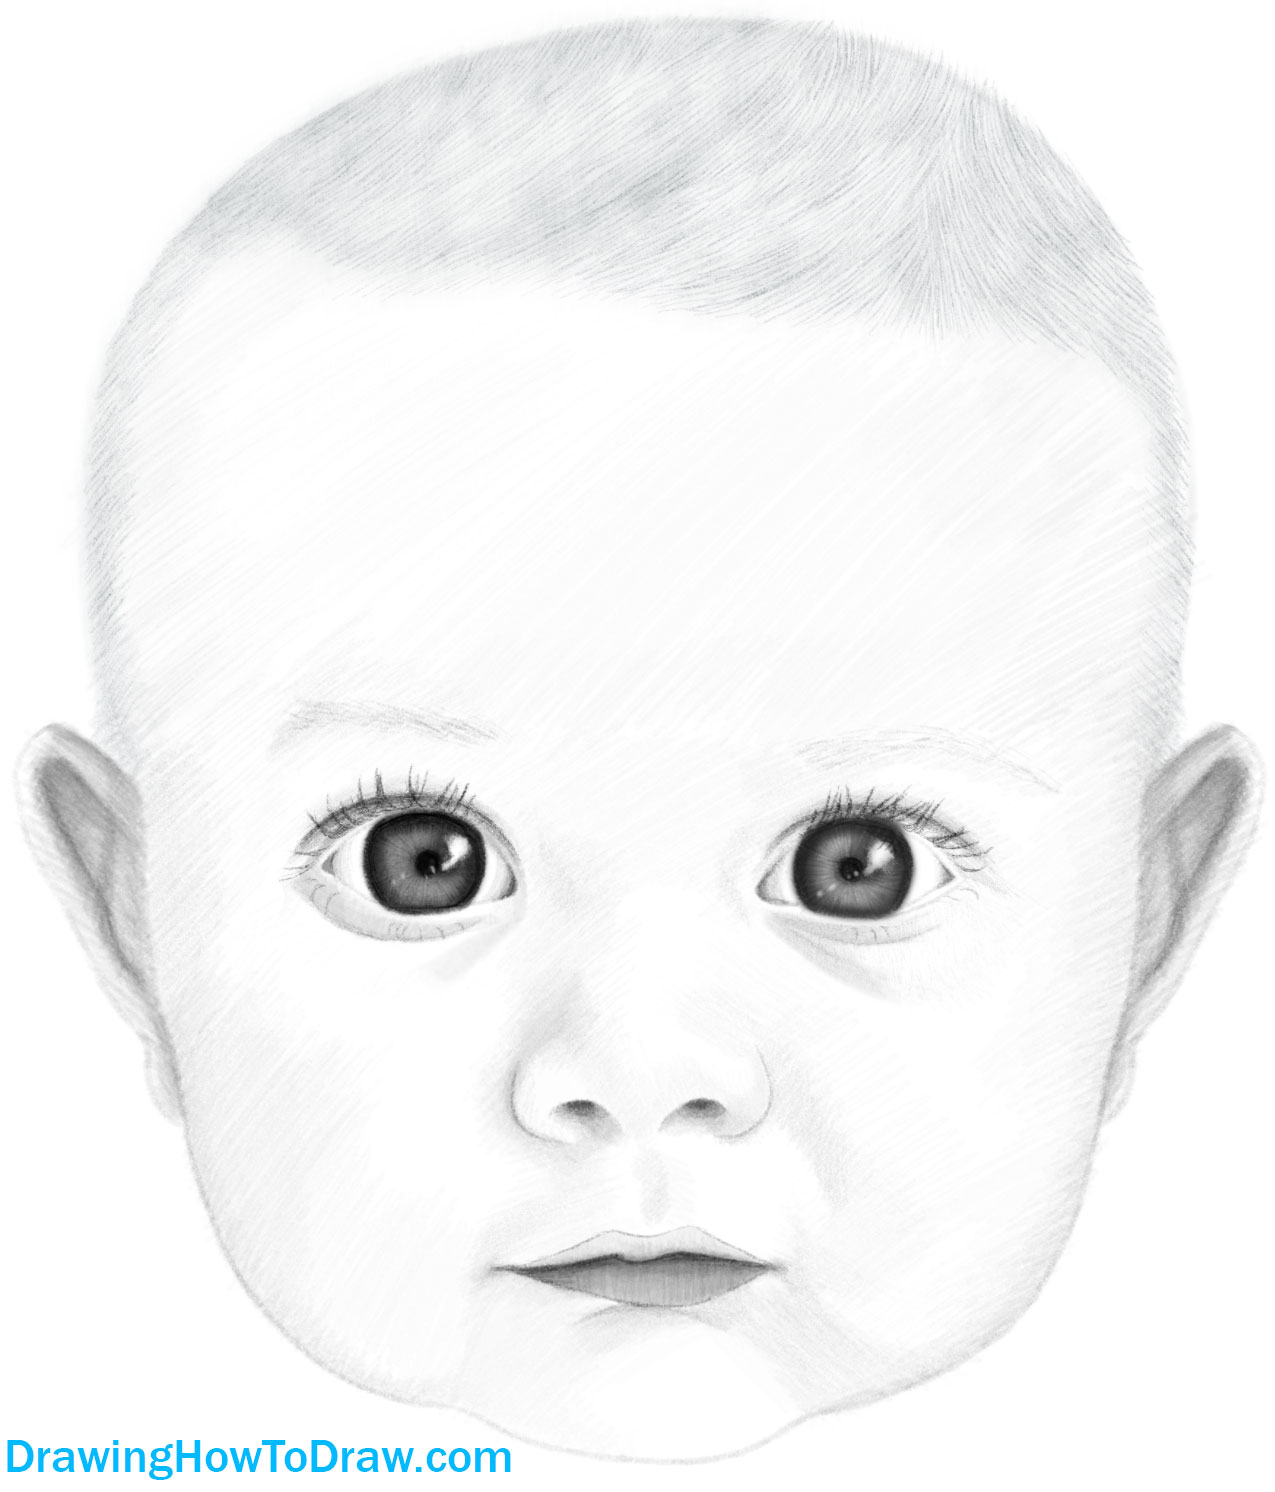
Finish drawing the hair. Lightly shade it. Then. try to soften any dark lines that don’t need to be there.
Technorati Tags: portrait, portraits, portraiture, proportional, proportions, proportional face, how to draw a face, face, faces, head, heads, front view, side view, front, baby, babies, infant, infants, cute, how to draw a realistic face, realistic
Today I'll show you how to draw Rick from the Rick and Morty cartoon tv…
Today I'll show you how to draw Morty from the Rick and Morty cartoon tv…
Today I'll show you how to draw the spunky little rabbit, Kuromi, from My Melody…
Today I'll show you how to draw this cute "bean duck" that I found on…
Today I'll show you how to draw Sosuke and Ponyo in a bubble (chibi /kawaii…
Today I'll show you how to draw a Boo from Super Mario Bros in Kawaii…
View Comments
This is the best instructions I've ever used. It helped me so much. Thank you.
Nice explaination step by step..
Worked out gr8..
Thank you for this!!! It will be so fun to try especially for an amateur like me.
Hello, wow this is a very nice explanation for drawing a baby’s face but I have a question 🙋🏼♀️ which pencils ✏️ do you use by this drawing please?
Thanks for showing us how to learn drawing this baby. 👍🏼😘.
Have a great creative day.
Ria
.......
loved this, he's so so cute! I love drawing, so this was just great.
Great idea. Worked but could be easier and shorter instructions. Also, the book thing at the end sucks.
Thank you SO much. I never drew human faces, just animals. After some practice, the proportions are easier to understand. I think it is very important to have a real
believable structure underneath to support your desired drawing.
Your directions have helped me place the features in real areas.
Gold star for you.
Thank you. I'm so glad it helped you. <3